Before starting, please make sure all the listed items below are prepared.
Items Should be Prepared #
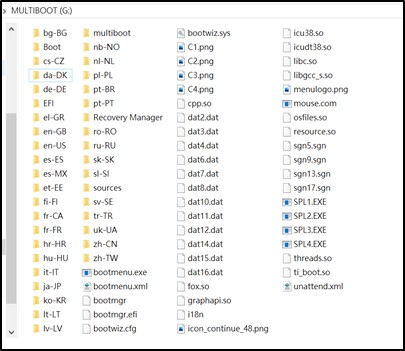
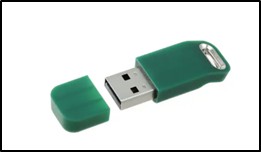
- USB Flash Drive (a bootable USB Drive)*1
Recommended capacity: 16GB or bigger, a multi-boot USB Flash Drive

- SSD Drive (or another USB Flash Drive)*1
For Storage the backup files and image files. Please install TMflow image files (for HMI recovery) and “Set Robot ID” file to the SSD drive for setting.

- Engineer Dongle (Maintenance Dongle)*1
To go to the desktop
Flow Chart Process #
#
Preparations : #
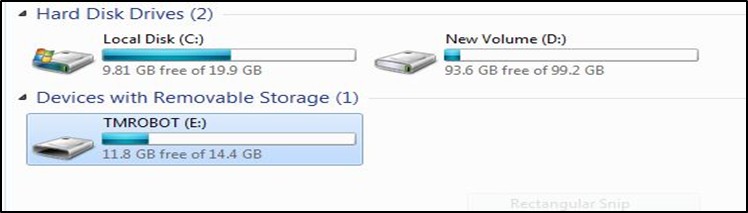
- An SSD Drive for the backup process
- Format the file system to “NTFS” type
- Name the SSD Drive into “TMROBOT”
Backup File Process : #
a. HMI Backup #
Go to the system setting and select the “Import/Export” function


Select the “Log” file by double-clicking on the files you want to back up. You can also export other important files such as project, TCP, variables, logs, etc.
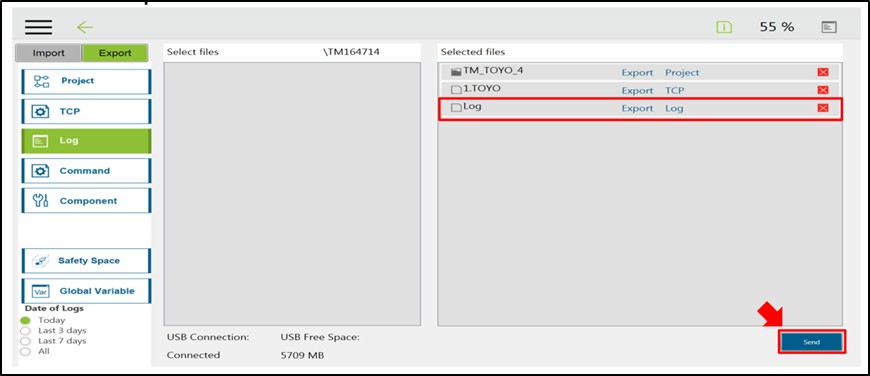
After you click the data to the export, the file will move to the “Selected files” list, then click “Send”

There will be a rainbow loop icon when exporting in progress. This might take a few minutes.
b. Manual Backup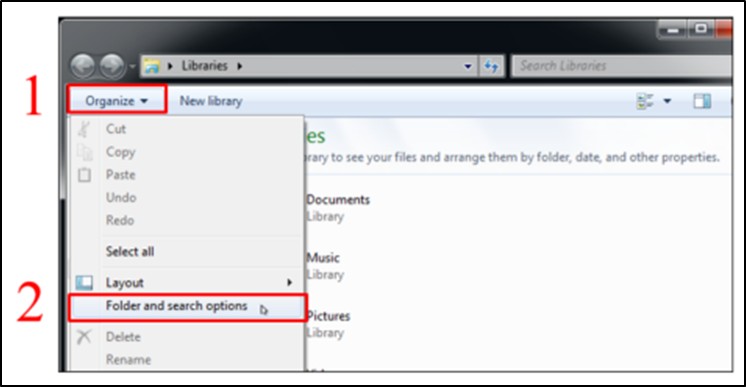
 #
#
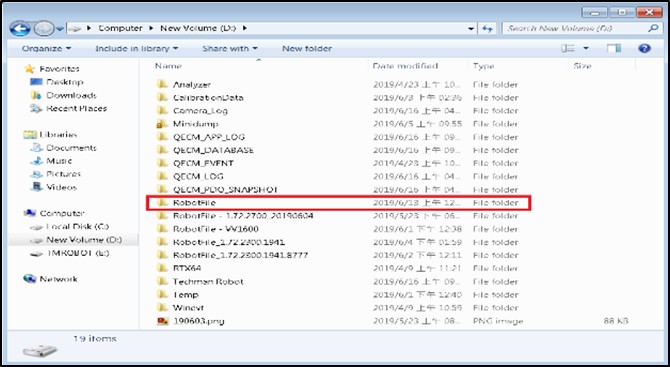
Backup the following folder (backup those files to the SSD Drive) :
- *C:\ProgramData\IntervalZero (If the ProgramData folder is hidden, please adjust the setting to display the hidden folder)

- D:\RobotFile
- D:\Techman Robot\TM Flow
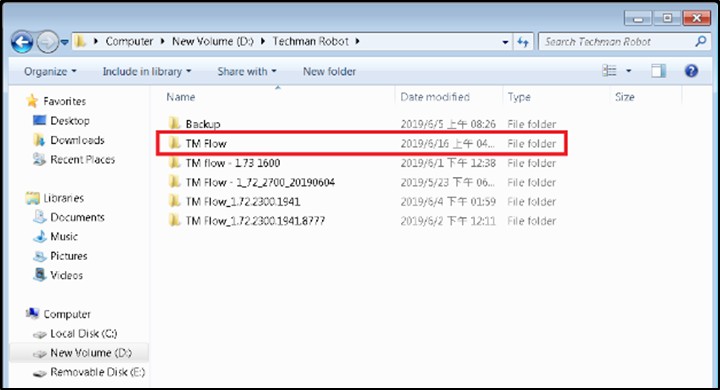
Image Restore #
Create a bootable USB Drive and recover the system
Image restore Process :
- Acronis True Image
- IPC Image
- Set Robot ID
- Change Computer Name
- Set TMflow to execute automatically
Preparation :
- Prepare a USB Drive to create the Multi Boot USB Drive.
- Format the file system to “NTFS” type.

Acronis True Image #
Download Acronis Cyber Protect Home Office from the Official Website.

Link: https://www.acronis.com/en-us/homecomputing/thanks/home-office/
Read all the License Agreements and click on the checkbox, then click “OK” button.

Create an account by filling in your email address and the password as well.
Access into the Acronis Cyber Protect Home Office Page
file:///C:/Program%20Files%20(x86)/Acronis/CyberProtectHomeOffice/Help/help/en-us/26974.html?tocpath=Tools%7CAcronis%20Media%20Builder%7C_____1
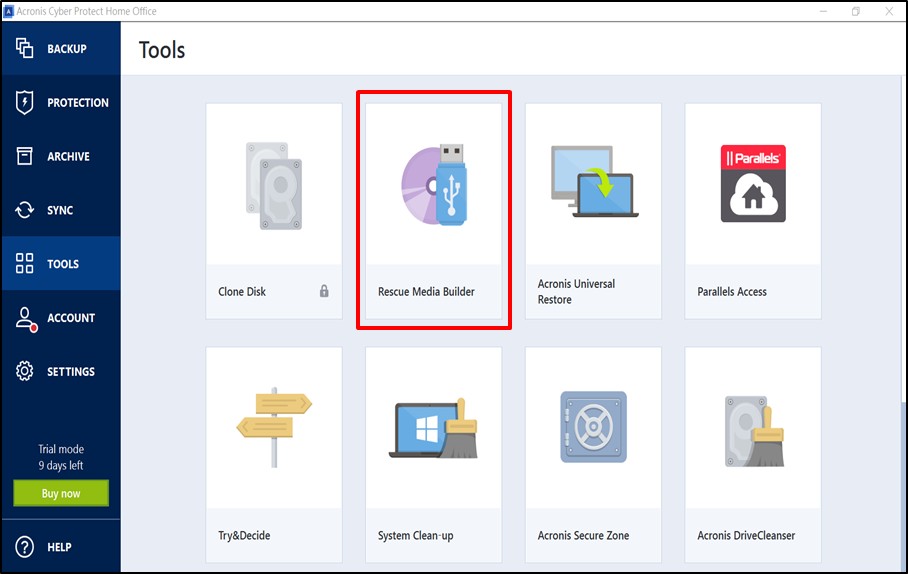
Select the “TOOLS” function on the left side function bar, and click on the “rescue Media Builder” icon
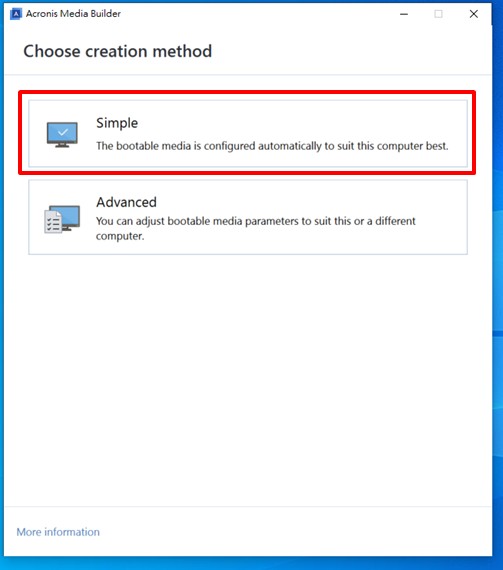
Select “Simple”
Note : Choose the optimal media type for your computer. If you use Windows 7 or a later version, WinRE-based media will be created.
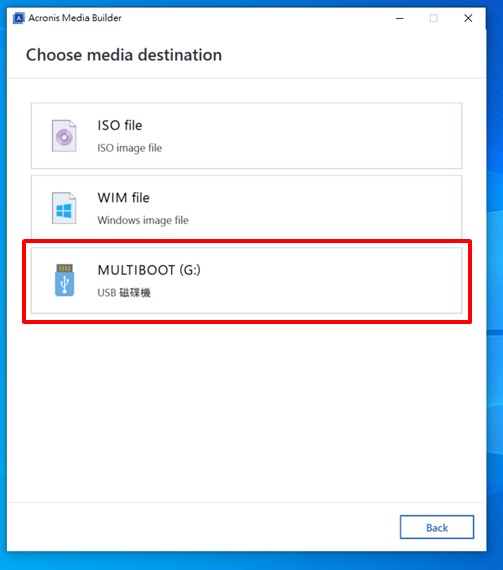
Select the USB drive to create a bootable drive
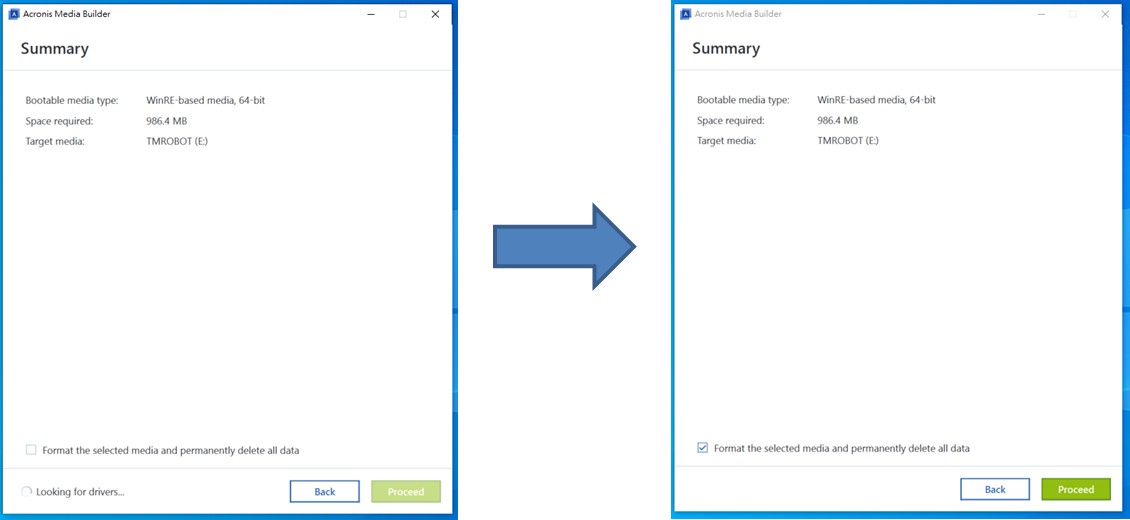
The system will automatically find the USB drive, and click on the “Proceed” button after the finding process. It will take a few minutes to wait for the process. 
After the process, click “Close” button to exit the message window. 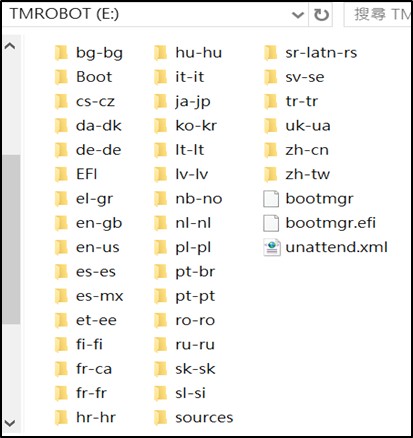
The bootable USB drive has been created successfully, then plug in to the control box
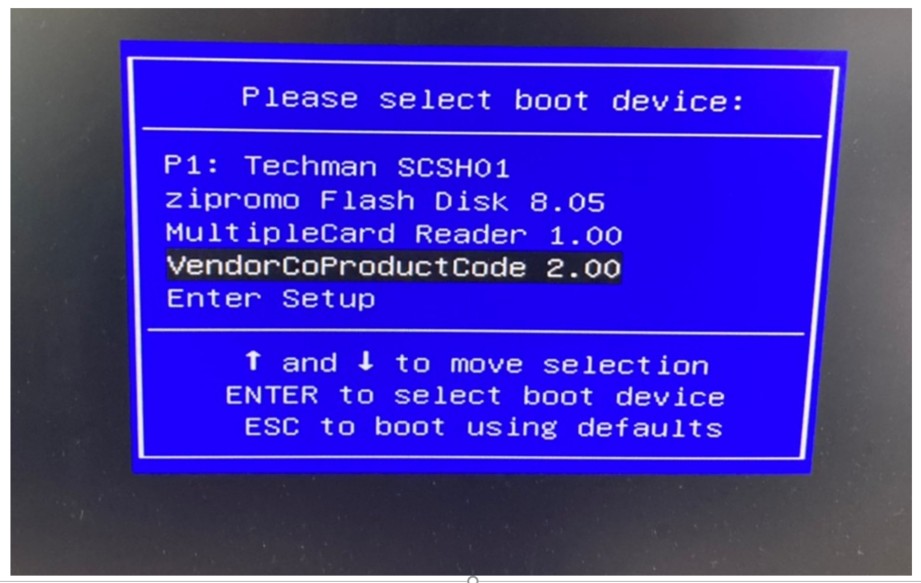
Reboot the robot and keep pressing F7 and F11 to enter the boot menu and select boot from the bootable USB Drive
wait for few minutes to let the system run by itself until this windows popup :
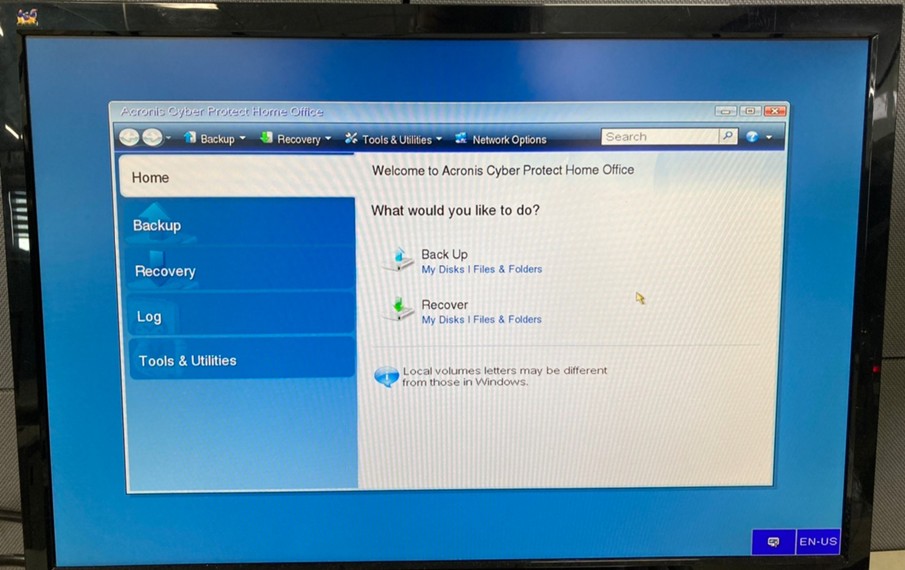
Successfully access into the recover setting page.
Now we are going to restore the image, please prepare this data :
IPC Image and Restore Image #

Put the ISO files into the SSD drive. (ISO files will be provided from TM FAE, the example files are to restore to HMI1.82.5100 on a HW3.2 robot).
go back to our TMflow :

after select the bootable USB, click enter and wait until this popup shows :
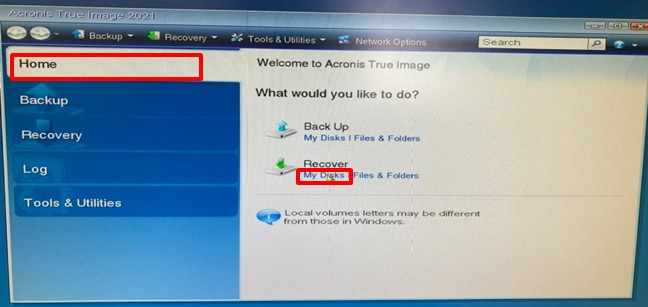
- Select “Home” on the left toolbar, find “Recover” (the one with green color), click on the letter “My Disks”
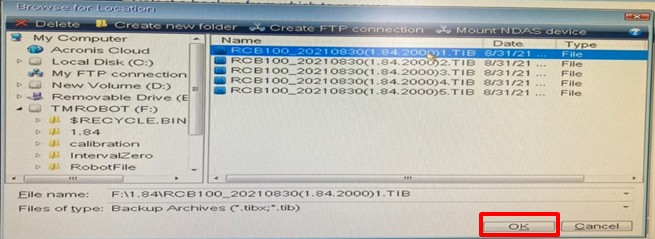
- To create a new recovery file, click on the “Browse” button to browse the ISO file storage place.

- Select “TMROBOT” (SSD Drive) to find the ISO file.
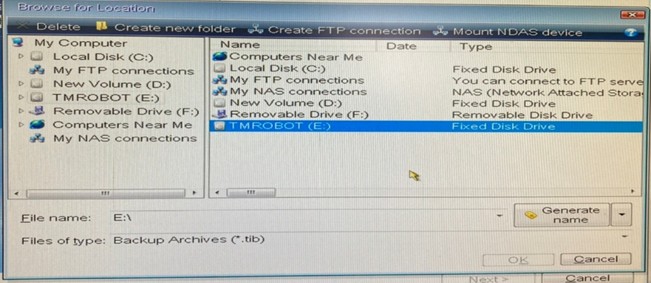
- Select the ISO file and click on the “OK” button to the next step.
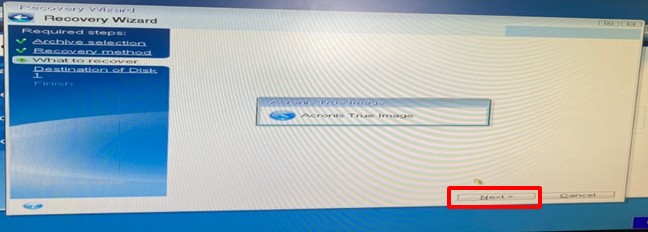
- Confirm the restore file is correct, then click on the “Next” button.

- Select “Recover whole disks and partitions” to restore all the disks, then click on the “Next” button.

- Click on the all checkbox and select all the disks, then click on the “Next” button.
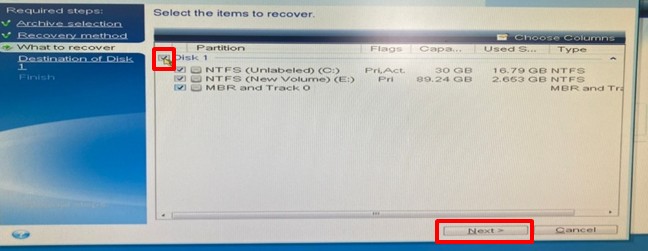
- Click on the “Next” button
- Select SSD (Serial ATA) as the restore target, then click on the “Next” button

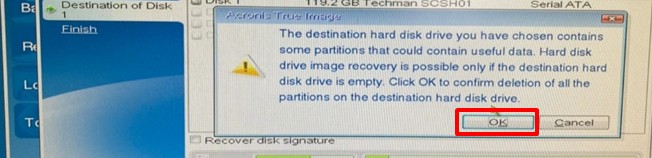
- Click on the “OK” button for the next step
- Click on the “Proceed” button for the next step
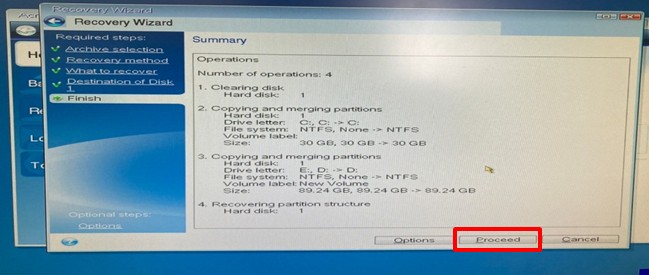
- The data restore process starts, it will take several minutes.

- The restore has been done, click “OK” to close the message window.
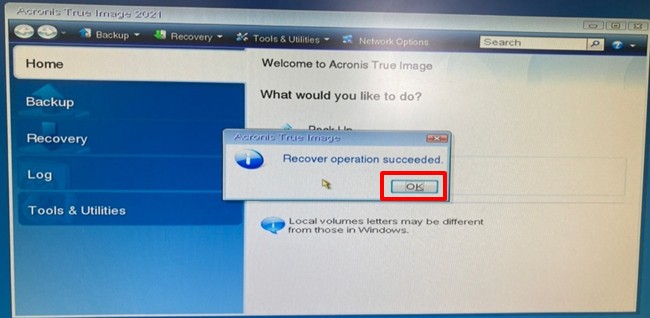
- Restart the robot and click leave to the desktop.

Insert the dongle key, otherwise, clicking EXIT will shut down the IPC.
Note: if it is not available to access Windows UI, please contact FAE.
- Restart the robot and restore parameter files from the backup folder :
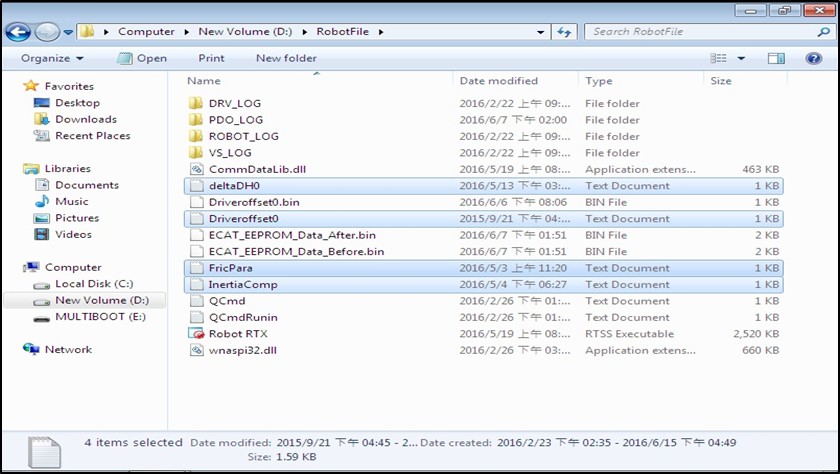
Copy some of these files from the backup file of SSD :
- deltaDH0.txt
- Driveroffset0.txt
- FricPara.txt
- InertiaComp.txt

- Paste these files on D:\RobotFile. If there is a file with the same name, replace it
- Copy the calibration folder and VisionTools.ini from the backup file of the SSD, paste these files on D:\Techman Robot\TM Flow\Vision

- Copy the backup file and paste it on C:\ProgramData\IntervalZero

- Check whether the RTX is activated successfully or not.

Open the software “Activation and Configuration” and check.
(C:\ProgramData\Microsoft\Windows\Start Menu\Programs\RTX64 3.7 Runtime)
If it shows like this, that means it has been successfully activated.
Set Robot ID #
Click RobotID_02.exe to set Robot ID

- Open RobotID_02.exe. file
- Type series of the control box. Then, click enter
- Restart the machine
Change Computer Name #

- Open the computer windows
- Right-click on the computer taskbar
- Click properties.
Change Computer Name #
Click change setting
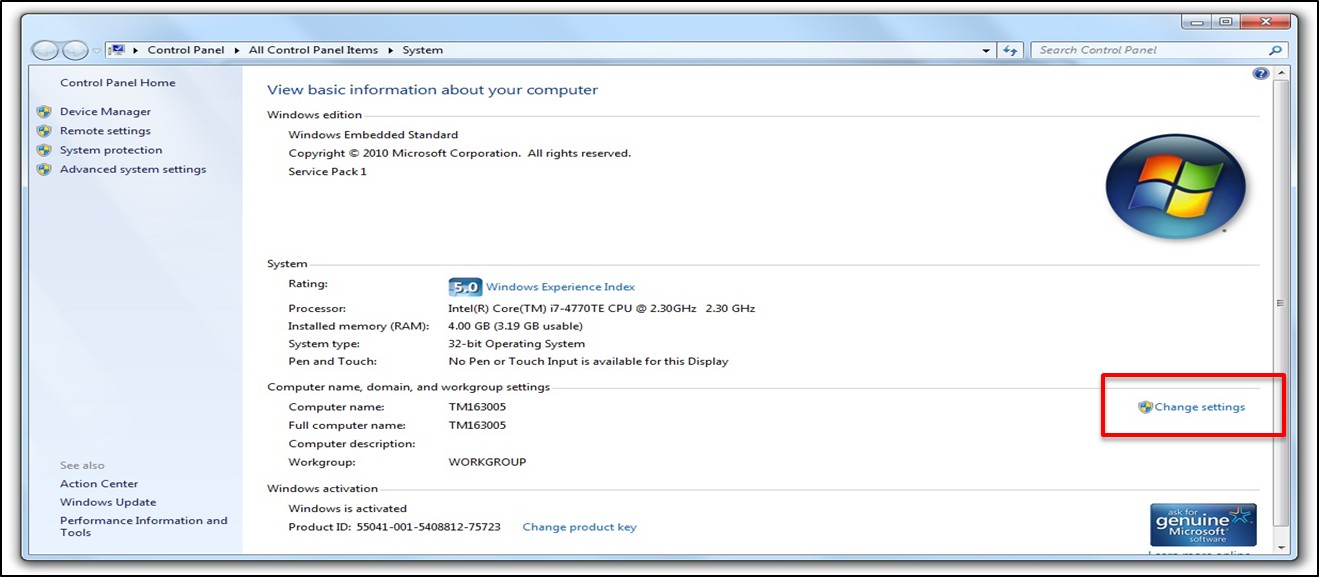


Caution : The new computer name must be the same as the number of QR code on the stick.
Restart your TMflow
Set TMflow to Execute Automatically #
Drag the shortcut of TMflow from the desktop to the path :
C:\ProgramData\Microsoft\Windows\Start Menu\Programs\StartUp
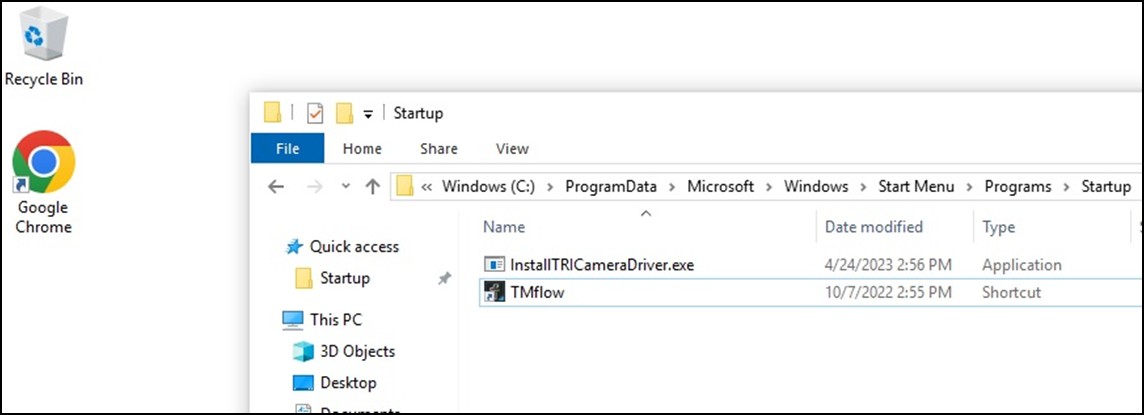
restart the robot and check if the TMflow is opened automatically


