Configuration #
For users of the Ensenso N35 series, please make sure the graphics card and the memory module is installed in the control box and connected to the 3D camera. The 3DVision authorized lock (TM Dongle) in the product package is inserted into the control box. Details can be found here.
Calibration and Modeling #
- In TMflow, navigate to
 , click ‘Project’, and click the ‘create new project’ icon.
 - Add a vision node and click the pencil icon of the vision node. Click the blue box next to Vision Job to proceed with related settings.
- In the Vision Job tab, click the ‘add’ icon, input the name of the vision job, and click ‘OK’ to create a new vision job.
Calibration #
3D Camera Eye in Hand #
With the EIH 3D Camera, 3D Bin Picking can be applicable to the mobile robot with more flexibility. In comparison to ETH, there is no need to calibrate every time the robot environment changes.
NOTE:
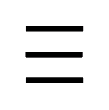
Before 3D camera eye in hand calibration or modeling, the 3D camera must be fixed on the tool end of the robot in EIH mode and connected to the control box with the USB 3.0 cable. The 3D calibration board of the 3D camera must be placed in an appropriate location, and use the cable to connect the 3D camera and the control box.
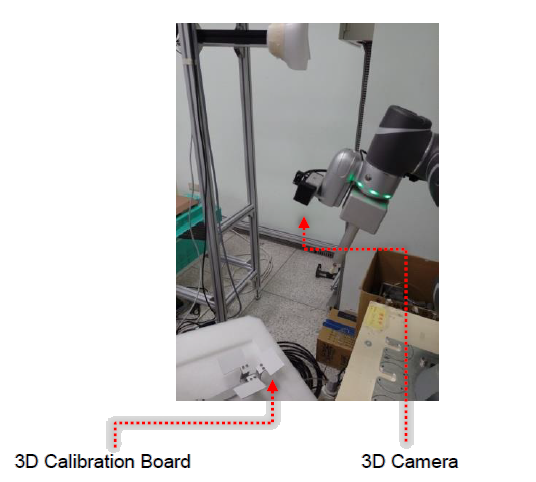
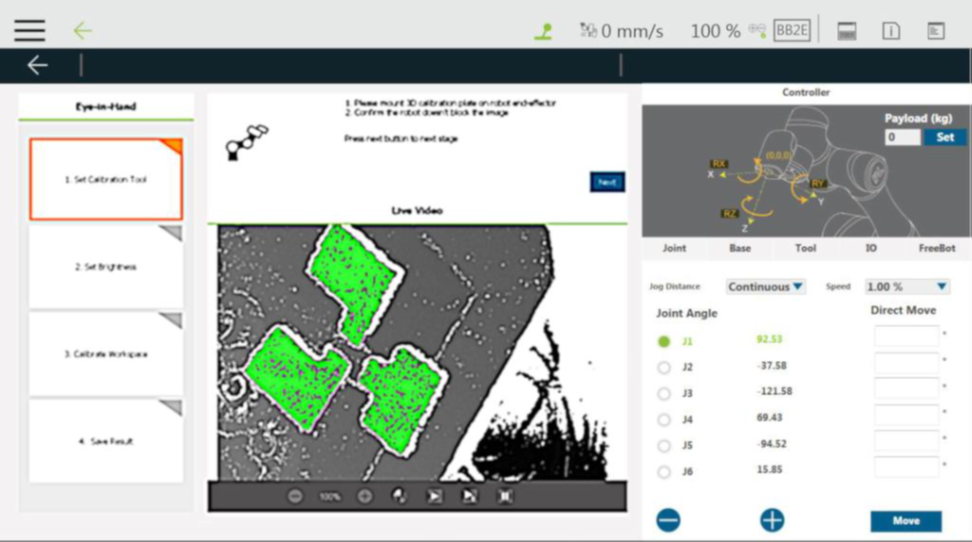
Step #1: After adding the vision job, in the vision screen, select the 3D camera in the camera list at the left as an unknown camera Go to the task list and click Calibration.
Step #2: When the screen prompts for calibration selection, click Eye in Hand.
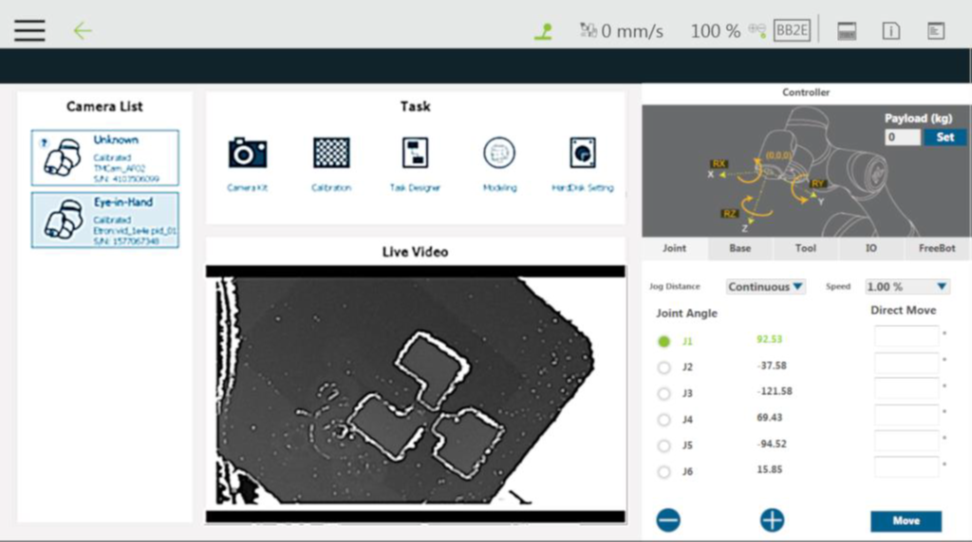
Step #3: Move the robot to make the 3D calibration board in the sight as shown in the Live Video. Once detected, the 3D calibration board will be shown in green. After confirming that the 3D calibration board is shown in green, click Next.
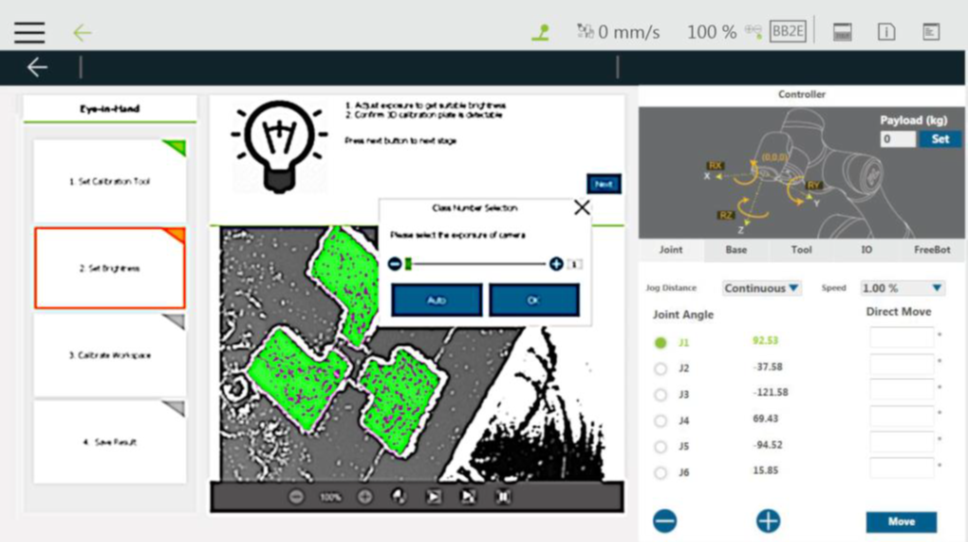
Step #4: Adjust the brightness automatically or manually to make the screen look moderate. Click OK, and then click Next.
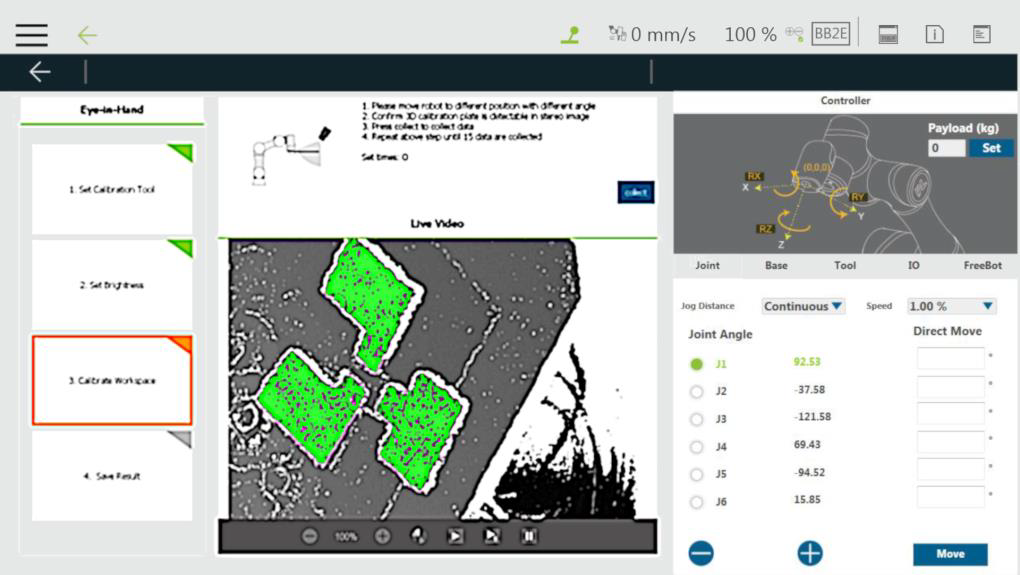
Step #5: Move the robot to capture the 3D calibration board with 15 different posture changes
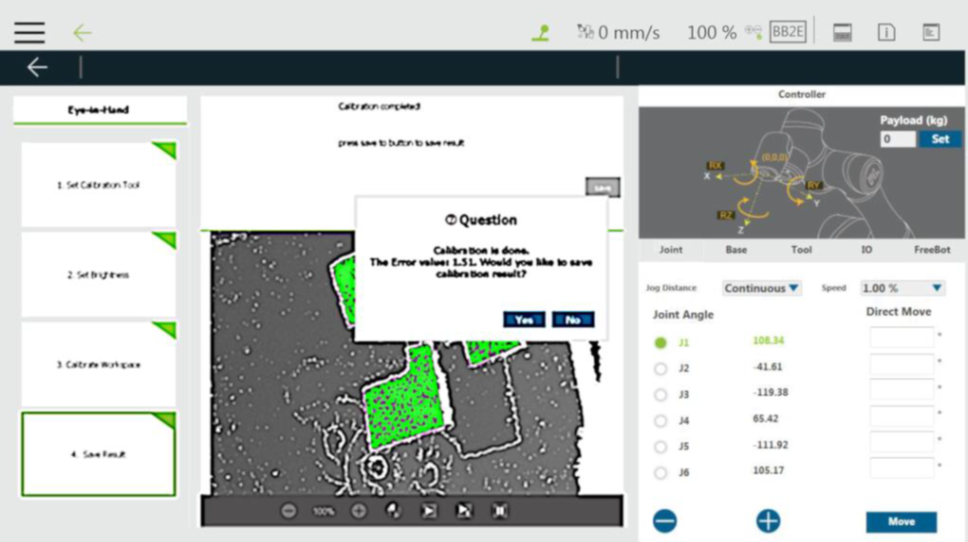
Step #6: After 15 takes, the system will calculate the calibration result automatically.
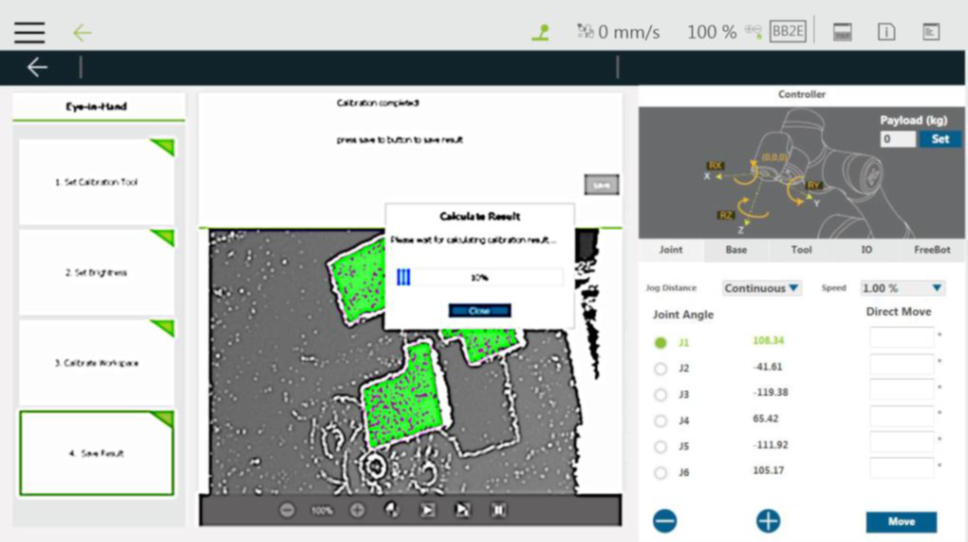
Step #7: The system will generate the standard deviation after the calibration. Now, users can click Yes to save the calibration result and apply the result to the 3D vision task editing.