Examples are valid for:
TMflow Software version:
- 2.16 or above.
- Visual Studio 2022
- NET 6.0
TM Robot Hardware version: Only Support HW3.2 or above
Other specific requirements: None
Note that older or newer software versions may have different results.
Introduction #
Role of Positioners in the Factory #
Robots in a factory are often tasked with processing or handling jobs. In cases where the workpiece is too large or the location for handling is too extensive, resulting in positions or trajectories that the robot cannot reach, an external positioner can be introduced into the work environment for assistance. The following diagram illustrates this scenario:
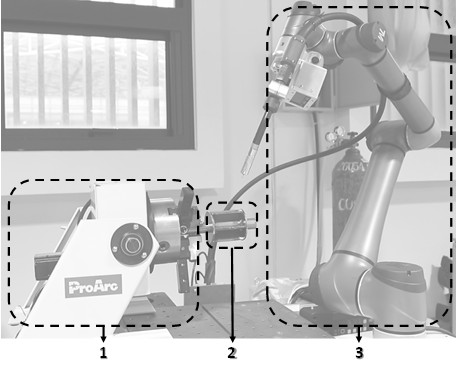
Figure details:
NO.1: Positioner
NO.2: Welding workpiece
NO.3: Robot
The above diagram depicts a common welding scenario. Due to the complex shape of the workpiece, there are welding paths that the robot cannot reach when the workpiece is in a fixed position. In such cases, with the assistance of an external positioner, the workpiece is placed on the external positioner. By rotating the external positioner, the workpiece can be moved to positions that were initially unreachable by the robot, enabling the successful completion of the task.
Implement Scenario #
This technical document uses a cylindrical workpiece as an example. The goal is to weld two paths on the workpiece, as shown in the diagram below:
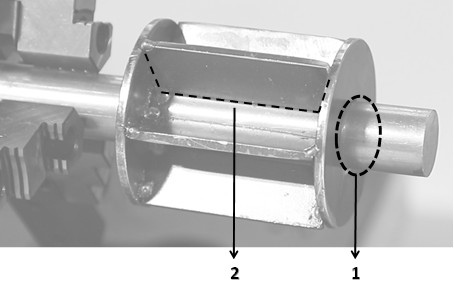
Path 1:The bottom of the cylindrical
Path 2:A U-shaped groove
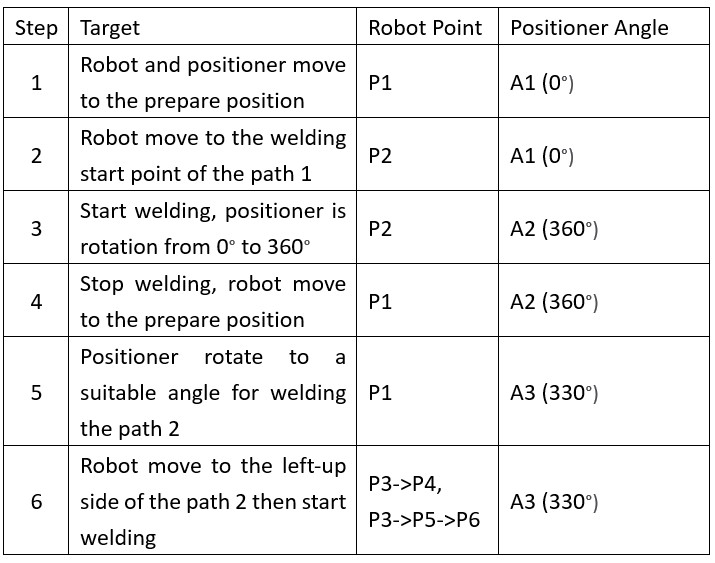
We plan the following steps to welding these paths:
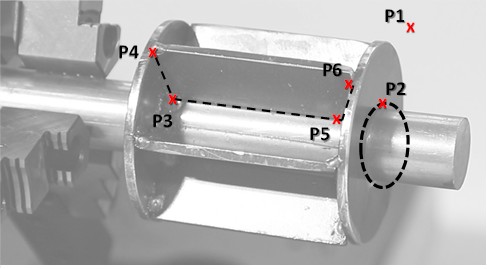
The positions of P1~P6 refer to the following figure:
This document will development the TMcraft GUI plugin, cooperation with TMflow to finish the above steps, please refer to the following chapters for the details.
Environment #
TMflow Software version:
- 2.16 or above.
- Visual Studio 2022
- NET 6.0
TM Robot Hardware version: Only Support HW3.2 or above
Getting Start #
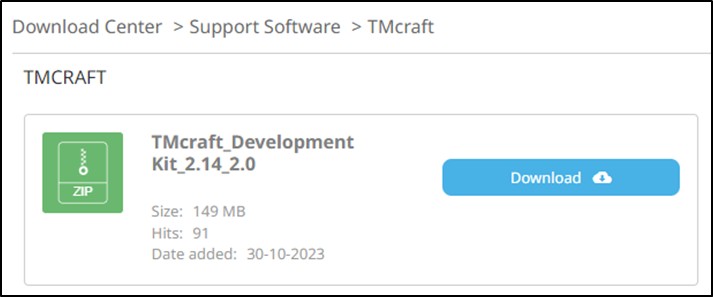
Get TMcraft Development Kit #
It is essential to download TMcraft and the development kit first to get more information about TMcraft. Please visit the Techamn official website and download TMcraft_Development Kit_2.16 or later. in Download Center > Support Softwate > TMcraft.
Get Necessary Information #
This technical document builds on the previous technical document: “How to establish the foundation for data exchange between TMcraft Node and TMcraft Toolbar.” Please carefully read the content of that document along with the Visual Studio project it corresponds to, to understand the implementation of TMcraft Node and TMcraft Toolbar. Also, familiarize yourself with how to create a shared reference and use a text file between these two, facilitating the implementation of the example in this technical document.
Download link for basic Visual Studio Project : TMcraft_Solution.zip ![]()
Download link for the implementation project of this technical document : PositionerControl.zip ![]()
Implement Steps #
The function of the TMcraft Toolbar and TMcraft Node are shown as below:

Next, create four Visual Studio projects referring to the previous technical document. For implementation details, please refer to the sections below and the corresponding code.
TMcraft Toolbar for Tuning Positioner #
TMcraft Toolbar can be design as shown below :
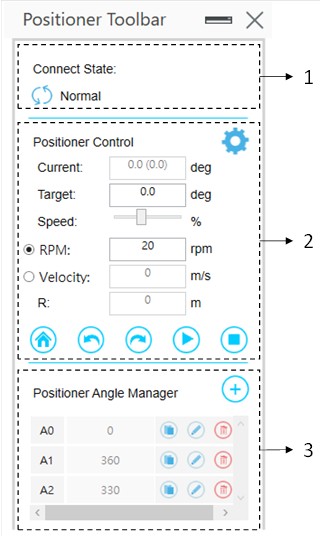
- 1: Connect the positioner and display the connect state
- 2: Edit parameters and control the positioner
- 3: Record and manage the rotate angle of the positioner
Users can first test the functionality of the positioner through the Positioner Toolbar implemented by TMcraft Toolbar, such as connection, forward rotation, reverse rotation, speed testing, and adjusting rotation angles, etc. Record the required angles save them to a text file through the area labeled with number three, and refer to the sections below for the implementation details of the text file.
Text Format Introduction #
The format of the text file as shown below :

Point :
Id : Point Id
J1~ J6 : Each angle of the robot joint
J7 : Rotate angle of the positioner
We define the format of the text file as XML markup language, which has the advantage of using the XmlSerialize functionality provided by .NET. It is a convenient, fast, and efficient way to store and read text files. The usage of XmlSerialize can be referenced in the previous technical document: How to Establish Data Exchange between TMcraft Node and TMcraft Toolbar and its Code.
With TMcraft Toolbar responsible for recording positions, adjusting speeds, and generating text files, we then design a TMcraft Node to read and display the content of that text file on the screen. Please refer to the sections below.
TMcraft Node for Insert Positioner Command to Control Flow #
MovePositioner Node is the TMcraft we built for this application as shown below:
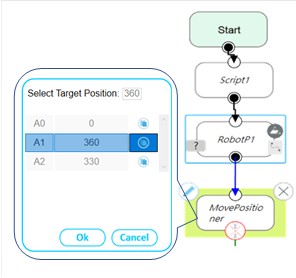
The MovePositioner Node allows the command to control the rotation of the positioner to be integrated into the robot’s control flow, ensuring that the control commands and timing between the robot and the positioner are controlled within the TMflow project.
Conclusion #
Through the development of GUI plugins with TMcraft, complex or cumbersome control processes can be transformed into a graphical interface. Based on different application scenarios, the most suitable operational interface can be designed. For example, on the production end of a factory, a streamlined operational interface can be customized, which simplifying the operator’s workflow and significantly improving production efficiency. When dealing with highly complex equipment, GUIs with user-friendly components such as buttons, text input fields, dropdown menus, multiple tabs, etc., can be utilized to design a better operational interface, making the control process of the equipment more user-friendly and enhancing the value of the equipment!


