- Introduction
- Environment
- Implement Scope
- Implement Steps
- Part A: How to Create Text File?
- Part B: How to Access Text File in Visual Studio Project?
- Part C: How to Implement TMcraft Toolbar in Visual Studio Project ?
- Part D : How to Implement TMcraft Node in Visual Studio Project ?
- Part E: How to Implement TMcraft_Test_App in Visual Studio Project ?
- Import Text File to TMflow
- How to Use TMcraft in TMflow ?
- Conclusion
Examples are valid for:
TMflow Software version:
- 2.16 or above.
- Visual Studio 2022
- NET 6.0
TM Robot Hardware version: Only Support HW3.2 or above
Other specific requirements: None
Note that older or newer software versions may have different results.
Introduction #
This document demonstrates an example of developing two types of GUIs and defining a text file to exchange data between these GUIs in TMflow. The integrated development environment is Visual Studio 2022. These GUIs can be plugged into TMflow. One of the plug-in GUIs is named TMcraft Toolbar, and the other one is named TMcraft Node.
TMcraft Toolbar #
TMcraft Toolbar is a floating window. Users can use this floating window anywhere and anytime in TMflow, as shown below:

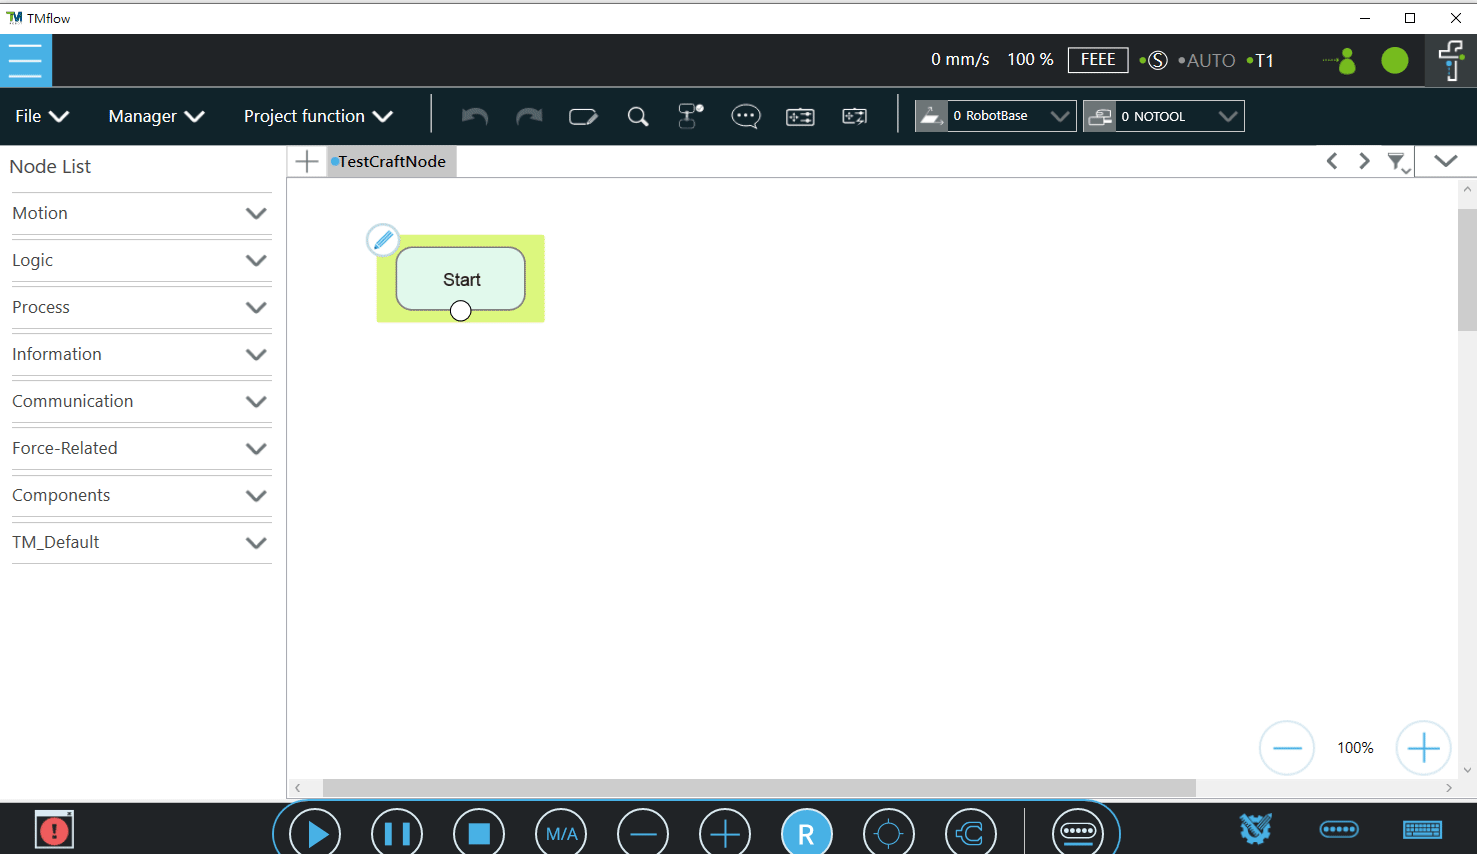
TMcraft Node #
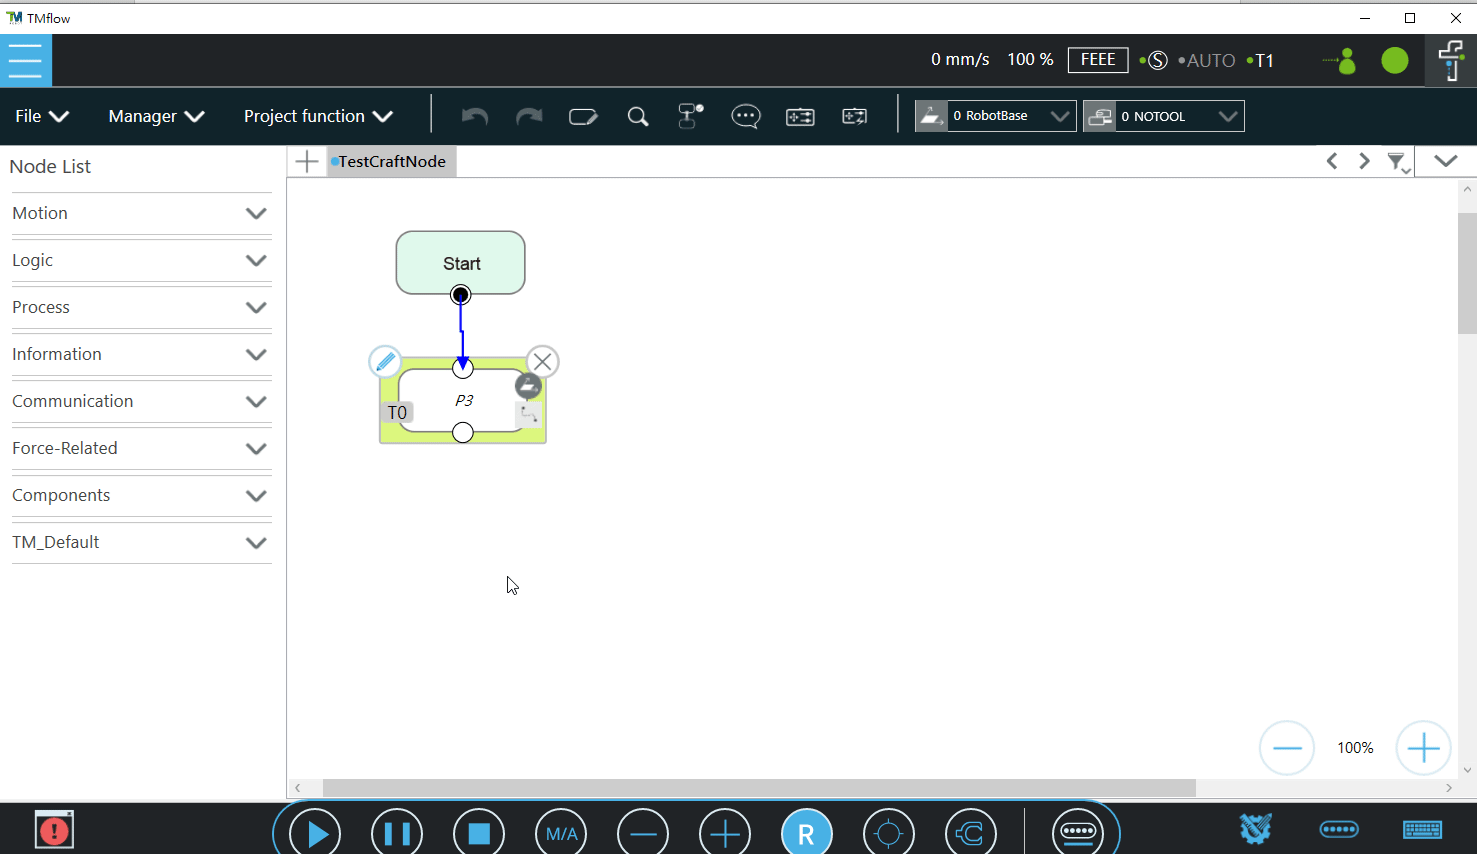
TMcraft Node is a node defined by the user for both functionality and interface. It can be plug-in to the control flow of TMflow. As shown below:
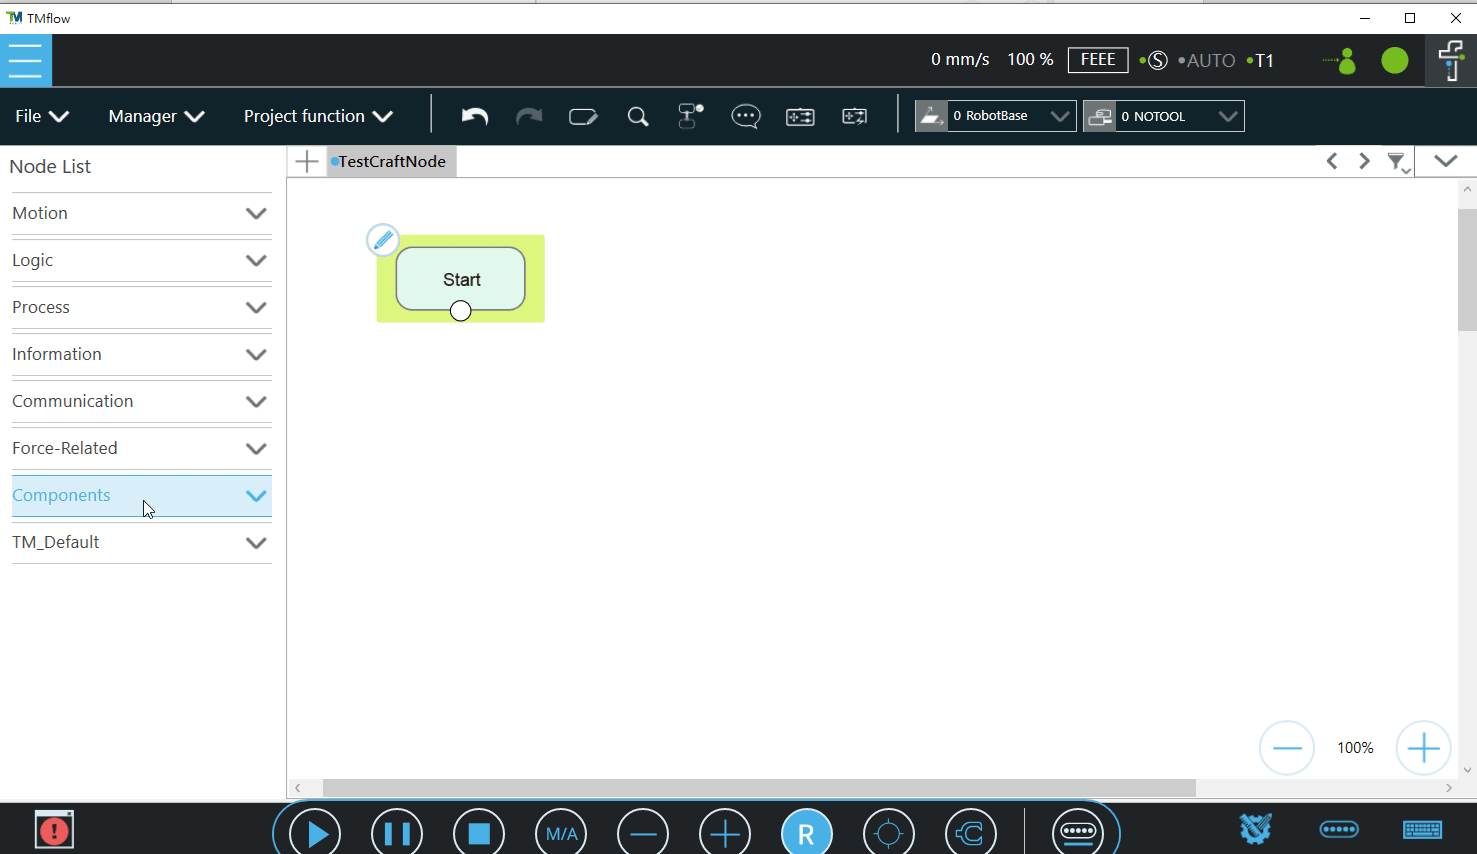
We created a TMcraft Node (First_TMcraft_Node). Users can find it in the Node List under the TM_Default group. The user-defined GUI will be open by clicking the edit button after dragging and dropping First_TMcraft_Node into the Flow project.
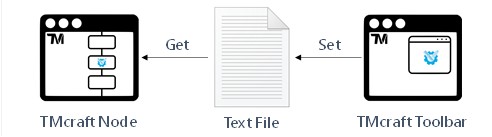
How to Share and Exchange Data Between TMcraft Toolbar and TMcraft Node ? #
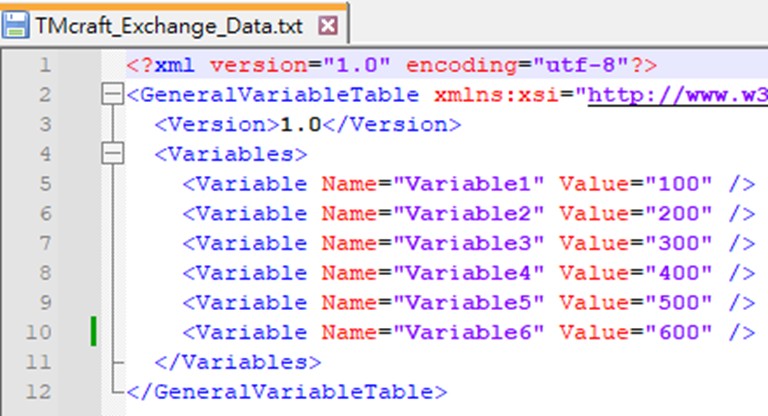
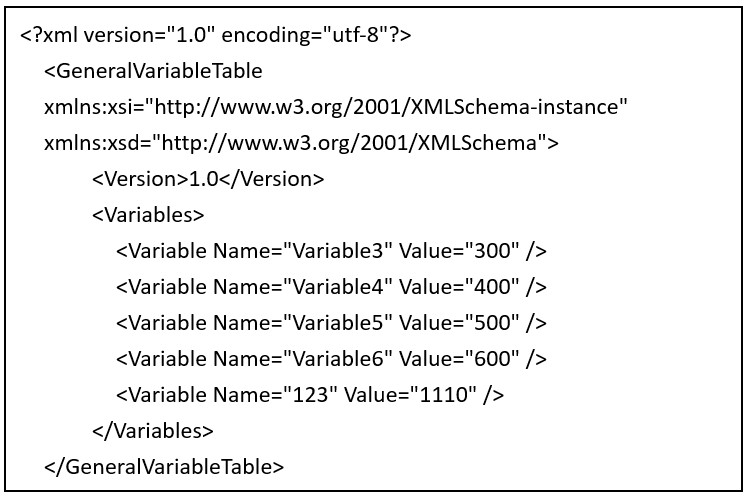
We create a text file to share data between TMflow Toolbar and TMcraft Node, the format of the text file is XML, and the content is very simple for this example. Each data has one Name and one Value. TMflow Toolbar will edit this text file, and TMcraft Node will display the edited result, as shown below:
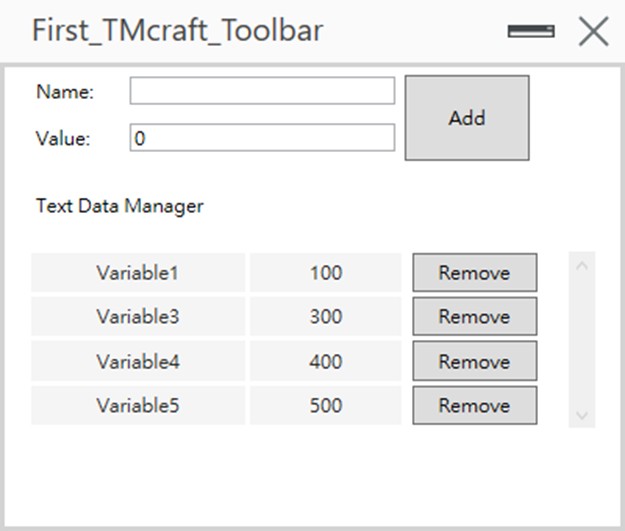
We designed the GUI of the TMcraft Toolbar to be able to edit this XML text file. Users can add and delete variables within the XML text file. The TMcraft Toolbar will instantly save the editing results to the XML file, as shown in the figure below:
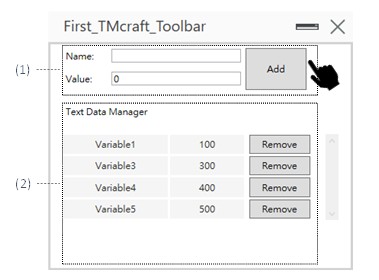 The design details of the TMcraft Toolbar GUI as shown below:
- Edit the Name, Value of the data and add data to XML file by clicking Add button.
- Check the data in the XML file and remove current selected data by clicking Remove button.
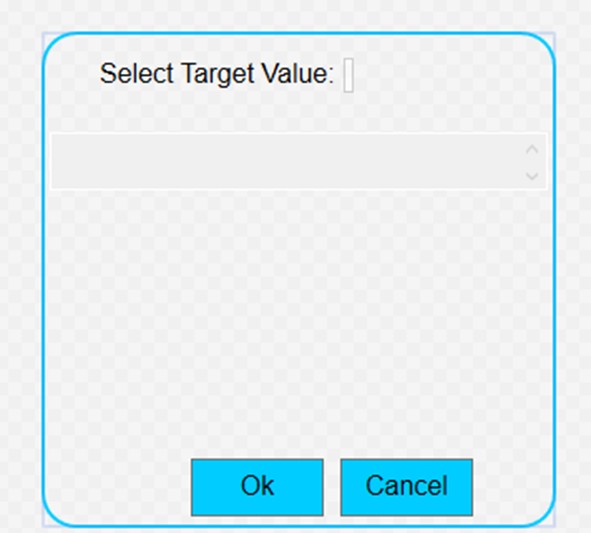
The TMcraft Node will read the data from the XML file. Each TMcraft Node can select a variable, and TMflow is responsible for saving the variable selected by the Node, as shown in the figure below:
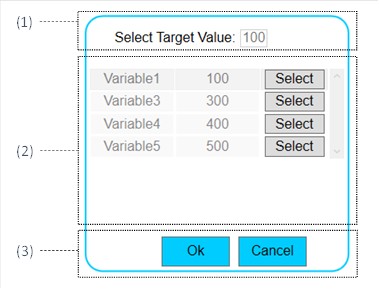
The design details of the TMcraft Node as shown below :
- Display current selected variable
- Display all variables of the XML file and user can select one variable by clicking Select button.
- Save or abort current edit result by clicking Ok or Cancel button.
Users can set parameters through the TMcraft Node. If the Ok button is pressed, the current editing results can be saved through the database provided by TMflow. The next time you open this Node, you can retrieve the last setting results by reading the database, as shown in the figure below:
The details of implement please refer to the following description.
Where to Find TMcraft and Development Kit ? #
It is essential to download TMcraft and the development kit first to get more information about TMcraft. Please visit the Techman official website and download TMcraft_Development Kit_2.16 or later. in Download Center > Support Softwate > TMcraft.
FILE REQUIRED : 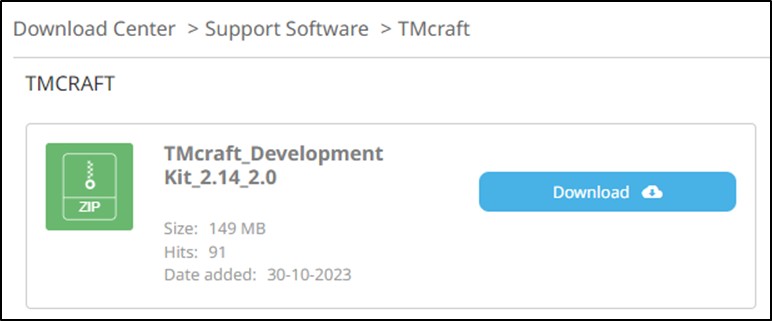
Download the Visual Studio project that will be implemented in this technical document after completing the download process of the TMcraft Development Kit.
Download : TMcraft_Solution.zip ![]()
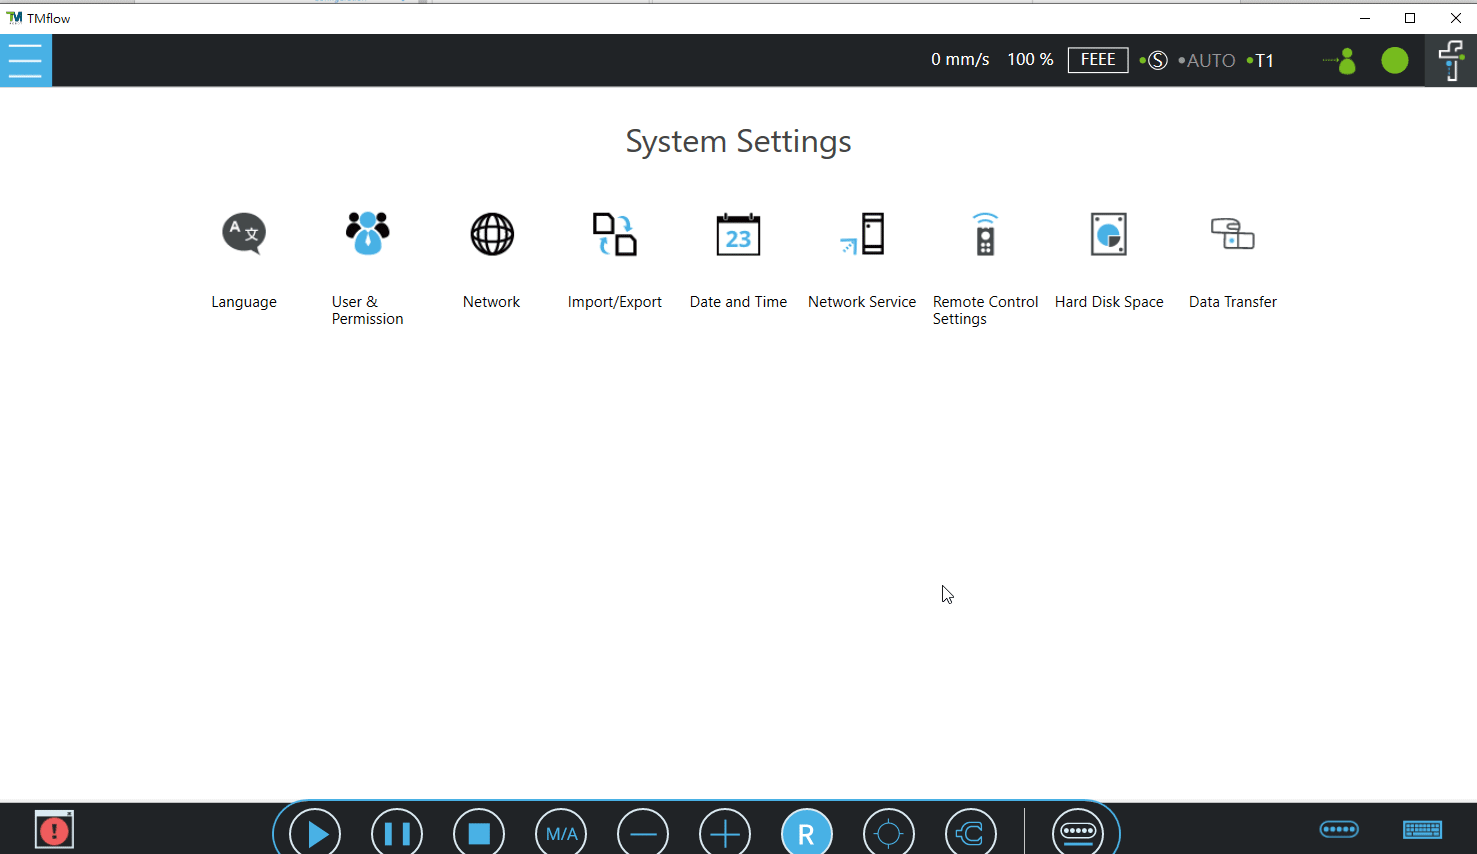
Environment #
TMflow Software version:
- 2.16 or above.
- Visual Studio 2022
- NET 6.0
TM Robot Hardware version: Only Support HW3.2 or above.
Implement Scope #
We will separate this application into 5 parts:
| Part A | (XML text file): | Define data format & saving data |
| Part B | (Text file manager): | Management the XML text file |
| Part C | (TMcraft Toolbar): | Implement GUI of TMcraft Toolbar |
| Part D | (TMcraft Node): | Implement GUI of TMcraft Node |
| Part E | (Test program): | Testing TMcraft Toolbar or TMcraft Node |
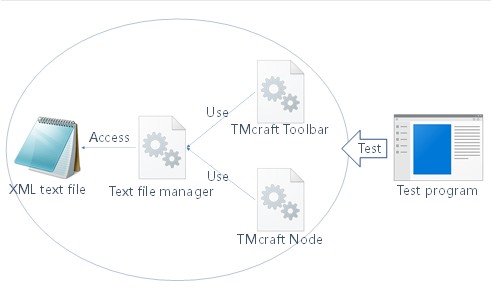
Because TMflow defines the file format of TMcraft Toolbar and TMcraft Node, these two GUI plugins, as DLLs, we need to compile TMcraft Toolbar and TMcraft Node into DLL files through Visual Studio. Additionally, we separate the management of XML text file into one program, compile it into a DLL file through Visual Studio, and then allow TMcraft Toolbar and TMcraft Node to access the XML text file by calling the DLL.
Because DLLs cannot be debugged during development, we will create a test program (Part E) to call the DLL files compiled from TMcraft Toolbar and TMcraft Node. This facilitates checking results and debugging during development.
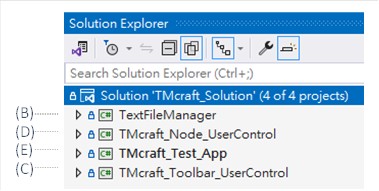
The above five parts, except for the plain text file (Part A), will all be implemented through Visual Studio. Therefore, four projects need to be created, as shown in the figure below:
Please refer to the following chapter for the details .
Implement Steps #
Part A: How to Create Text File? #
This technical article chooses the XML markup language to define parameters. The XML example is provided below:
Because TMflow only allows .txt files to be imported into Text File folder, please modify the file extension of the XML file to .txt before placing the text file on a USB, please make sure the folder on the USB is: E:\TM_Export\TMcraft Pool\TextFiles\ExchangeData.txt, “E:” is the root directory of the USB, and it depends on user’s computer.
Part B: How to Access Text File in Visual Studio Project? #
XML format text files can be quickly integrated with Visual Studio using the XmlSerializer provided by .NET. Here are the steps:
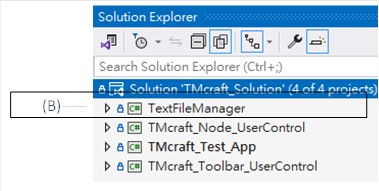
Step 1: Add a Class Library project in Visual Studio and named TextFileManager as shown below:


User can find the project in the project tree, as shown below:
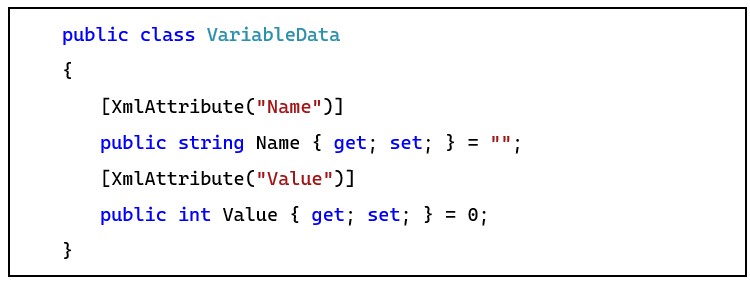
Step 2: In the code of Visual Studio, add classes and class member that correspond to the data in the XML file.
Step 3: Define classes and class member as XmlRoot, XmlElement, XmlArray, XmlArrayItem, and XmlAttribute according to the format of the XML file.
Step 4: Using TMcraft TextFileProvider to parse the text file.
Step 5: Design the interface of the TextFileManager and implement the function of these interface. Through this interface, the functionalities and data required by TMcraft Toolbar and TMcraft Node are exposed. The interface design is as follows:
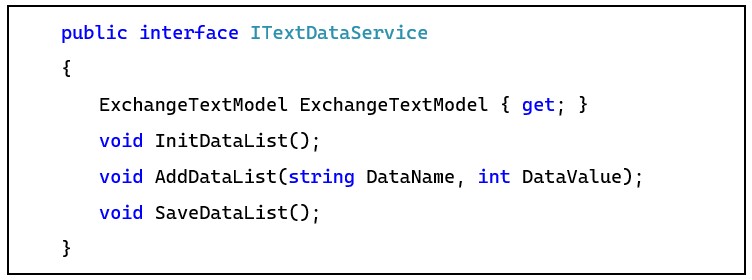
The details of the interface as shown below:
ExchangeTextModel: The XML data base of theTextDataManage
InitDataList: Initialize and synchronize the data in the TextDataManager
AddDataList: Add a set of the data by sending DataName & DataValue
SaveDataList: Set current edit result to XML file
The more information of XmlSerializer please refer to .NET official website:
https://learn.microsoft.com/zh-tw/dotnet/standard/serialization/examples-of-xml-serialization
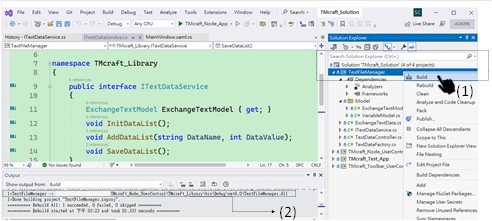
Step 6: Click Build after right click TextFileManager node (No.1) to generating the TextFileManager.dll (No.2) as shown below:
Part C: How to Implement TMcraft Toolbar in Visual Studio Project ? #
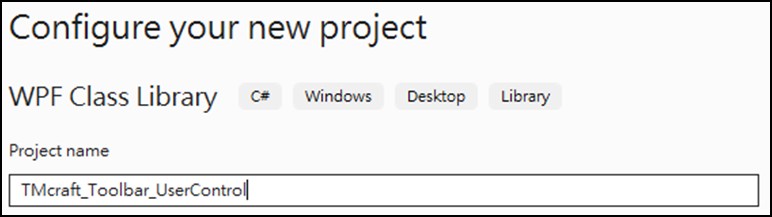
Step 1: Create a WPF User Control library project named TMcraft_Toolbar_UserControl as shown below:

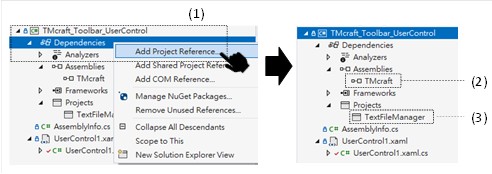
Step2 : Add TMcraft.dll (No.2) and TextFileManager.dll (No.3) as project’s Dependencies, by click Add Project Reference… after right click Dependencies node (No.1):
Step 3: Implement necessary function, code and GUI, please refer to the source code for the details.
Part D : How to Implement TMcraft Node in Visual Studio Project ? #
Step 1 and Step 2 please refer to the Part C.
Step 3: Implement necessary function, code and GUI, please refer to the source code for the details.
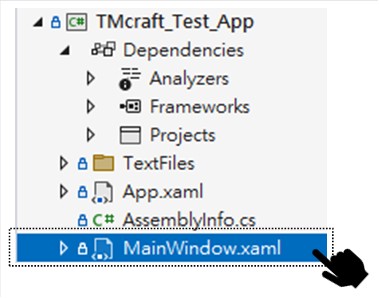
Part E: How to Implement TMcraft_Test_App in Visual Studio Project ? #
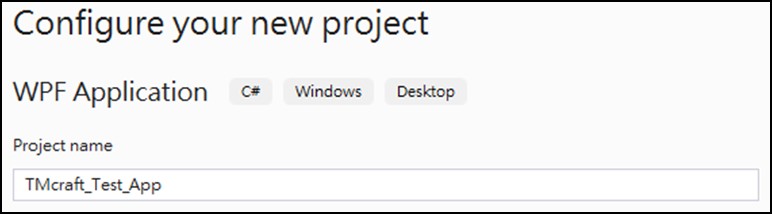
Step 1 : Create a WPF application project named TMcraft_Test_App as shown below:

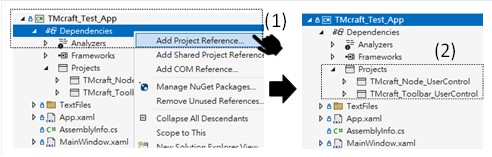
Step 2: Add TMcraft_Node_UserControl.dll and TMcraft_Toolbar_UserControl.dll (No.2) as project’s Dependencies, by clicking Add Project Reference… after right click Dependencies node (No.1):
Step 3: Open MainWindow.xaml to modify Height, Width to fit TMcraft Toolbar or TMcraft Node depends on their size and add <contentControl> tag in the <Grid>, please refer to the following description or source code for the details:

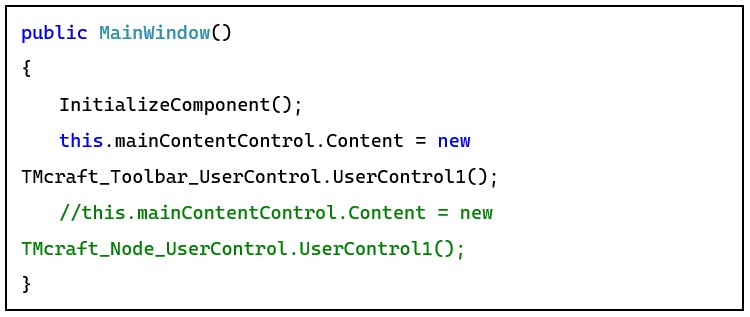
Step 4: Edit MainWindow.xaml.cs‘s construct to define which one to be display or debug on the TMcraft_App, only one can be the content of this contentControl at the same time, please modify the code of UserContol if you want to display both at the same time.
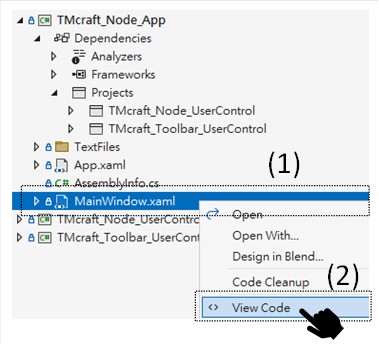
The way to open MainWindow.xaml.cs as shown below:
Step 1: Right click MainWindow.xaml.
Step 2: Click View Code.
Import Text File to TMflow #
It is necessary to import the text file before opening TMcraft Toolbar or TMcraft Node because the user can’t create the TextFiles folder without using the import text files function in TMflow. For details on importing a text file, please refer to the following description:
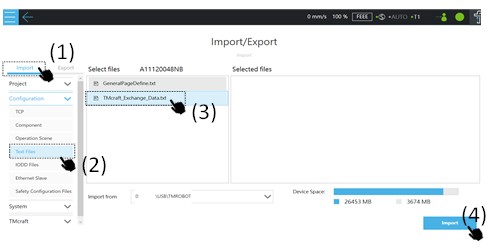
Step 1: Click Import and select USB in System -> Import/Export page
Step 2: Click Configuration -> Text Files
Step 3: Click TMcraft_Exchange_Data file
Step 4: Click Import button
After finish these steps, Text File Manager in TMflow will display this file and the file’s content, please refer to the following figure for the details.

How to Use TMcraft in TMflow ? #
How to Generate zip File of TMcraft Toolbar and TMcraft Node ? #
After implementing the GUIs and functions of TMcraft Toolbar and TMcraft Node using Visual Studio and building the DLLs file, we need to pack the DLLs and related files. In this document, we use TMcraft Packer to pack these files. Please refer to the development kit for packing details.
TMcraft Node:
Chapter 5. Build TMcraft Node Package in TMcraft Node Tutorial_Basic Development_Rev1.01_EN.pdf
TMcraft Toolbar:
Chapter 5. Build TMcraft Toolbar Package in TMcraft Toolbar Tutorial_Basic Development_Rev1.01_EN.pdf
How to Import and Enable TMcraft Toolbar into TMflow ? #
We can import TMcraft Toolbar into TMflow after completing the above steps and packaging TMcraft Toolbar using TMcraft Packer. For details on TMcraft Packer, please refer to the development kit. The result is shown below:
Step 1: Import TMcraft Toolbar
step 2 : Enable TMcraft Toolbar
How to Import and Enable TMcraft Node into TMflow ? #
We can import TMcraft Node into TMflow after completing the above steps and packaging TMcraft Node using TMcraft Packer. For details on TMcraft Packer, please refer to the development kit. The steps of importing TMcraft Node are shown below:
Step 1: Import TMcraft Node:
Step 2: Enable TMcraft Node:
The result is shown below :
Conclusion #
It is very useful to know how to exchange data between TMcraft Toolbar and TMcraft Node because these TMcraft GUI plugins are independent before we established the connection. Not only text files but also any type of saved data can be connected to TMcraft to enhance your application. For more examples, please refer to another technical document: How to build an application of positioner with TMcraft.


