Examples are valid for:
TMflow Software version: 1.76.6300 or above.
TM Robot Hardware version: HW 3.2 or above
Other specific requirements: None
Note that older or latest software and hardware versions may have different results.
Hardware Installation Guide #
Note :
- For Profinet card , please contact our sales team for purchasing purpose
- The picture in this document is using Control Box for Hardware 3.2 , please note that different control box version might slightly has different installation position due to control box version
Hardware Preparation : #
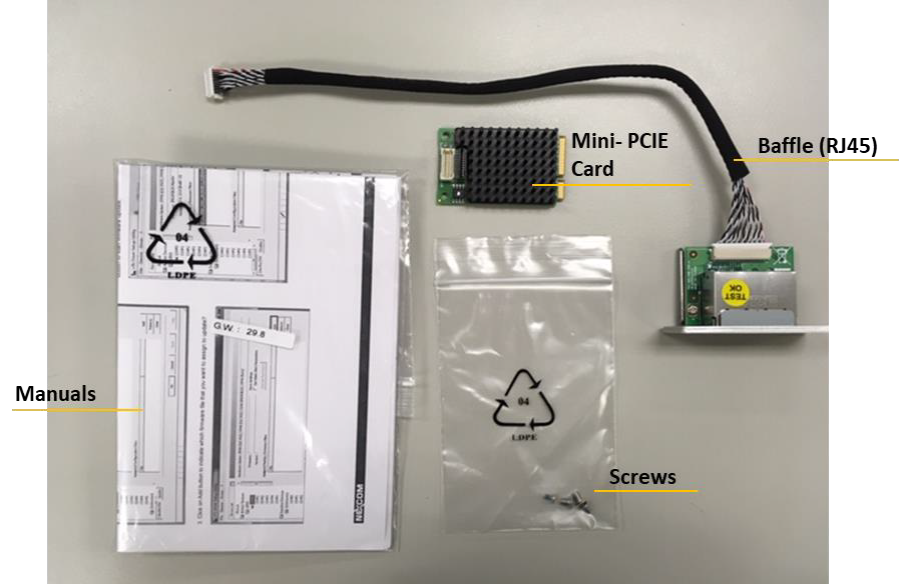
Hardware Installation Procedure : #
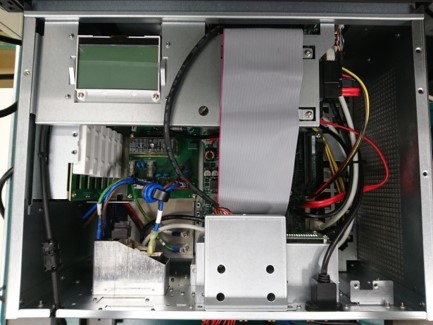
Step 1 : Remove the top cover of control box
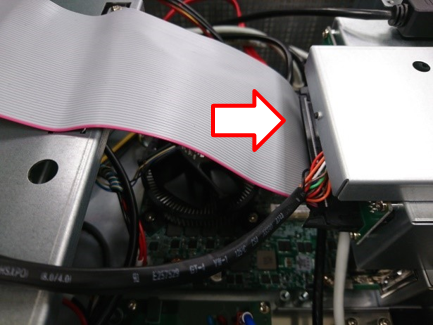
Step 2 : Remove the “flexible flat cable”
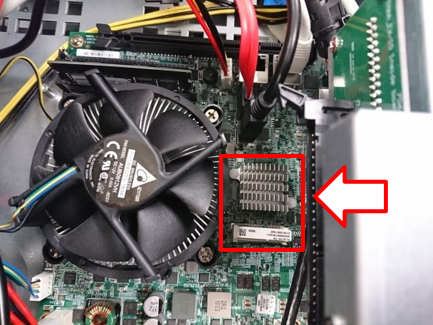
Step 3 : Find the mini- PCIE slot
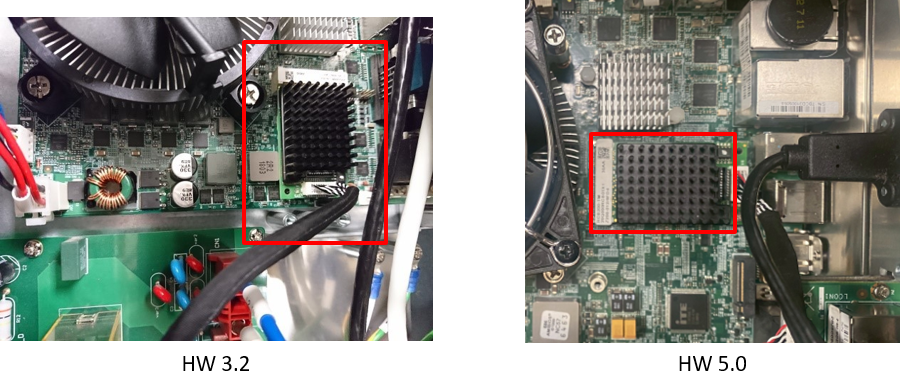 Step 4 : Install the PROFINET mini-PCIE board and communication cable (please check your control box version and refer to the picture)
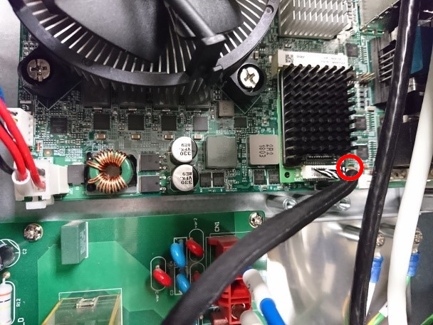
Step 5 : Fix the board by screw
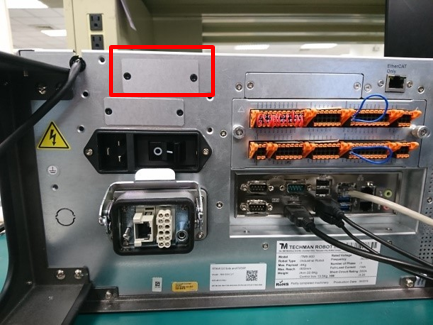
Step 6 : Remove the barrier plate
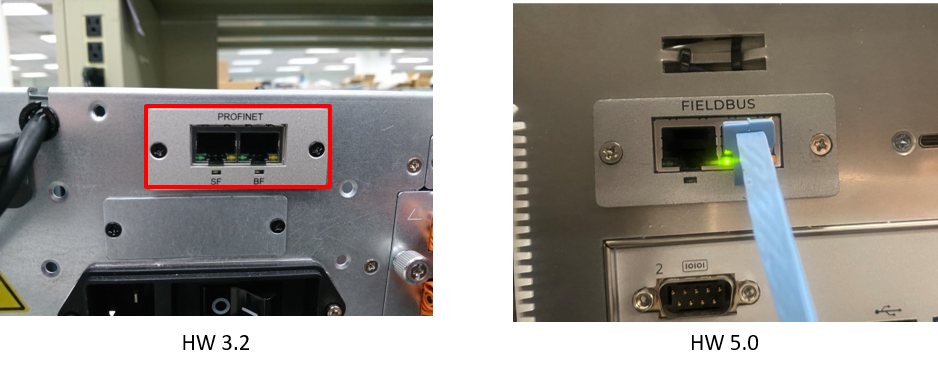
Step 7 : Install the PROFINET communication Module

Step 8 : Plug-in the communication cable and assemble back the top cover of control box
SF (System Fault) = Hardware or software error
BF (Bus Fault) = Bus error (for CPUs with DP interface only)
Software Installation Guide #
NOTE :
- If the pre-install HMI (factory image) is HMI v1.80 and above, users can skip step 1-4 below and start from step 5 (FW only)
- If the pre-install HMI (factory image) is lower than TMflow 1.76, please follow step 1-5 (Image + FW)
- If the pre-install HMI (factory image) is TMflow 1.76 or above but the PROFINET device is not pre-install, please execute the Step 5 below “Update/Check FW & Setting” .
- For FW data, please ask your FAE to provide it and note that a maintenance dongle is also needed.
- If you want to upgrade the HMI from version 1.76 to version 1.80, please remove the PROFINET mini-PCIE board before the upgrade.
Driver Installation – Step Overview #
IMAGE :
- Install cifX Device Driver (cifX Device Driver Setup.exe)
- Install SYCON.net (SYCONnet netX setup.exe)
- Modify Windows Registry Setting (CIFX_Edit_InstallDir.reg)
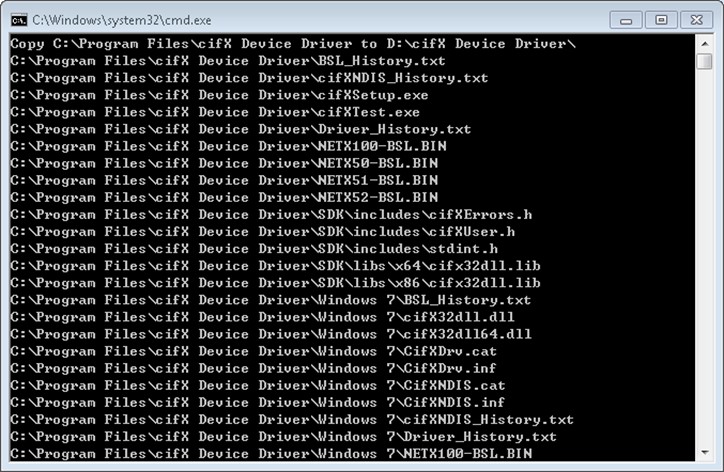
- Duplicate Driver Folder (CIFX_Copy_Files.bat)
FIRMWARE :
5. Update/Check FW & Setting
– CifxSetup.exe
– CifxTest.exe
STEP 1. Install cifX Device Driver
If the image version (original factory version) is 1.76 and before, please go through the following step.
This driver is valid for bothh PROFINET adapter and Ethernet/IP adapter.
Go to the windows desktop and disable the “EWF(OS: Win7)” or “UWF(OS:WIN10)” setting in C drive. Please refer to manual WIN7 EWF Setting and WIN10 UWF Setting.
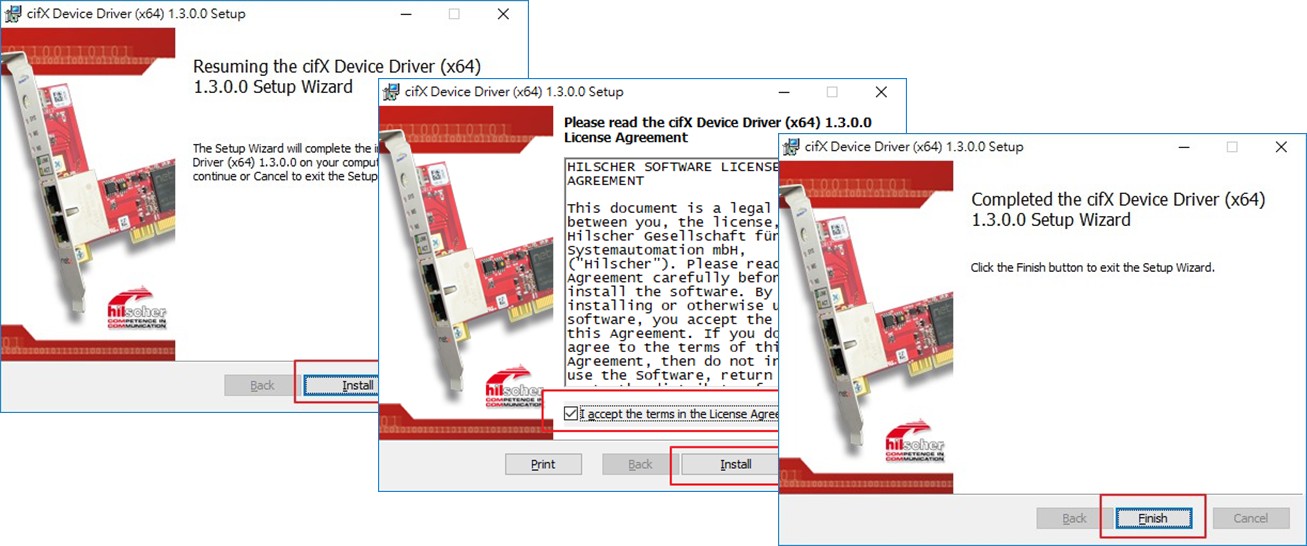
Install cifX Device Driver (Version 1.3.0.0)
- Click “Install”
- Enable “I accept the terms in the License Agreement” checkbox and Install
- Click “Finish”
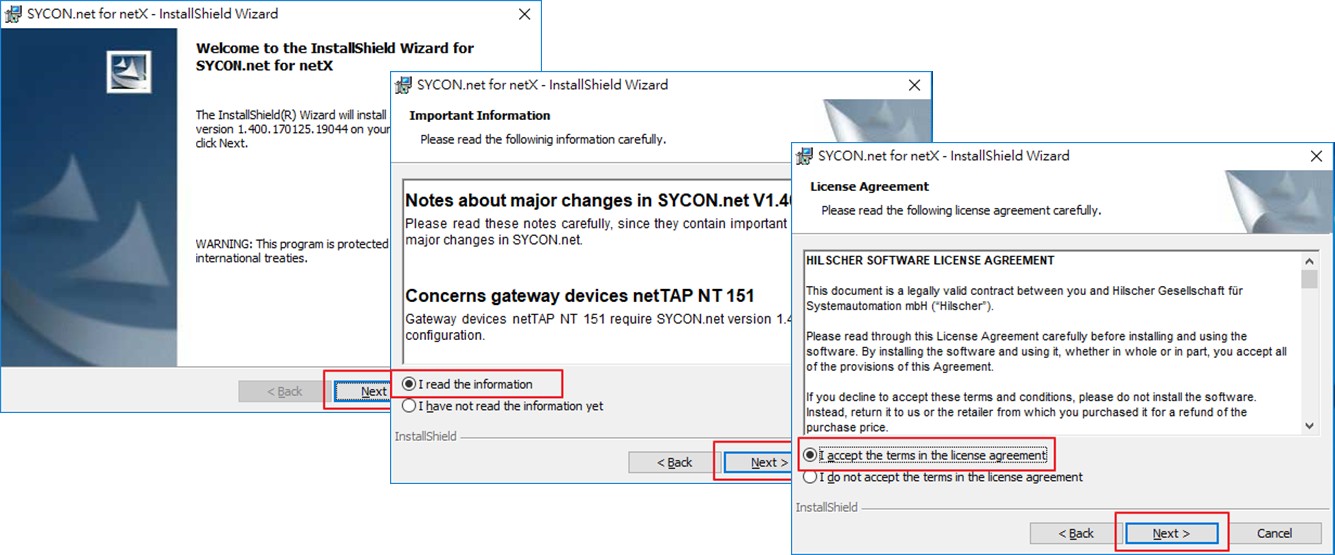
STEP 2. Install SYCON.net (Version 1.4.0.0)
- Click “Next”
- Select “I read the information” and click “Next”
- Select “I accept the terms in the license agreement” and click “Next”
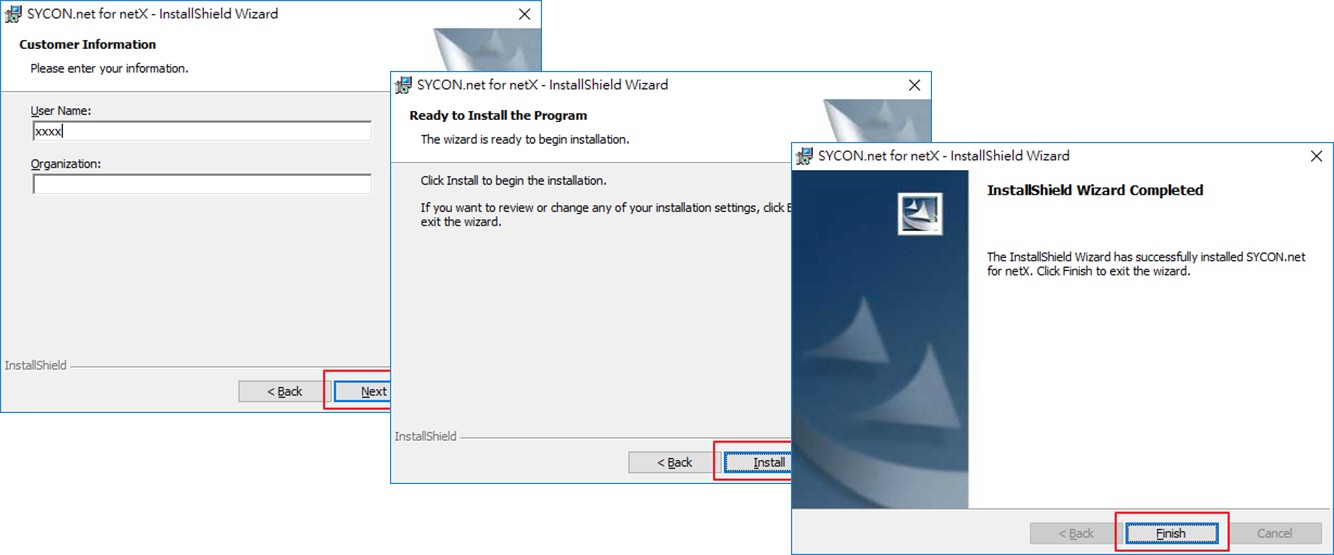
- Enter the User Name and click “Next”
- Click “Install”
- Click “Finish”
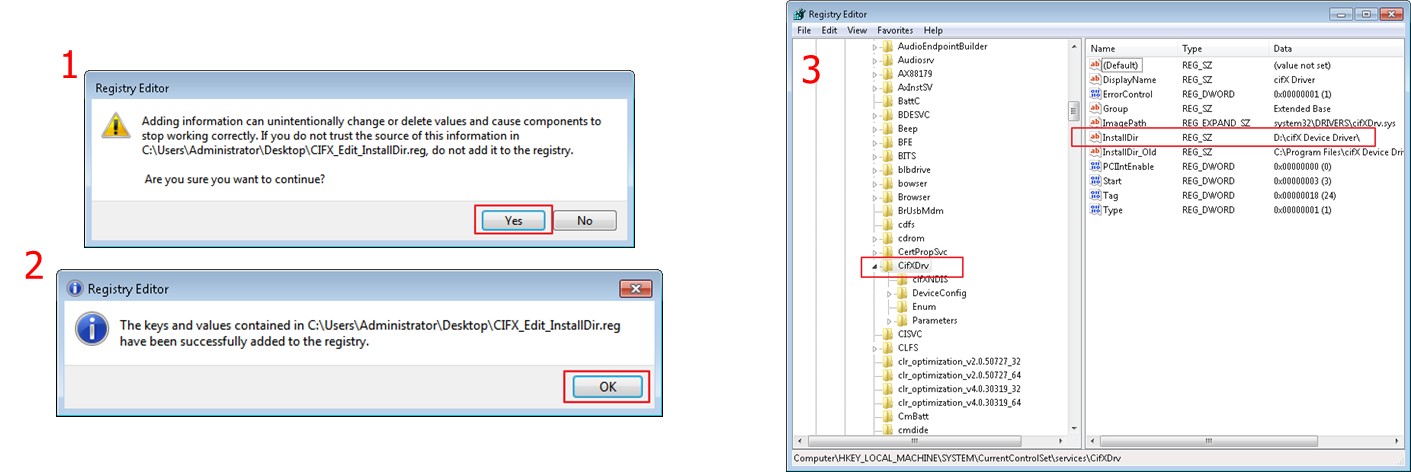
STEP 3. Modify Windows Registry Setting
- Execute CIFX_Edit_InstallDir.reg
- [HKEY_LOCAL_MACHINE\SYSTEM\CurrentControlSet\services\CifXDrv]
STEP 4. Duplicate Driver Folder
- Execute CIFX_Copy_Files.bat
STEP 5. FW Update and Boot Up Setting
- CifxSetup.exe
- CifxTest.exe
Note : Please follow the steps below, make sure to add the firmware and configuration files into the Profinet hardware, and then apply them together to enable the driver properly.
- Put the following firmware in your USB drive
- CONFIG.nxd
- firmware.nxf
- NWID.nxd
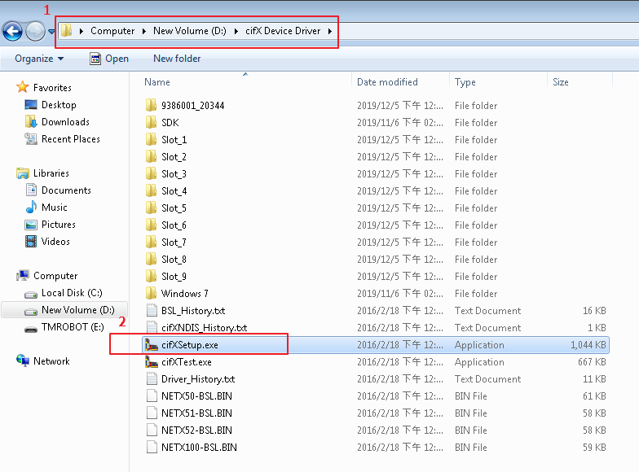
5-1. Update FW & Setting – CifxSetup.exe #
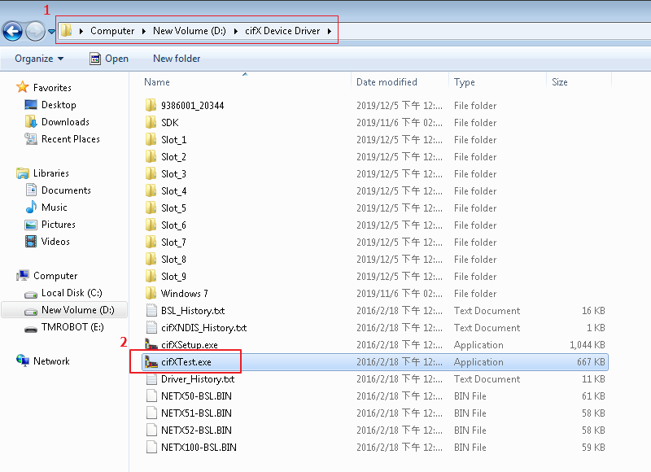
- Go to the D:\cifX Device Driver
- And click “cifXsetup.exe”
- Select “CH#0”
- Click “Add” in Assign Module/Firmware Files to select the “firmware.nxf”
- Click “Add” in Assigned Configuration Files to select “Config.nxd” and “NWID.nxd”
- Click Apply
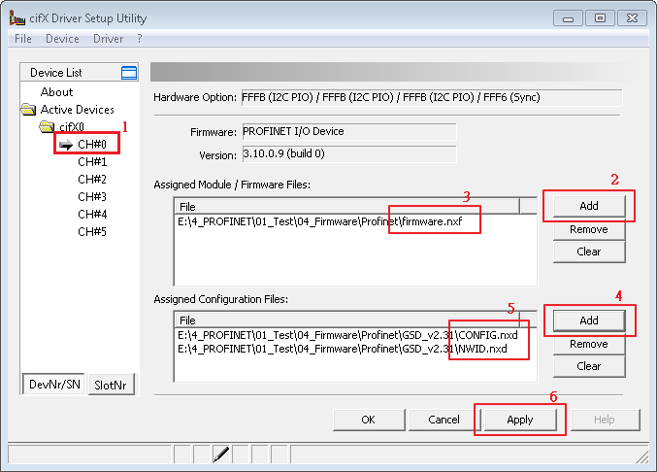
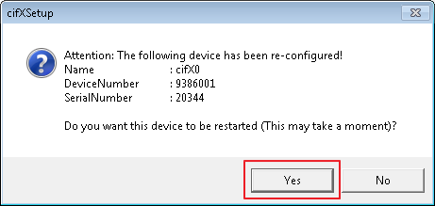
- Click “Yes” to finish the cifXSetup
Follow the steps in the picture based on the description in the picture.
5-2. Check FW & Setting – CifxSetup.exe #
- Go to the D;\cifX Device Driver
- Click “cifXTest.exe”
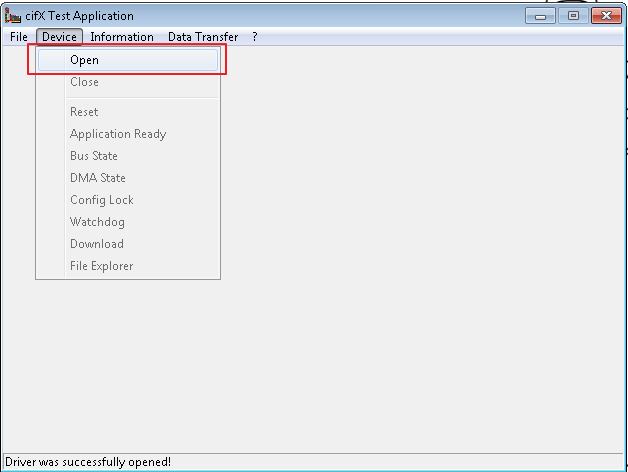
- Go to the Device tab in the cifX Test Application, and click “Open”
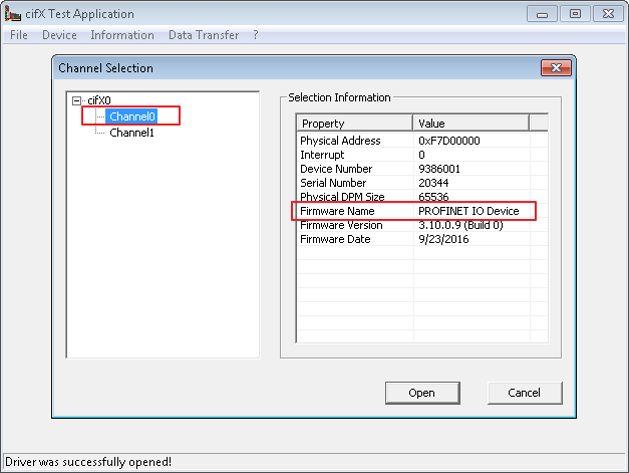
- Select the Channel0 and see if the firmware has been installed well.
Run cifXRegistryEdit.exe
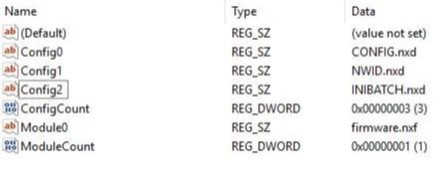
- After finishing running the cifXRegistryEdit.exe, open the registry editor and find Computer HKEY_LOCAL_MACHINE SYSTEM CurrentControlSet Services CifXDrv DeviceConfig 9386001 20637 Channel0
- Check the following setting is correct
- Enable the EWF (OS :W i n7) or UWF(OS:WIN10) again


