Brief Introduction #
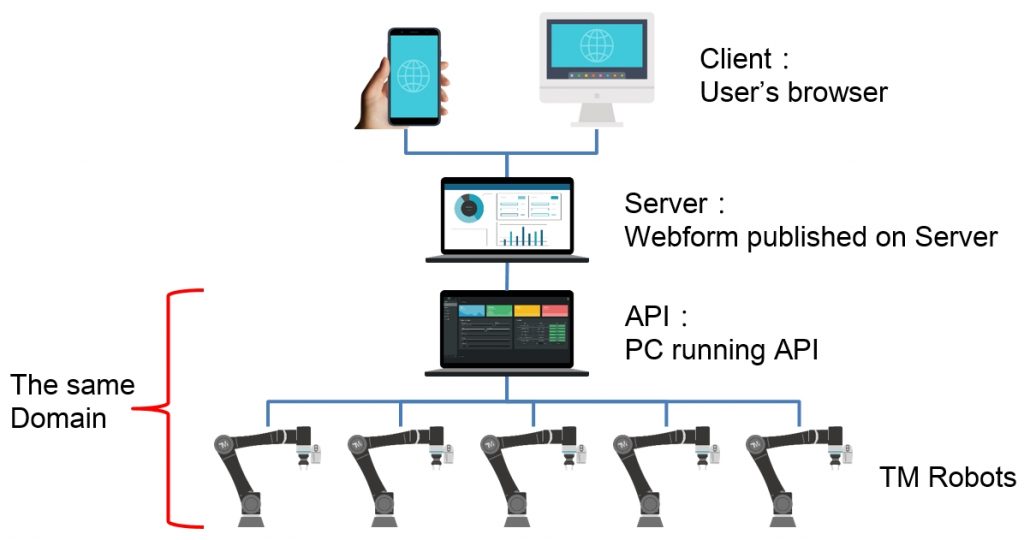
TM Robot Management API-Advance allows customer to not only get detailed information from multi robot, but also control project changing/download/upload and variable value changing.
API could be running in a separate PC as it and all other robots are in the same local network.
In this example, we are using the API through HTTPS, then design ASP.NET Webform UI as a demonstration.
Demo development environment is as follow: Win10 64bit OS and Visual Studio 2019.
With the implementation of Webform, it is possible to monitor and operate your robot in the office, or even on a mobile phone. For detail explanation, please refer to TM Robot Management API-Advance Manual.
Demo Video #
Pre-setting of API #
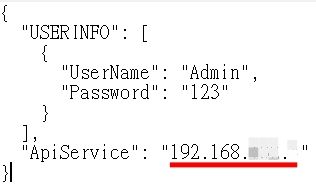
First of all in service-config.json file, please set “ApiService” as the PC’s IP.
Then in modbus-config.json, first you need to make sure ModbusConfiguration-Enable was set as “True” on the top (mark as Green). Then you could setup “enable” as “true” for each data if you want to receive those(mark as Red), and vice versa.

In _start.bat, you could setup the Port of each protocal as you wanted, in this demo we Setup HTTPS Port as 9832. Also, don’t forget to set SERVICE_HOST_NAME as PC’s IP
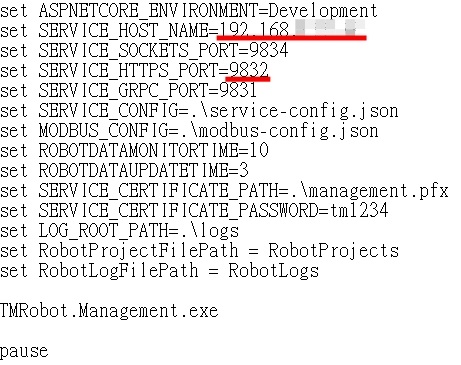
After setting complete, double click on _start.bat to execute this API.
Pre-setting of Robot #
- TM Robot Setting
Despite most API functions receive broadcast of Robots, but some functions related to project handling need to setup TMM connection of Robot:
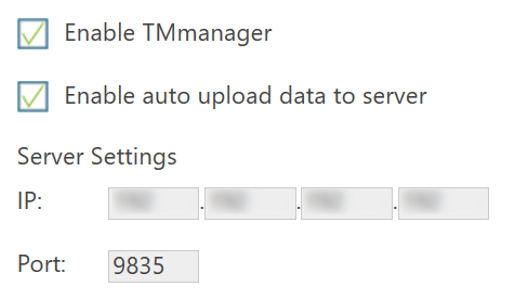
Click on Robot Setting/TMmanager icon, check on Enable TMmanager and Enable auto upload data to server. Set the IP the same as the PC which you want to implement this API. Port will be set as 9835.Please refer to below picture
Make sure your PC’s IP is fixed instead of floating, and in the same local network with all the robots you want to connect with.
Because a lot of functions get feedback based on Robot Name, please check every robot have distinct name to make sure the process.
- How to check the robot is connecting with the PC?
In cmd, try:telnet 192.168.xxx.xx 502(192.168.xxx.xx is the IP address of the robot, and port 502 is fixed for Modbus); if there is an empty window pops out, means the robot you would like to connect is connecting with PC.
Visual Studio C# Code #
If you would like to know more about this Demo, you could download here for the Visual Studio Project file for reference.
Please contact with TM Robot sales representative if you are interested in this API product.
Since this is a Demo project, please use it with care.
Demo Compatibility: Robot API version 1.02.4000


