Examples are valid for:
TMflow Software version: 1.76.6300 or above
TM Robot Hardware version: Hw5.0
Note that older or newer software versions may have different results.
Other specific requirements:
SIEMENS Pre-Cautions
- Make sure you already download TIA Portal (you can download it through SIEMENS web). In this tutorial, we are using TIA Portal V15.1 version
- Prepare your Siemens Licence
- PLC type being used in this case : CPU 1214C DC/DC/DC ( 6ES7 214-1AG40-0XB0 )
NOTE :
- Please check your own PLC type (written at the side)
- Make sure you have already installed the PROFINET hardware into your control box.
Installation Procedures #
Open TIA Portal and create new project
Add New Device and select PLC type you use
Configure PLC IP Address
- Select device configuration
- in the Device view, select the PROFINET interface of the PLC. in the properties window, select Ethernet addresses and set IP address. This assigns the PROFINET IP address to your PLC so it can communicate with other devices
- After finish setting, click OK
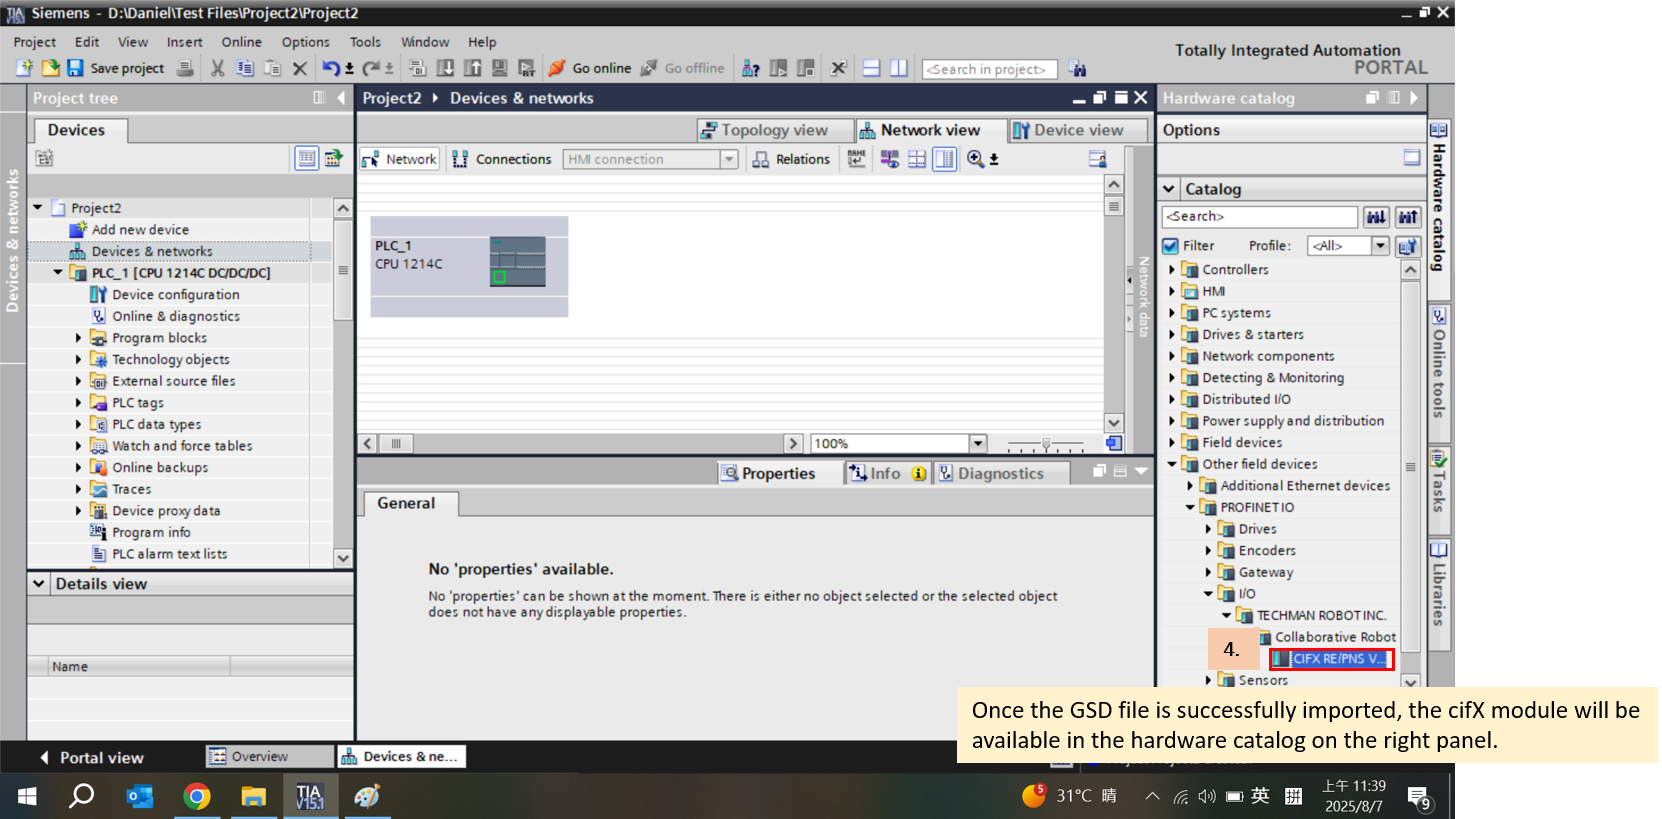
Install GSD File for TM Robot in TIA Portal
- Click Options –> Manage general station description files (GSD)
- select the GSD File
- Click Install
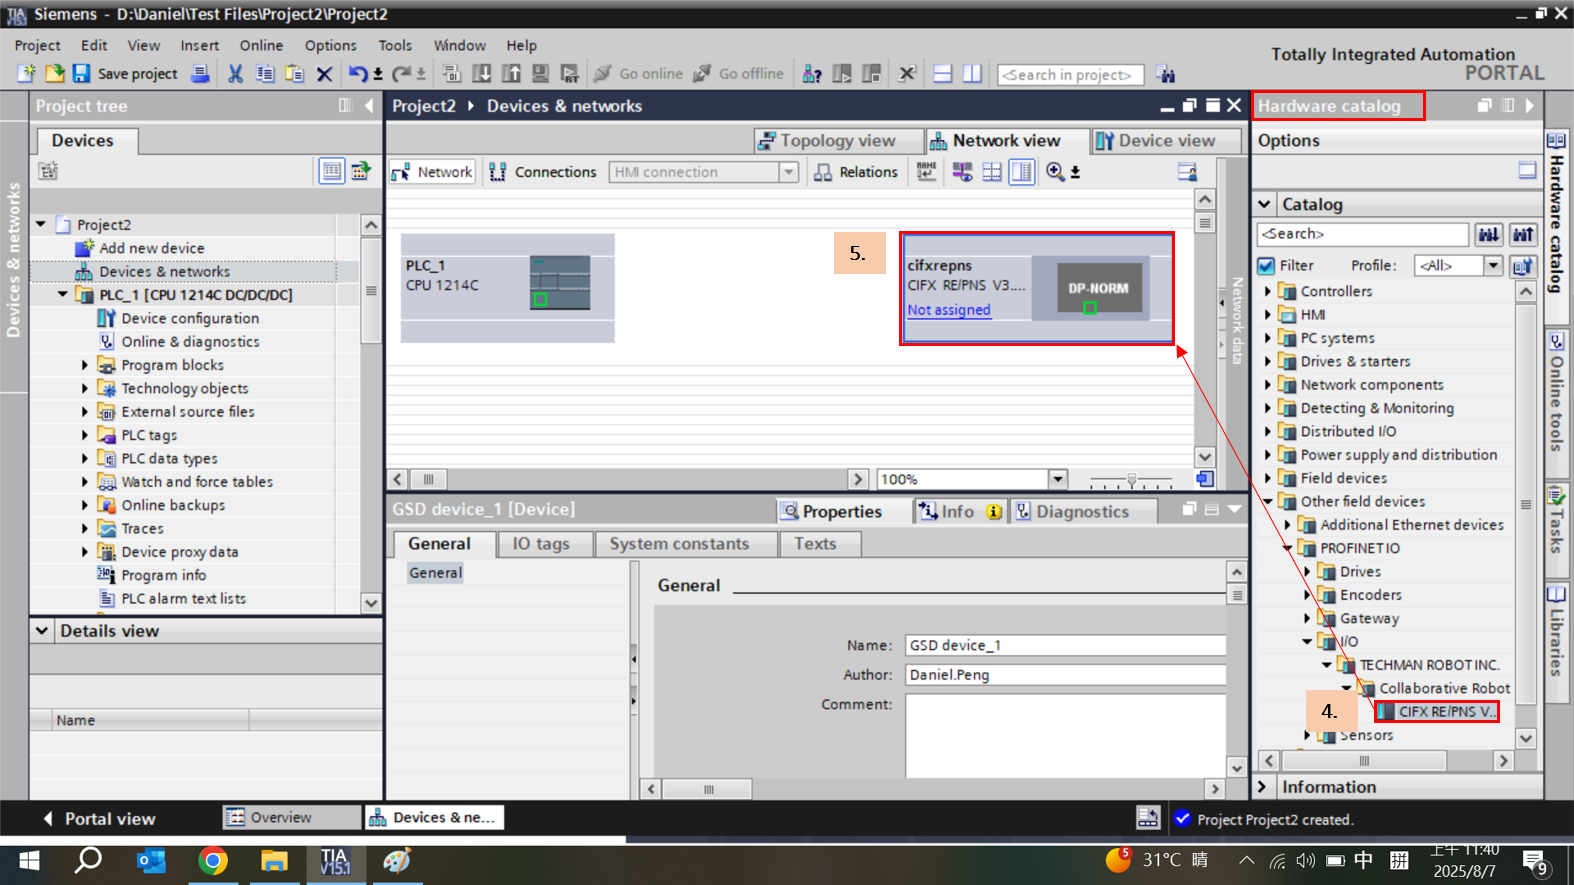
Locate the cifX module in the hardware catalog, drag it into the Devices & Networks workspace, and then double-click the module to open its configuration
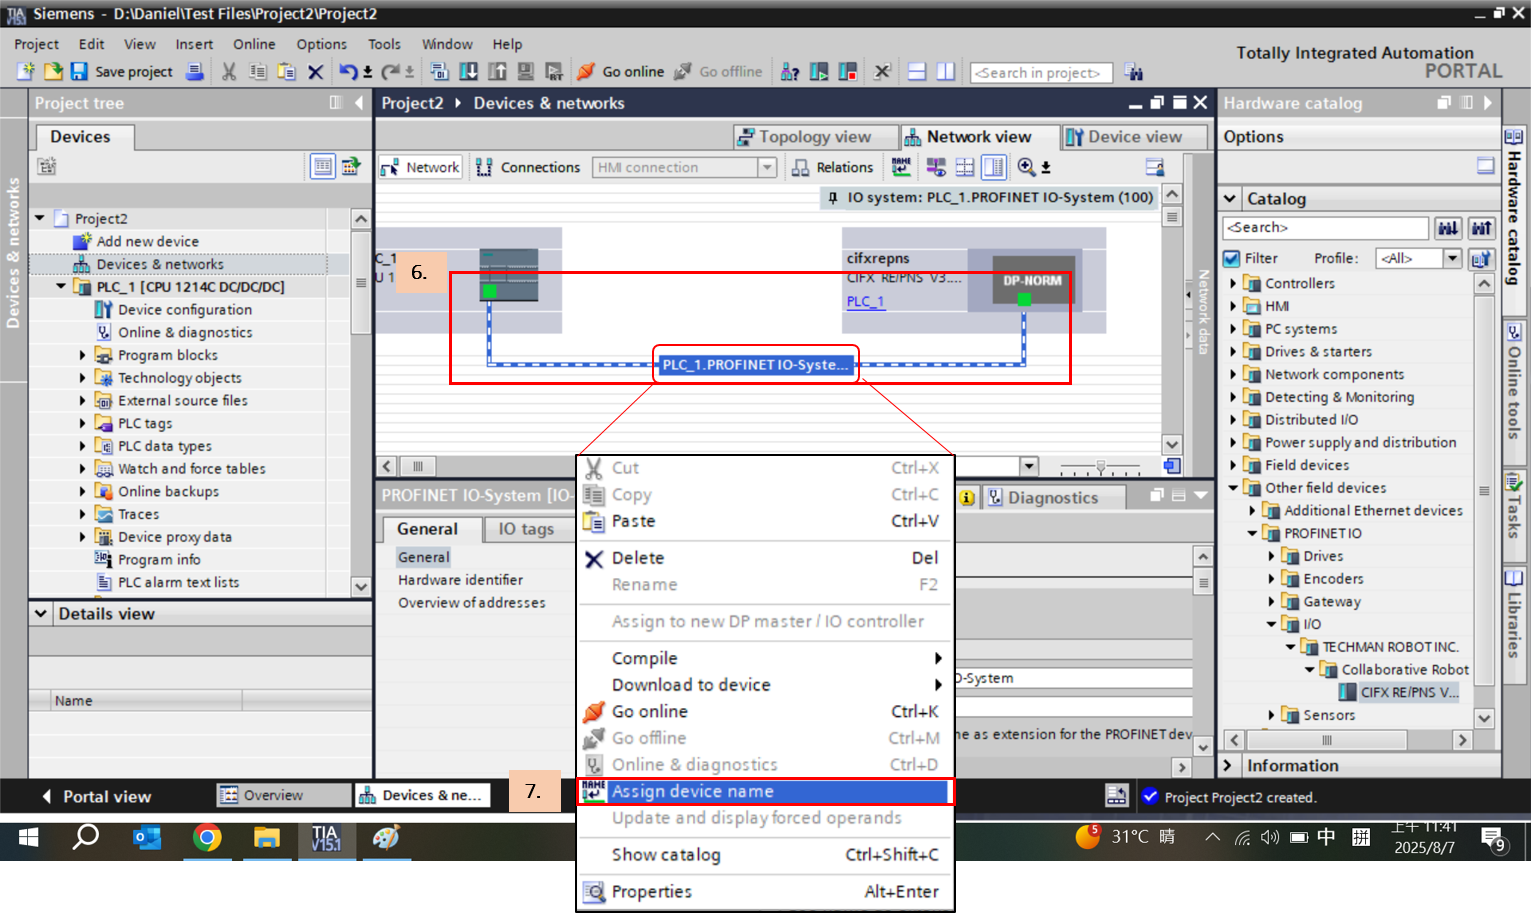
Connect PLC to the CIFX module, then assign device name
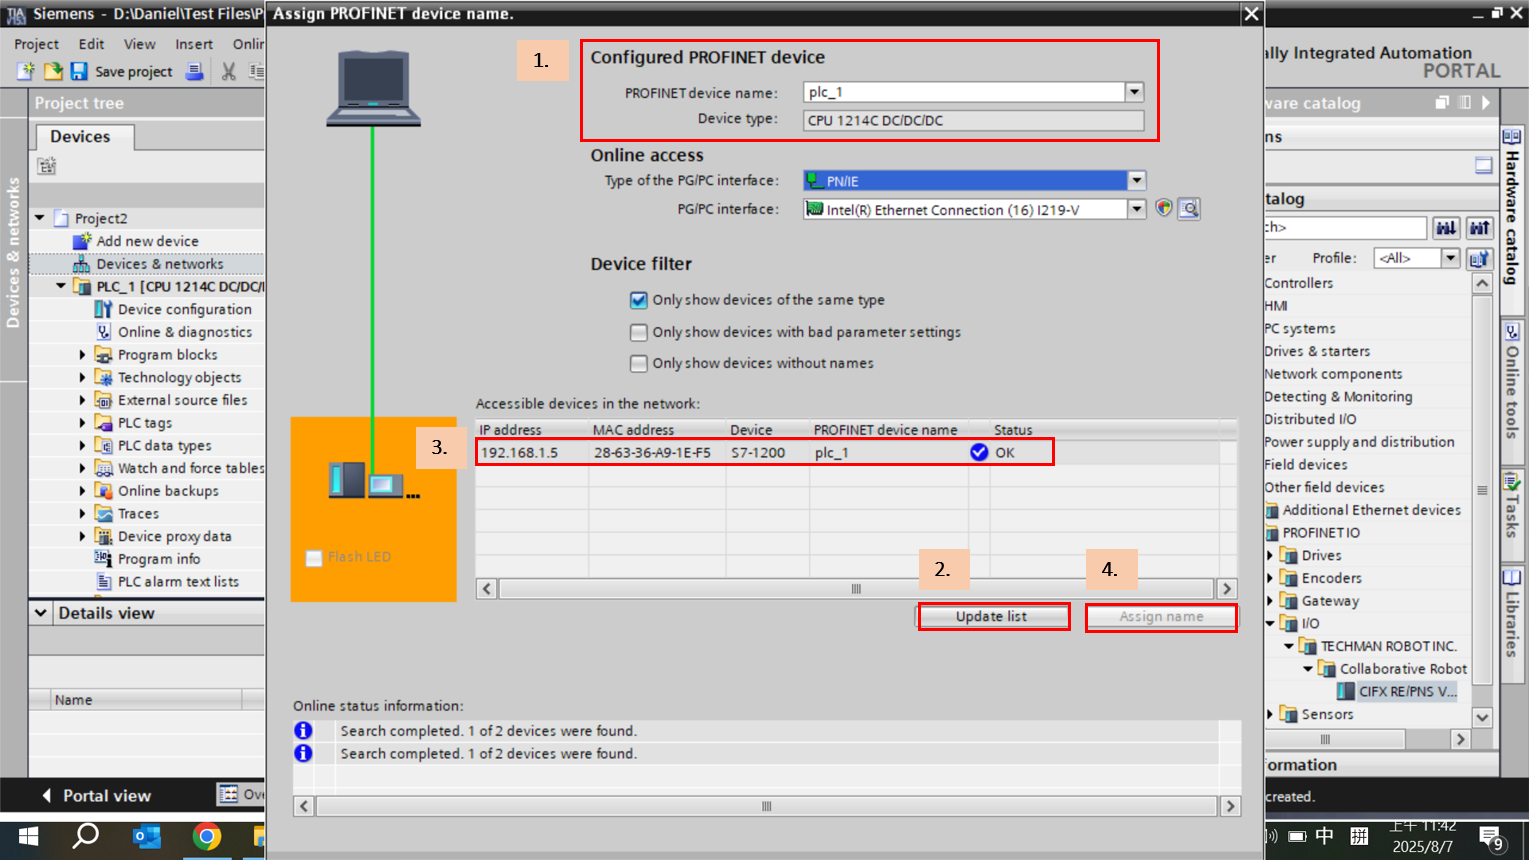
Assign Device Name for PLC
- In Configured PROFINET Device – select your PLC
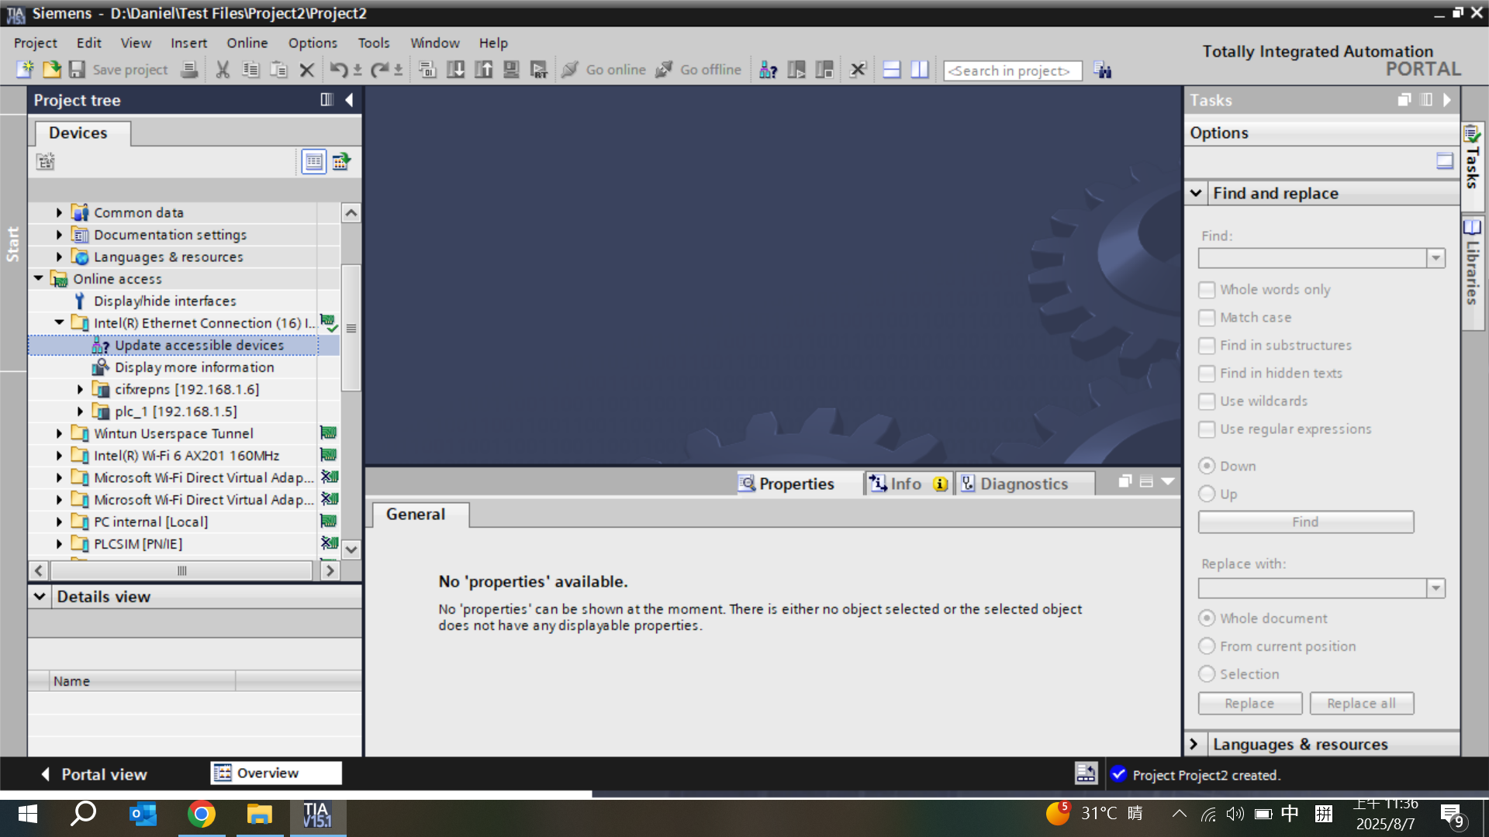
- Click update device list to scan the network and make sure the PLC is connected
- Verify communication status
- Click assign device name
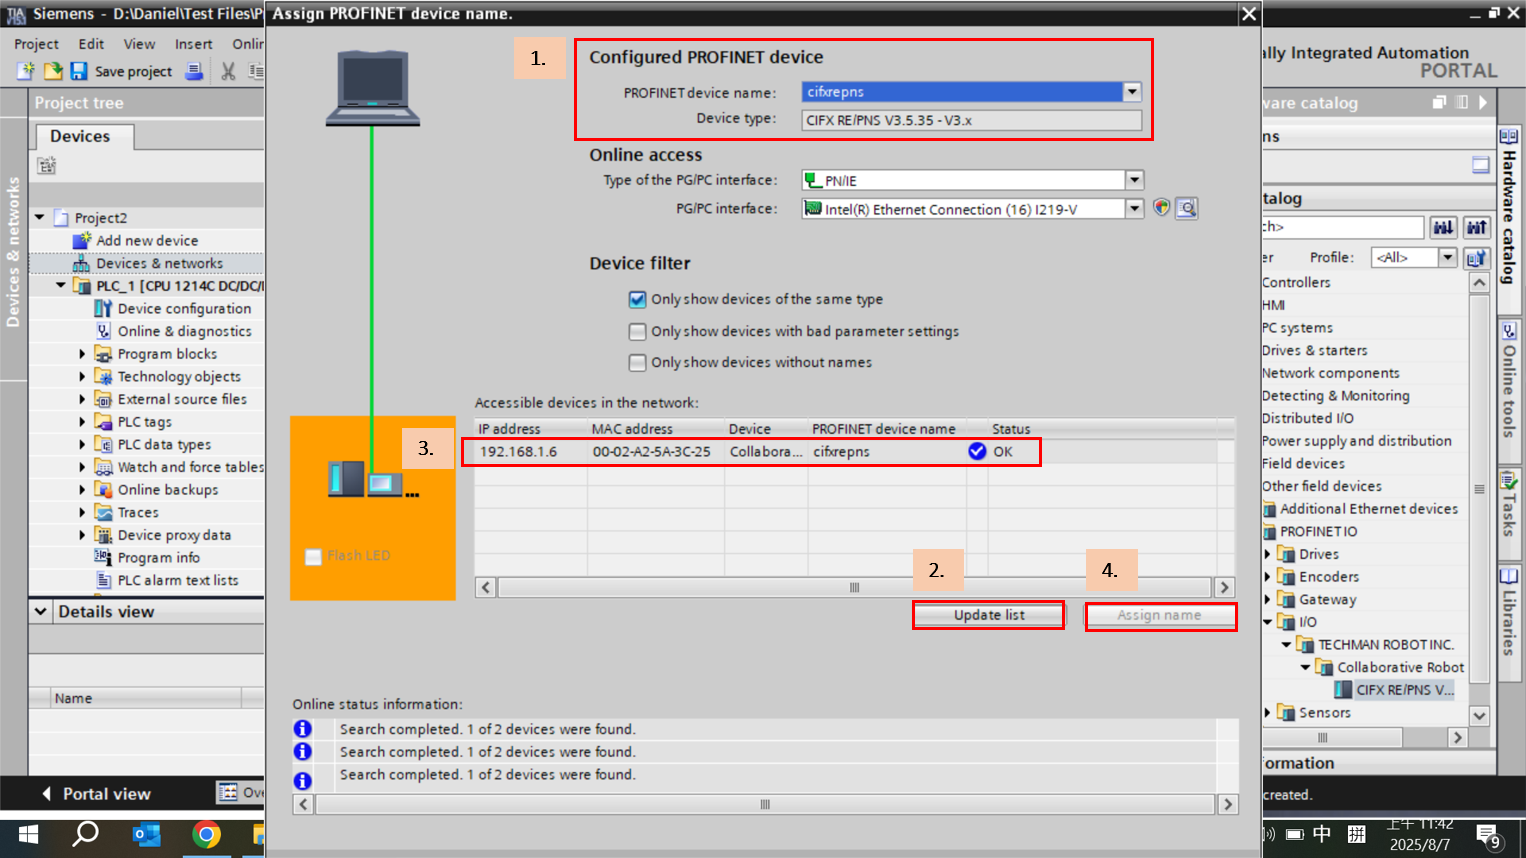
Assign Device Name for PROFINET
- In Configured PROFINET Device – select your CIFX
- Click Update List
- Check if the status shows OK
- Click Assign Name
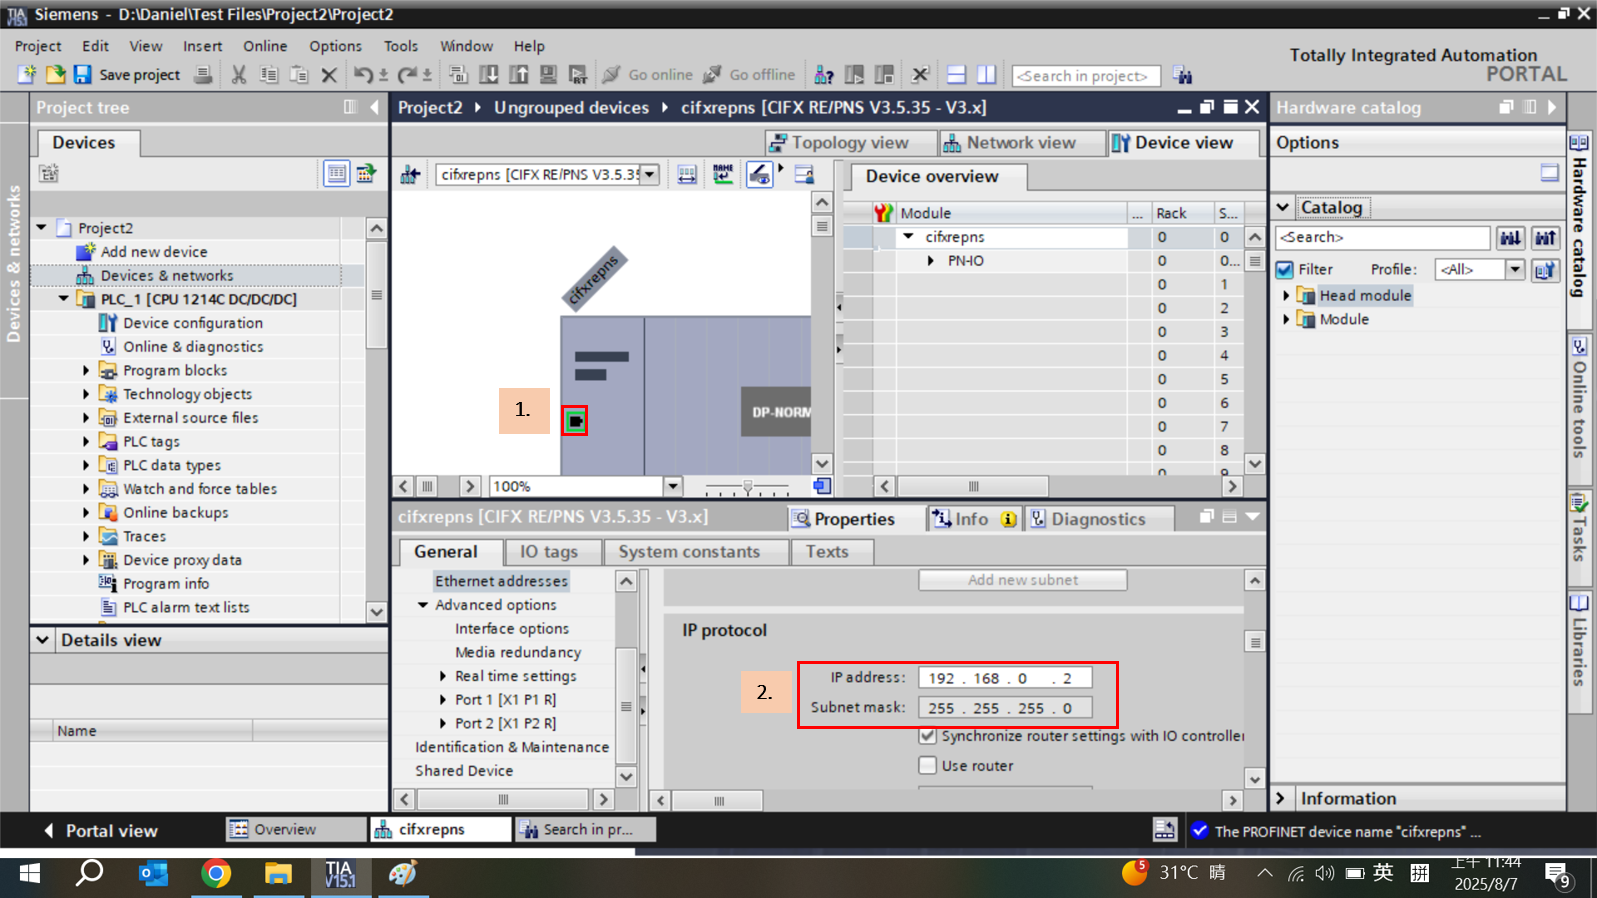
Configure CIFX IP Address
Assign Modules to the CIFX Rack
- In hardware catalog, open Module file
- Drag the modules into the CIFX rack in sequence, starting with the input modules followed by output modules. The order should follow the number after TM_X (e.g., 1, 2, 3, and so on).
Ex :
TM_1_T2O
TM_2_T2O
TM_3_T2O
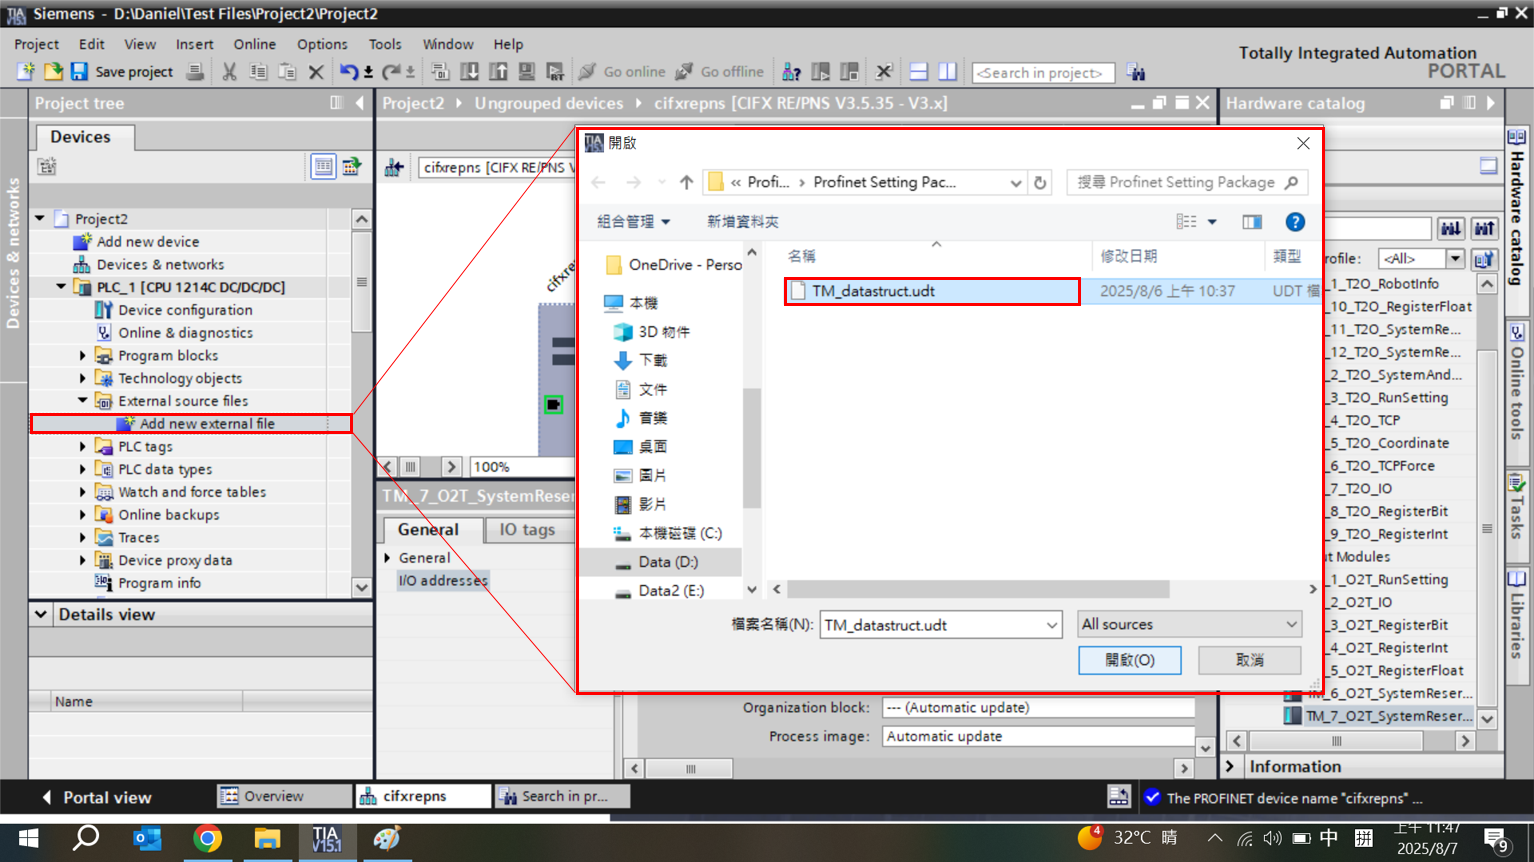
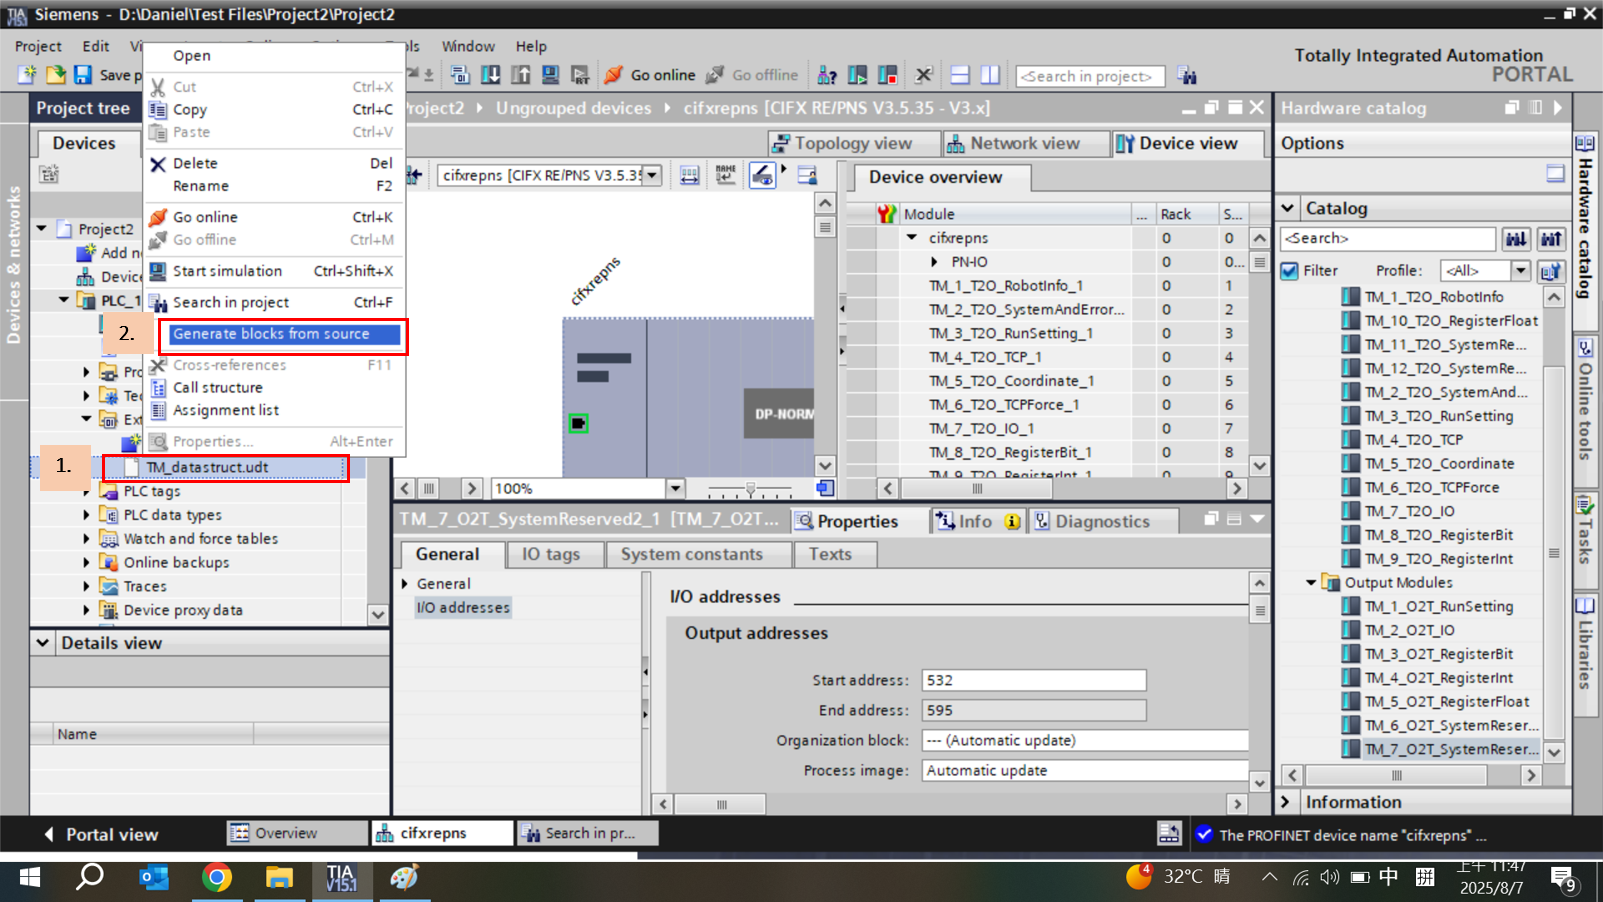
Add New External File
Generate Blocks from Source
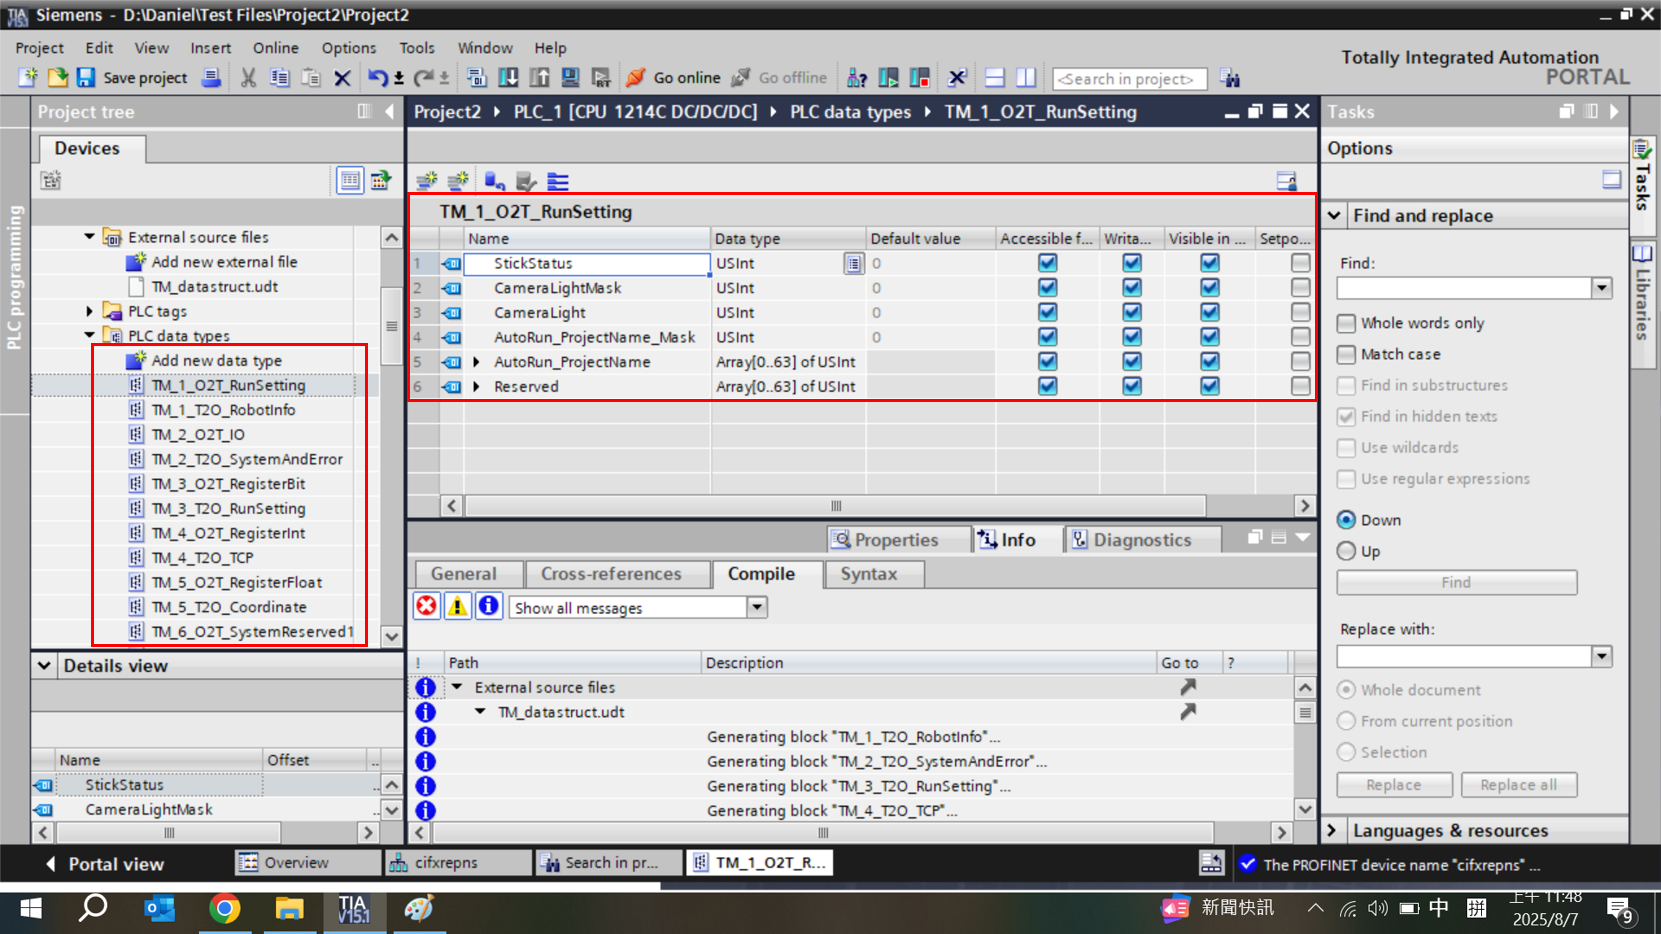
Newly Added Data Types from External Source File
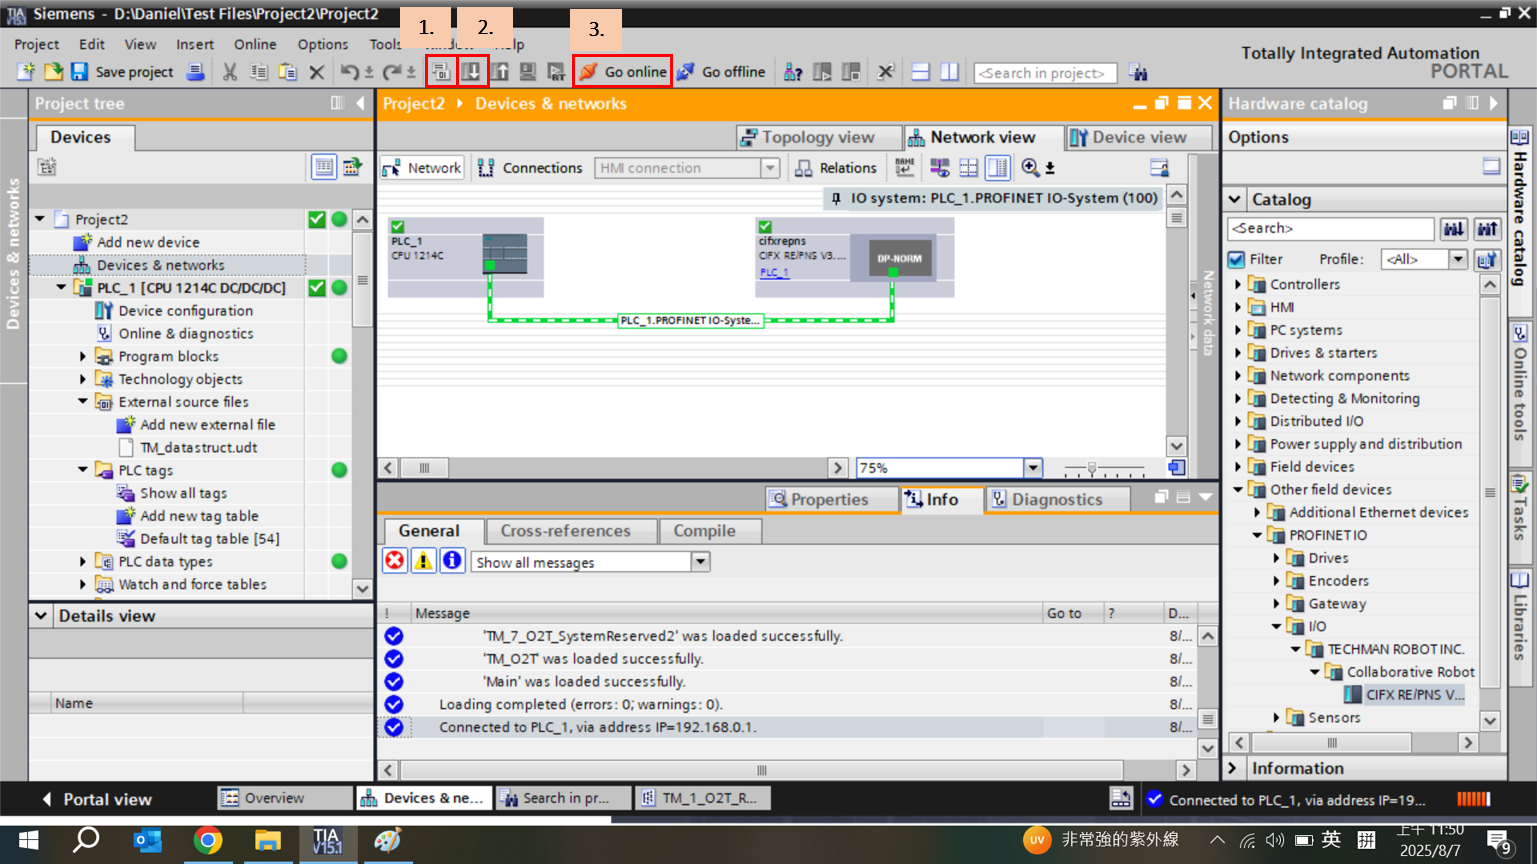
Compile, Download, and Go Online
Example : Control Camera Light from Siemens PLC #
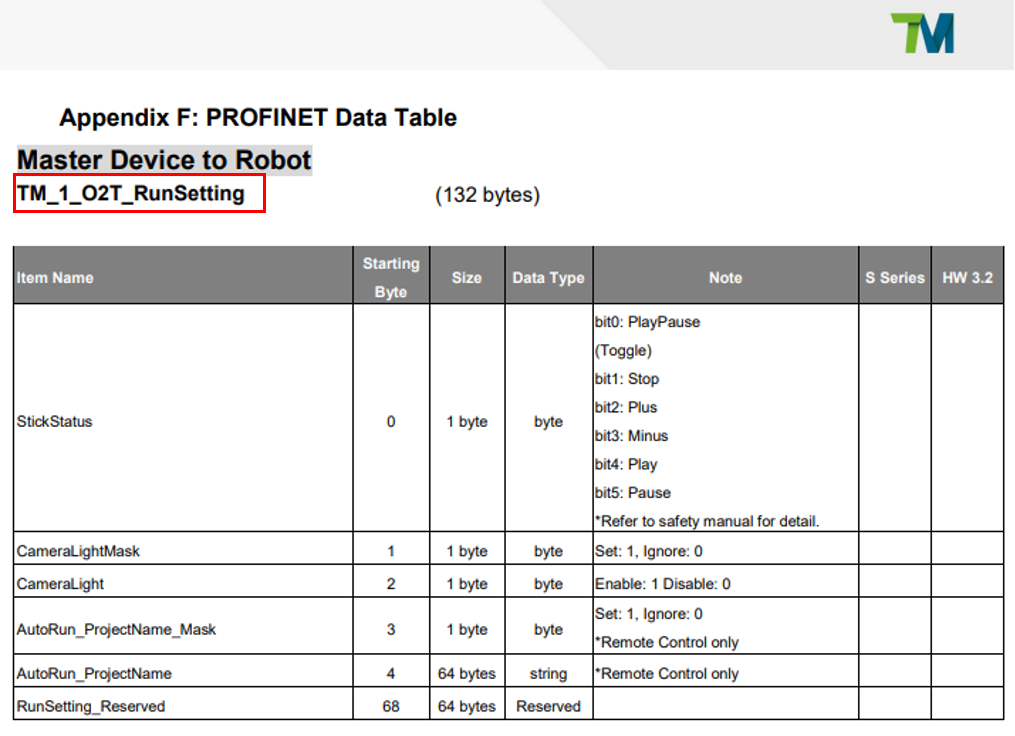
- Check the TM Robot PROFINET Data Table in the TMflow Software Manual, which can be downloaded from our website
- Check address table for the camera light
from the table, we can see that the code for the camera light is TM_1_O2T_RunSetting
Check the CIFX Address Table and verify the Q address
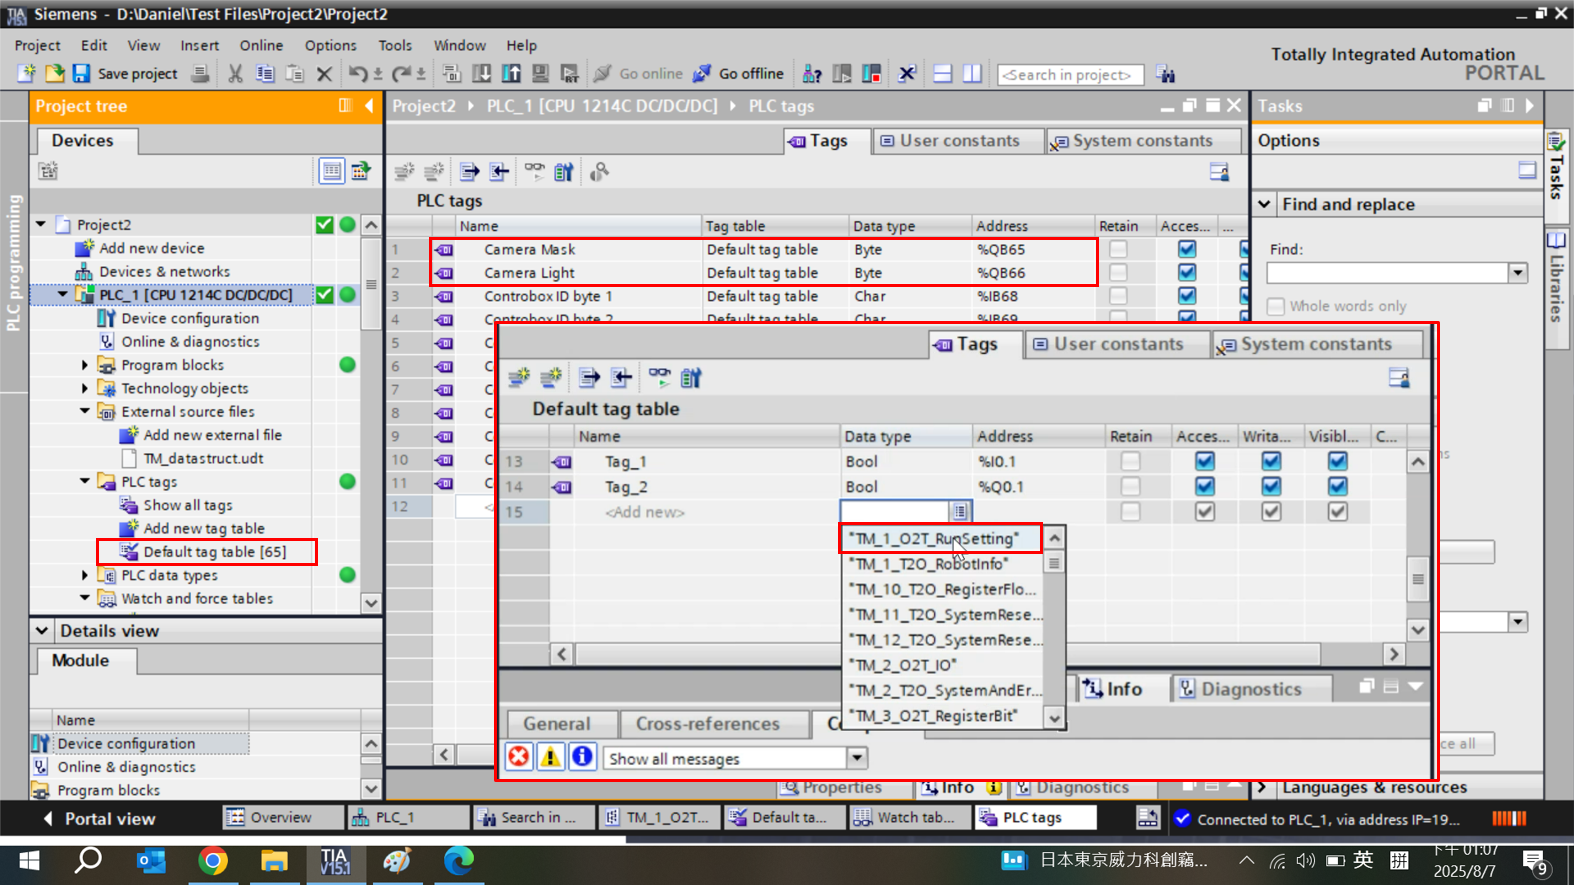
- Type your tag name (camera mask and camera light)
- Set your data type based on the profinet table
- For camera mask and camera light = TM_1_O2T_RunSetting
Address :
Camera mask : %QB65 (starting byte = 1) –> means output byte 65. Since the Q Address for TM_1_O2T_RunSetting starts at 64 and the camera light mask in the Profinet data table occupies 1 byte, therefore you have to write %QB65
Camera Light : %QB66 (starting byte = 2)
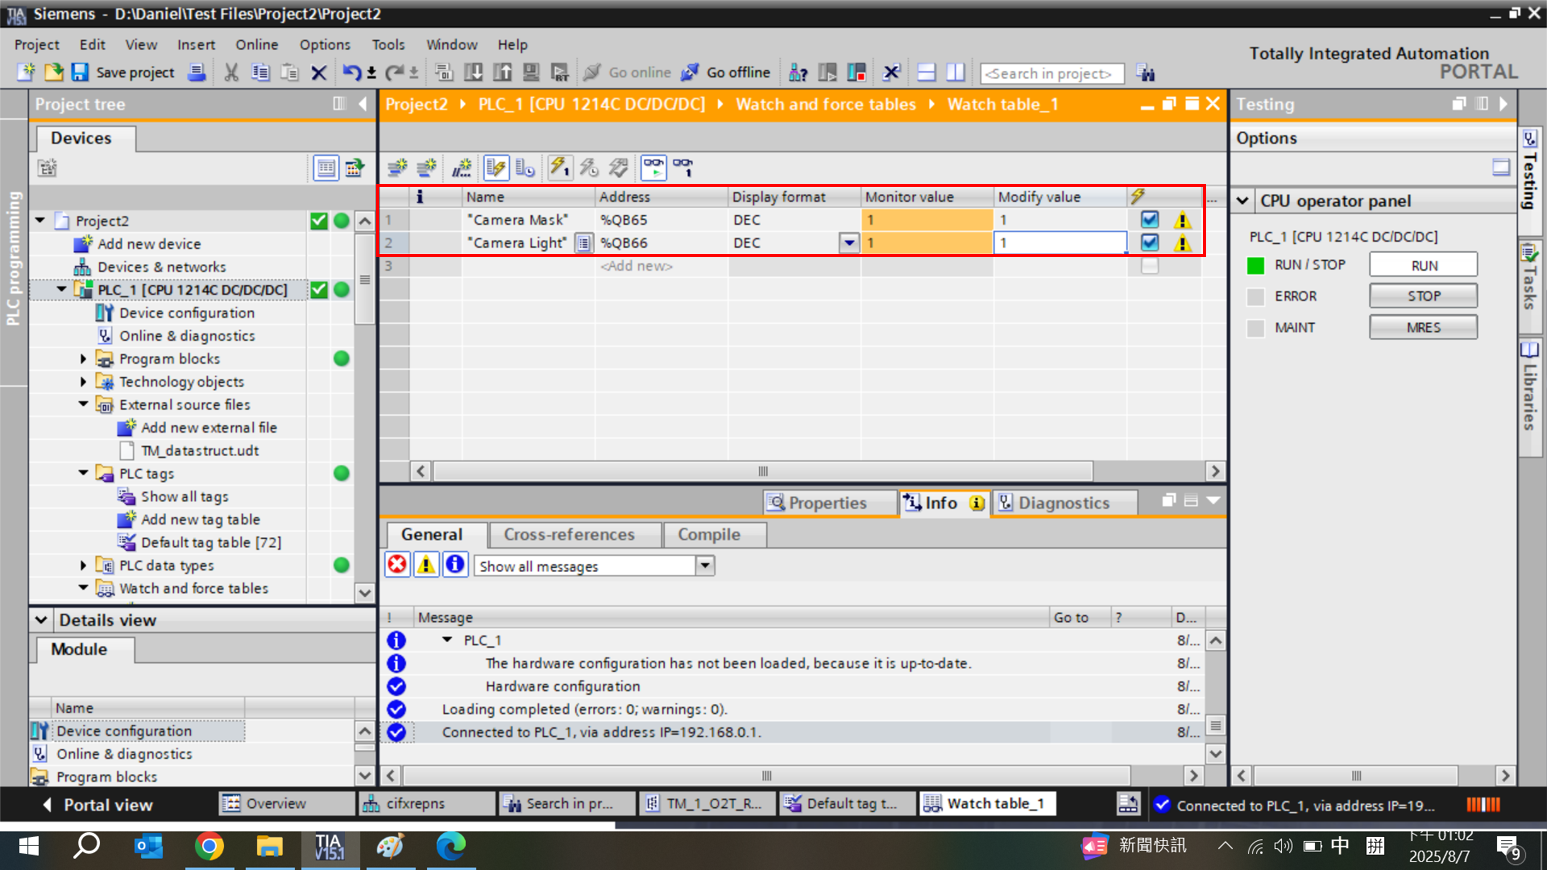
In the watch table page, enter the tag you want to monitor by typing either its tag name or its address.
Then, you can control the robot light by entering a value in the Modify value column
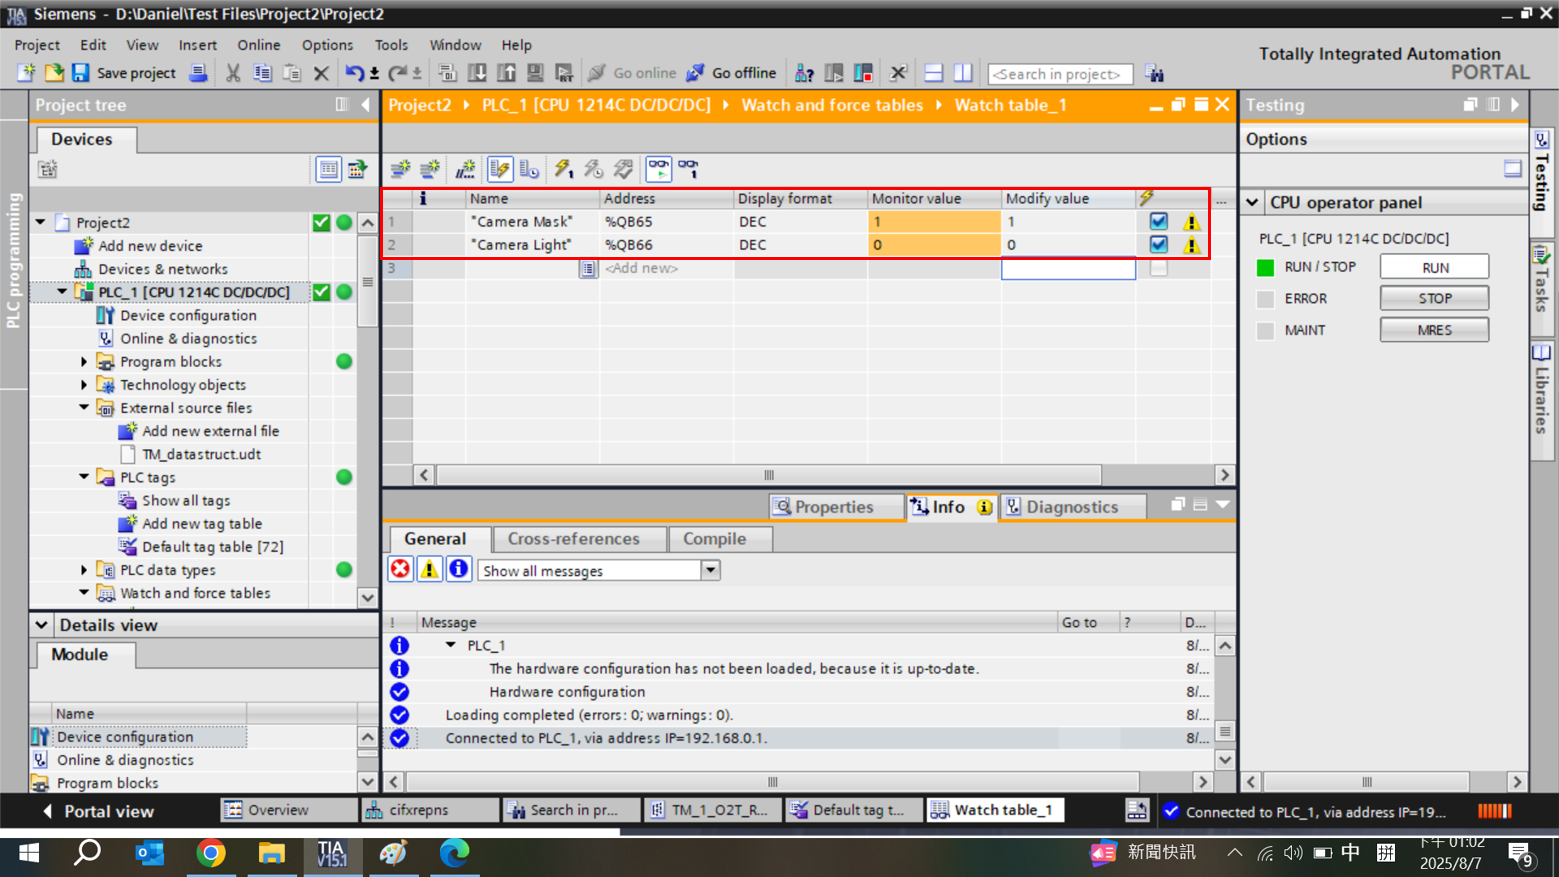
You might also repeat the same procedure to check the ControlBox ID value :

