Brief Description #
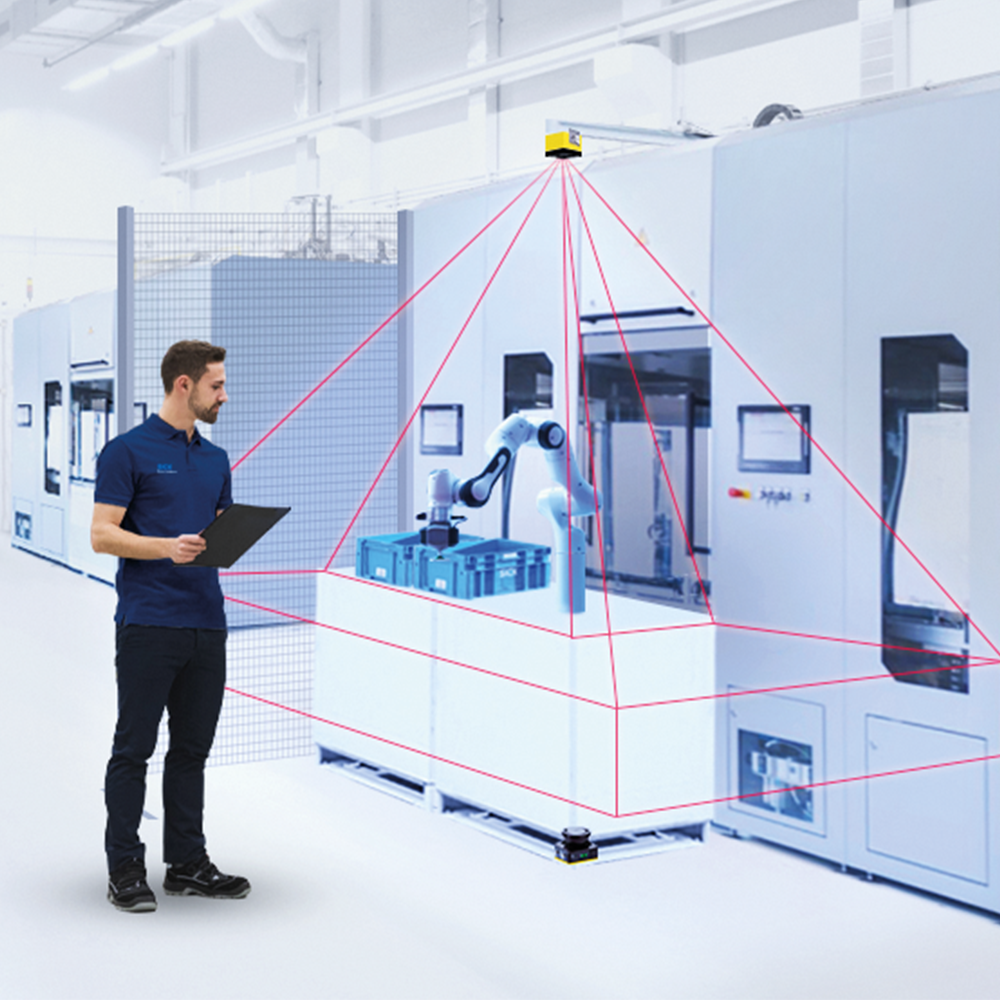
SICK safeVisionary2 is a 3D time-of-flight camera with performance level C that safely detects infringement around robotic applications and helps effectively reduce residual risks, such as persons leaning or reaching out. This means the camera enables effective human-robot collaboration with fewer stops and reduces safe distances.
By using safeVisionary2 with the Techman robot, the robot can turn into Human–Machine mode or STOP once safeVisionary2 detects the object in the required protection area.
Please click here for introduction video about safeVisionary2, and click here to browse safeVisionary2 TM Plug&Play page.
Prepare all necessary elements #
- SICK safeVisionary2: please contact SICK local partner or SICK Subsidiaries near your location to order it.
- external 24V power with >3.5A output: since safeVisionary2’s peak current consumption is 3.5A, which exceed the maximum current Techman robot controller can provide, an external 24V power is needed to power-on safeVisionary2.
Installation Step-by-Step #
-
- Config safeVisionary2
- Download SICK Safety Designer here and install it on your PC.
- Mount safeVisionary2 according to the safety concept for the robot application.
- Power on safeVisionary2 with external 24V power supply. (pin1 +24V, pin3 0V)
- Connect safeVisionary2 with PC on RJ45 cable.
- Open Safety Designer on PC, and configure the protective fields according to your safety design. Remember to set IP on both safeVisionary2 and PC in the same domain (192.168.1.X)
Please refer to tutorial videos below:
Tutorial safeVisionary2 (Pt. 1): Align the safe 3D camera virtually in the Safety Designer
Tutorial safeVisionary2 (Pt. 2): Create and edit 3D protective fields in the Safety Designer
- Connect safeVisionary2 to robot
- Connect external power to robot controller before power on (Please refer to Techman robot hardware manual):
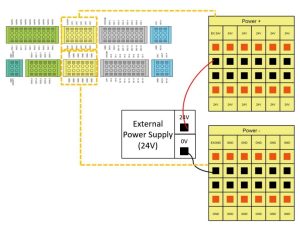 \
\ - Connect safeVisionary2’s +24V and 0V to robot controller’s connector as above.
- Check if the status light on safeVisionary2 is performed as it should be, Please refer to SICK safeVisionary2 instruction manual chapter 9.1.
- Connect safeVisionary2’s OSSD to robot safety input according to need.
For HW3.2 Techman robot, there are 2 safety inputs on robot controller to connect:Safety Connector Definition SF Input SI1-1
SI1-2User Connected External Safeguard Input SF3 SI2-1
SI2-2User Connected External Safeguard Input for Human–Machine Safety Settings SF9 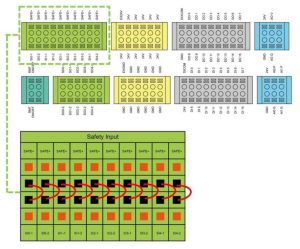
User Connected External Safeguard Input Port is a N.C. contact (Normally closed). When User Connected External Safeguard Input Port is OPEN, the robot enters the Protective Stop state.
User can set Safeguard Input Port as auto or manual reset in TMflow=>Safety setting=>Safety IO Settings, as below picture.
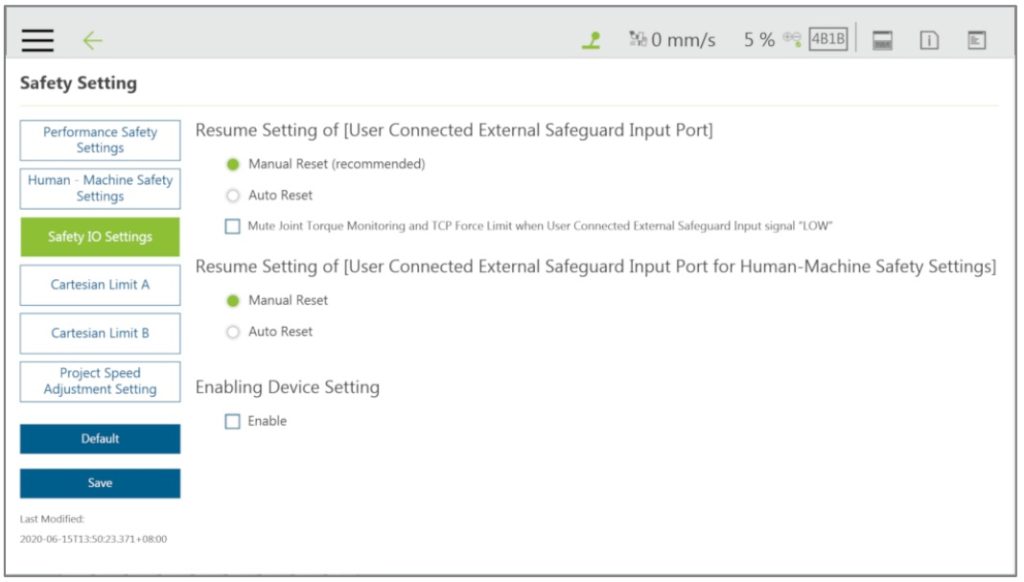
User Connected External Safeguard Input Port for Human–Machine Safety Settings is a N.C. contact (Normally closed). When User Connected External Safeguard Input Port for Human–Machine Safety Settings is OPEN, the robot decrease the limits to which is set in Human-Machine Safety Settings.
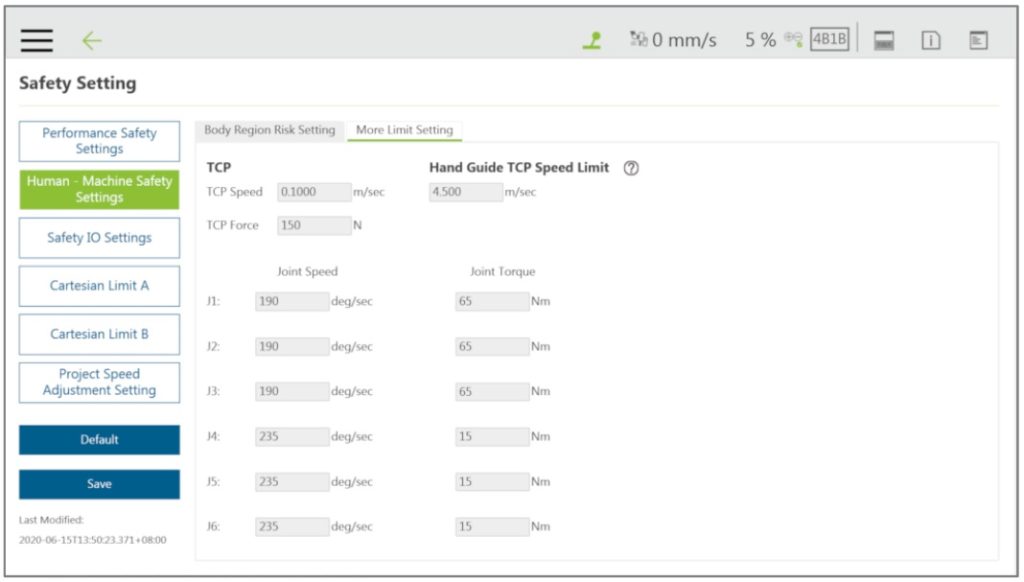
The speed and torque limits of Human–Machine Safety Settings could be set in TMflow=>Safety setting=>Human–Machine Safety Settings, as below picture.
Please refer to TMflow manual for more detailed information.In this article, OSSD1 is set with pin 2 and 4, and I want robot to turn into Human–Machine mode while object is detected in OSSD1 protective area, so connect those two wires to SI2-1 and SI2-2 of the safety input.
- Power on robot to test
- Connect external power to robot controller before power on (Please refer to Techman robot hardware manual):
- Config safeVisionary2
Disclaimer #
Since a robotic system is always integrated into a specific application, the integrator must carry out a risk assessment to determine the risk mitigation measures so that the risk associated with the application is adequately reduced. Please note that every safety solution needs to be verified and validated


