Configuration #
For users of the Ensenso N35 series, please make sure the graphics card and the memory module is installed in the control box and connected to the 3D camera. The 3DVision authorized lock (TM Dongle) in the product package is inserted into the control box. Details can be found here.
Calibration and Modeling #
- In TMflow, navigate to
 , click ‘Project’, and click the ‘create new project’ icon.
 - Add a vision node and click the pencil icon of the vision node. Click the blue box next to Vision Job to proceed with related settings.
- In the Vision Job tab, click the ‘add’ icon, input the name of the vision job, and click ‘OK’ to create a new vision job.
Calibration #
3D Camera Eye to Hand #
The purpose of 3D camera eye-to-hand calibration is to obtain the relationship between the robot and itself so that the 3D camera’s calculated position can be converted into the position of the robot. The following steps explain the calibration method.
NOTE:
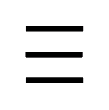
Before the 3D camera eye-to-hand calibration or modeling, the 3D camera must be fixed in ETH mode, and the calibration board or modeling workpiece of the 3D camera must be fixed to the robot flange. 
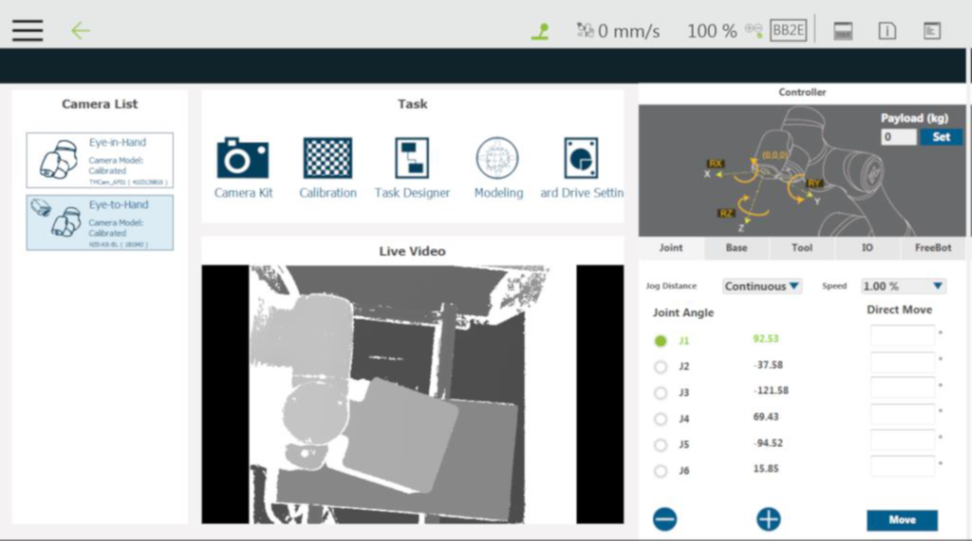
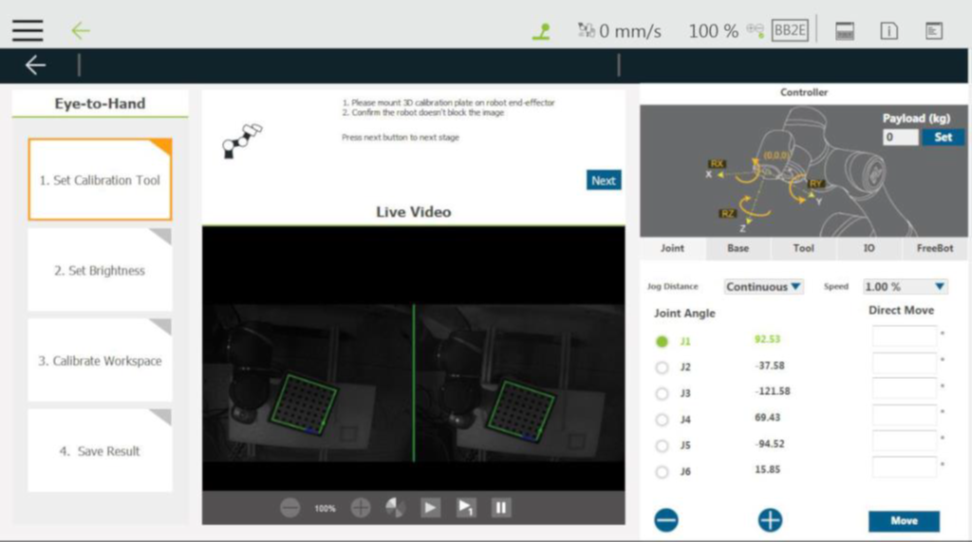
Step #1: After adding the vision job, in the vision screen, select the Ensenso 3D camera in the camera list at the left. Go to the task list and click Calibration.
Step #2: When the screen prompts for calibration selection, click Eye to Hand.
Step #3: After confirming that the calibration board is in the visions of both lenses, click ‘Next’.
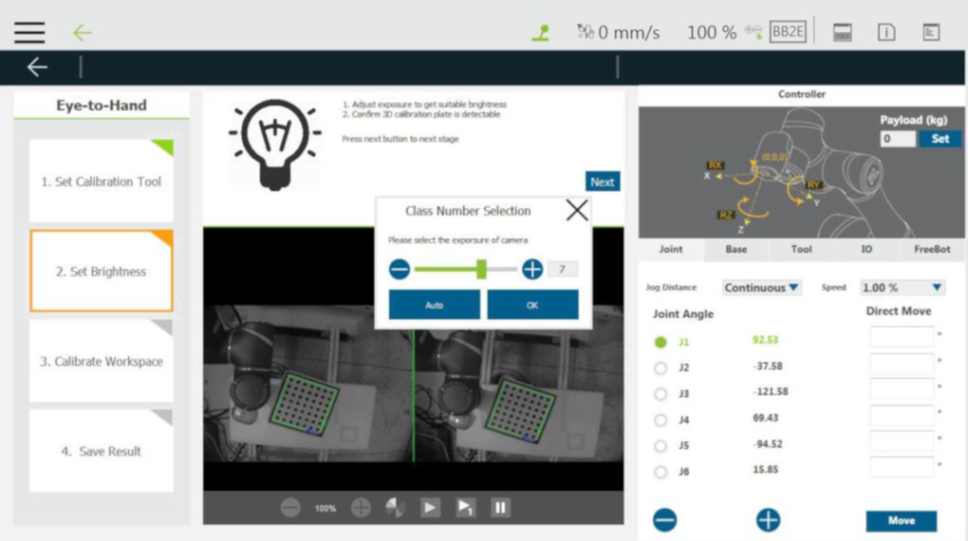
Step #4: Adjust the brightness automatically or manually to make the screen look moderate. Click ‘OK’, and then click ‘Next’.
Step #5: Once confirming that both lenses recognize the calibration board, click collect.

Step #6:Once clicked collect, the collect button will be grayed out before moving the robot. After properly moving the robot, users can collect the next one.

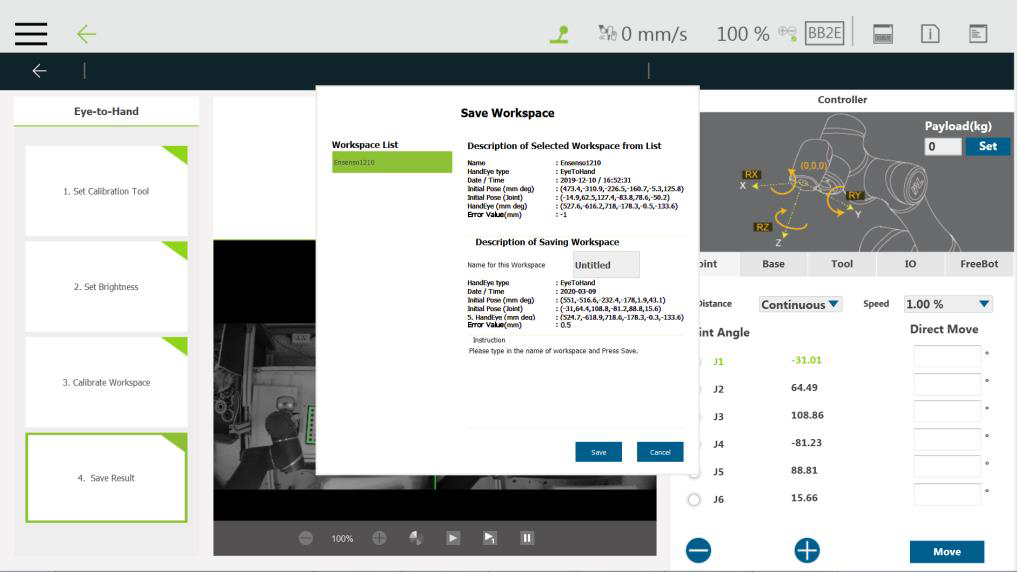
Step #7: Repeat moving the robot and click collect as much as possible to make the robot have a variety of posture changes in the collection of the 15 takes for the calibration reference with a variety of point information. Afterward, the system automatically calculates the hand-eye parameters and returns a calculation result in a pop-up window.
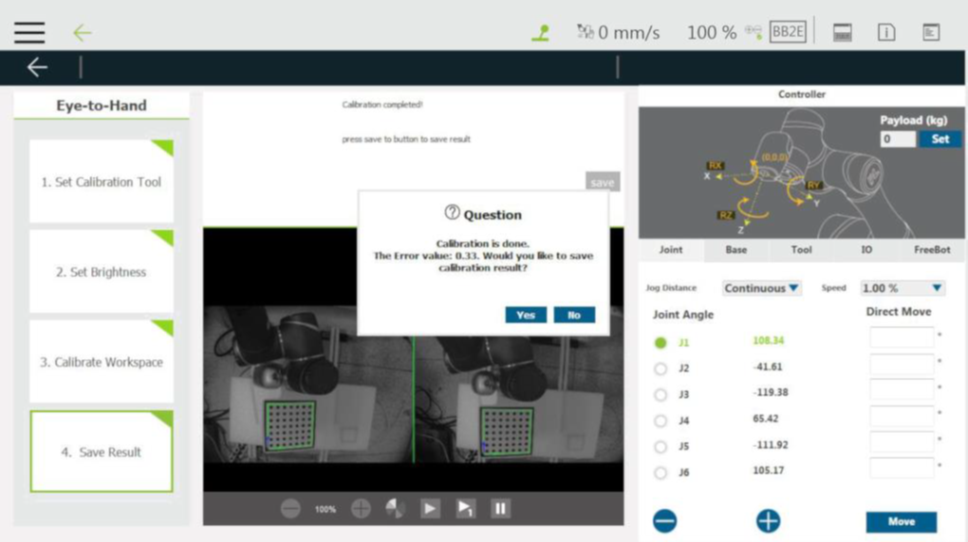
Step #8: Now, users can click Yes to save the calibration result or modify the name to save and previously saved parameters during saving.