Start Using Path Planning Function in TMflow
Updated on 2026 / 07 / 30
Examples are valid for:
TMflow Software version: 2.24 or above, TMflow Simulator only.
TM Robot Hardware version: HW5.0 or above
Note that older or newer software versions may have different results.
TMcraft file download here :
1. Introduction
The TM path planning function will automatically generate path between two points. Even if there is an obstacle between the points, the path planning function will generate a path with no collision and is able to be executed.
2. Required Components
| # | Name | TMcraft Type | Description |
| 1 | run_tmrp_global_planning_serviceV1200 | Service | The main service for calculating a possible path for Collision Free Path Node(#4). |
| 2 | TMsceneSocketServerV1100 | Service | The service to translate scenes for Planning service(#1) use. |
| 3 | PathPlanningSetupV1500 | Setup | The project function for assigning certain scene for path planning use. |
| 4 | CollisionFreePathNodeV1300 | Node | The node for assigning start/goal point position. |
| 5 | SceneChangeNodeV1500 | Node | The node to create, move or attach object with robot. |
3. Import & Enable TMcrafts in TMflow
To import the TMcraft listed above,
- click ≡ in the upper left corner of TMflow, and go to System > Import/Export > Import.
- click TMcraft > Service to import a TMcraft service.
- click TMcraft > Setup to import a TMcraft setup.
- click TMcraft > Node to import a TMcraft node.
Shift the corresponding TMcraft from Select files to Selected files. After selecting all the items you are about to import, click Import in the lower right corner to import them into TMflow.
To enable the imported TMcrafts,
- click ≡ in the upper left corner of TMflow, and go to Configuration > TMcraft Management.
- click Service, check the Enable field for items.
- click Setup, check the Enable field for items.
- click Node, check the Enable field for items.
- click Save, and restart TMflow.
3.1 Path Planning Service
| # | Name | TMcraft Type |
| 1 | run_tmrp_global_planning_serviceV1200 | Service |
| 2 | TMsceneSocketServerV1100 | Service |
Once you restart the TMflow from the previous steps, the service is now executing in the background of TMflow.
To check if the service executing properly, go to Configuration > TMcraft Management > Service. The green lights indicate the service is executing currently.

3.2 Path Planning Setup
| # | Name | TMcraft Type |
| 3 | PathPlanningSetupV1500 | Setup |
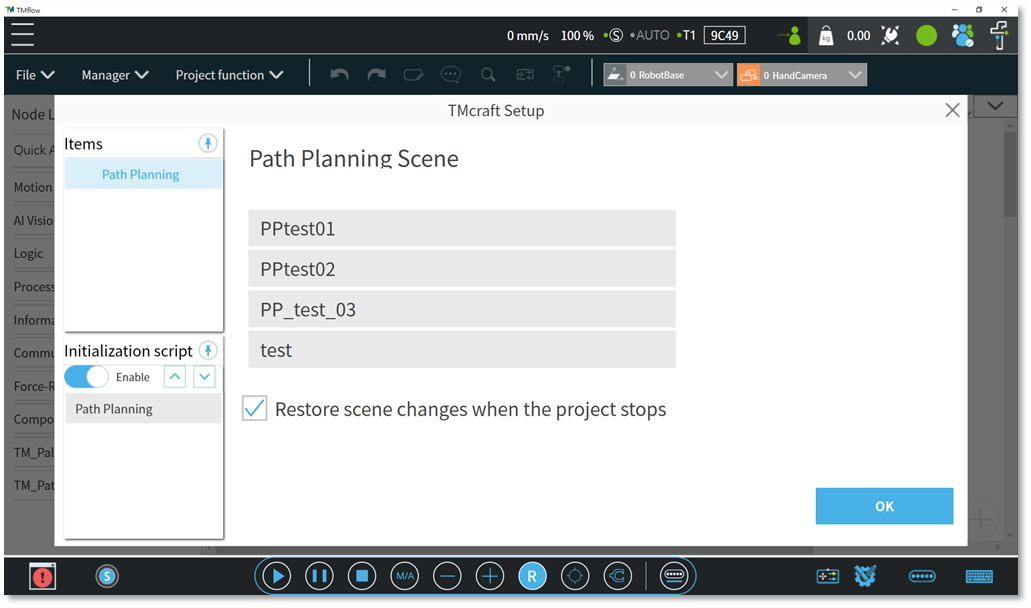
To setup the scene for your project, go to Project > Project function > TMcraft Setup and click “Path Planning”. The path planning scene will list all the scene you created in TMscene window. You can select the scene for path planning function and click OK to save.
3.3 Path Planning Nodes
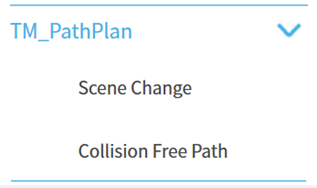
You can navigate to the TM_PathPlan section in Node list to find the nodes for path planning used.
| # | Name | TMcraft Type |
| 4 | CollisionFreePathNodeV1300 | Node |
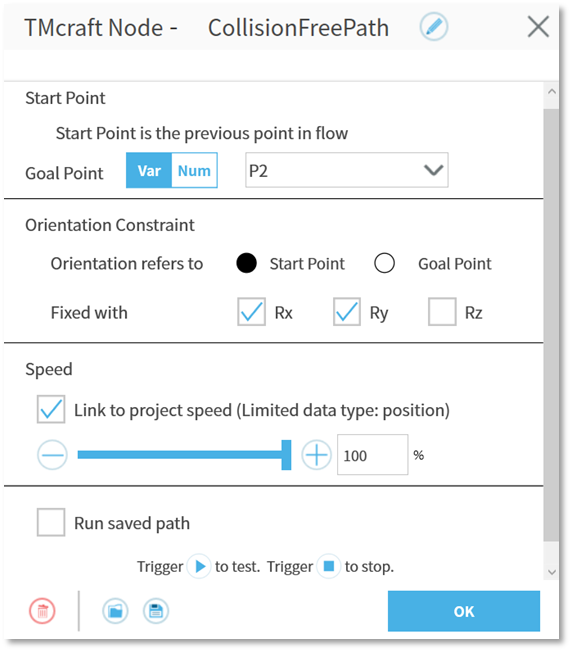
The Collision Free Path Node is used to create the path between start point(current position) and goal point(assigned end position) in accordance with the obstacles in the scene.
There are some settings in the Collision Free Path Node:
1. Start Point: Not for assign. It is the robot’s current position.
2. Goal Point: Assignable. It can be a existed point or assigned values.
3. Orientation Constraint: Constraint the robot orientation to follow either start point or goal point.
4. Speed: Speed for motion execution.
5. Run saved path: If the planned path works for you after simulation, check the “Run saved path” and the robot will always run saved path, even deploy the project to real robot.

| # | Name | TMcraft Type |
| 5 | SceneChangeNodeV1500 | Node |
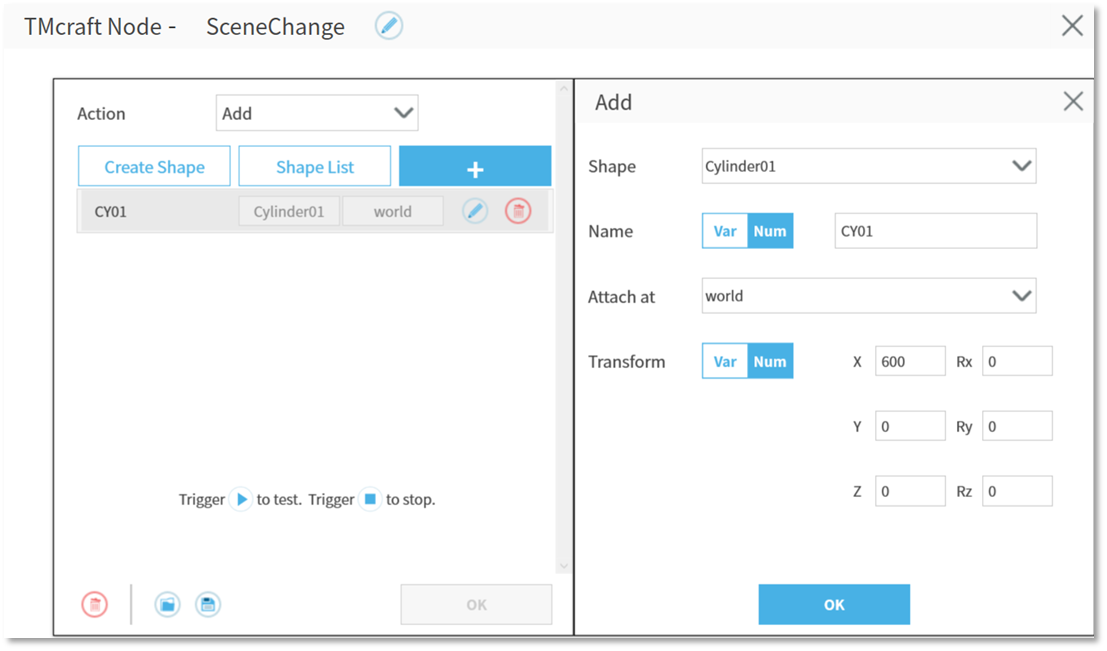
The Scene Change Node allows you to change the scene dynamically. You can add, remove objects to the scene; remove all created objects; attach or detach objects to the robot. The object can be created in different shapes of cuboid, crate, cylinder or sphere.
4. Basic Trial
Nodes | Description | Flow |
| Start | Enable the “Initialization by TMcraft setup” before execution. | 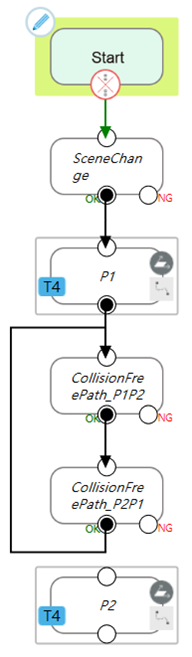 |
| SceneChange | Add a cylinder in front of the robot. | |
| P1 | The start and initial point. | |
| CollisionFreePath_P1P2 | The calculated path from P1 to P2 by path planning function, | |
| CollisionFreePath_P2P1 | The calculated path from P2 to P1 by path planning function, | |
| P2 | The goal point. No link in flow, just for assigning a point. |
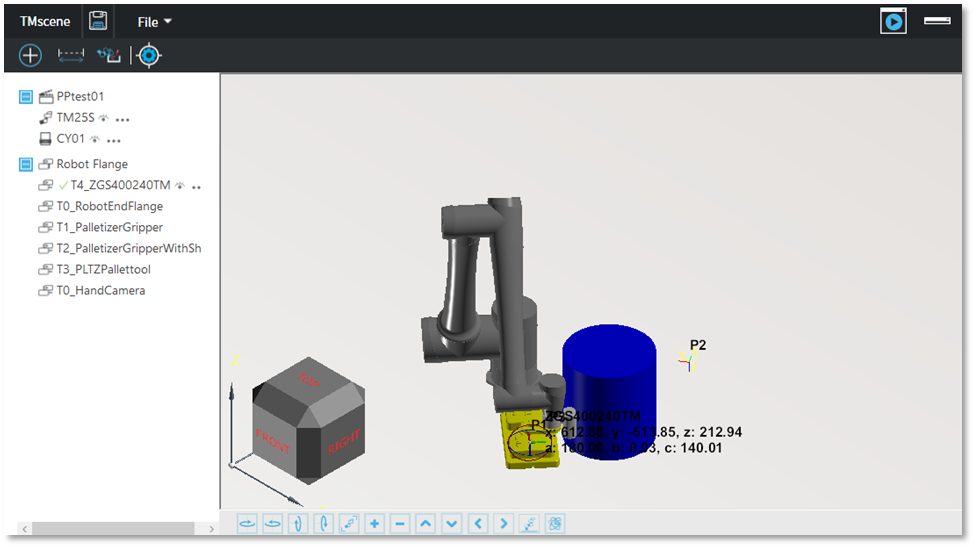
The flow nodes are linked as above. When executing the project, the flow will first add a cylinder in front of the robot, the robot then goes to P1. The path planning function will start to calculate a possible path from P1 to P2. After finding the optimal path, the robot will go to P2. Repeat the previous procedure to go back to P1, then go back to P2, then repeat.
Was this article helpful ?