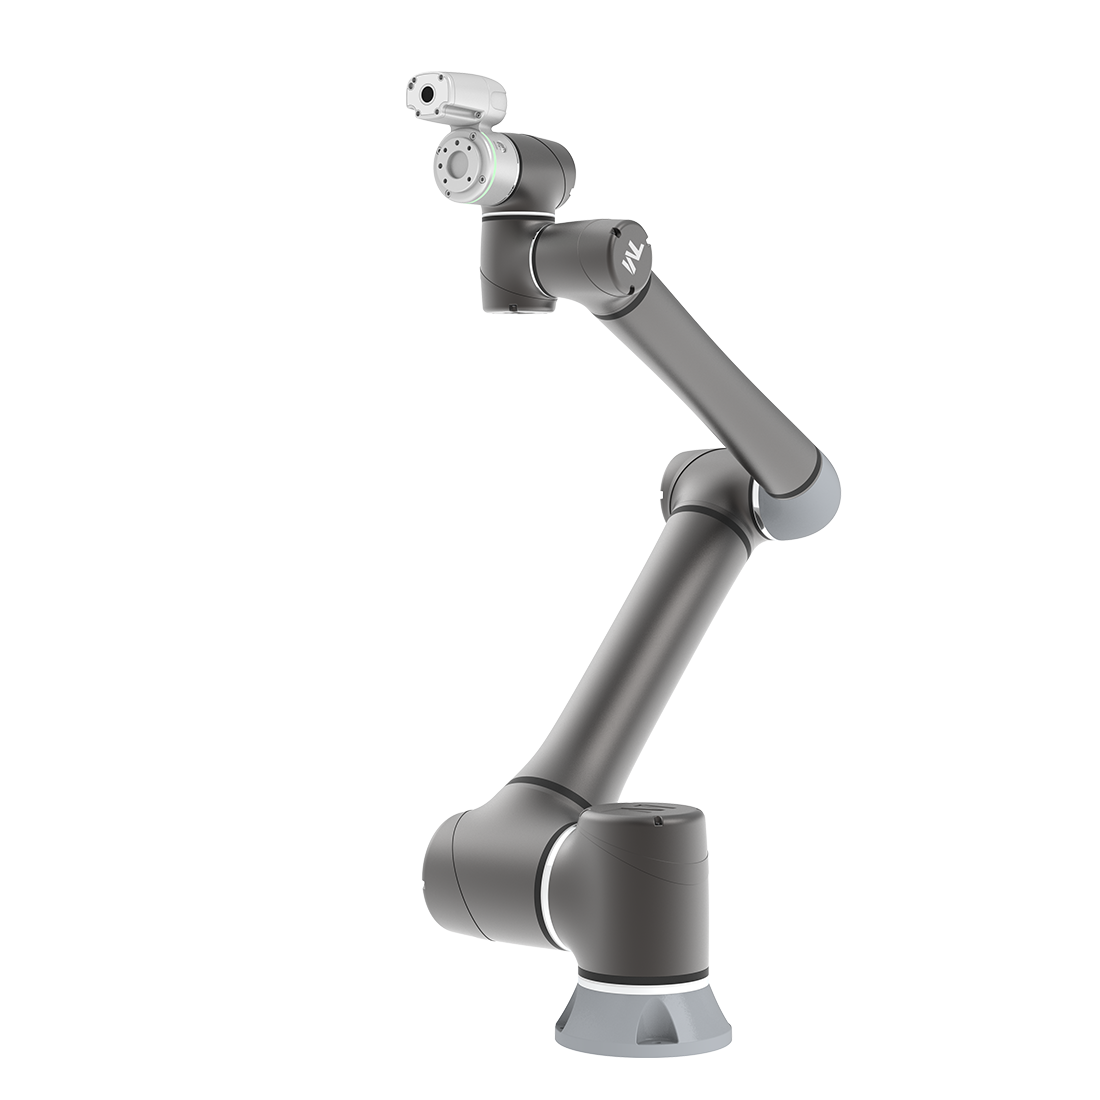
Scanning Barcode Using TM Built-in Camera Easily

Updated on 2026 / 08 / 27

Examples are valid for :
TMflow Software version : All versions
TM Robot Hardware version : All versions
Other specific requirements : None 
Note that older or newer software versions may have different results.


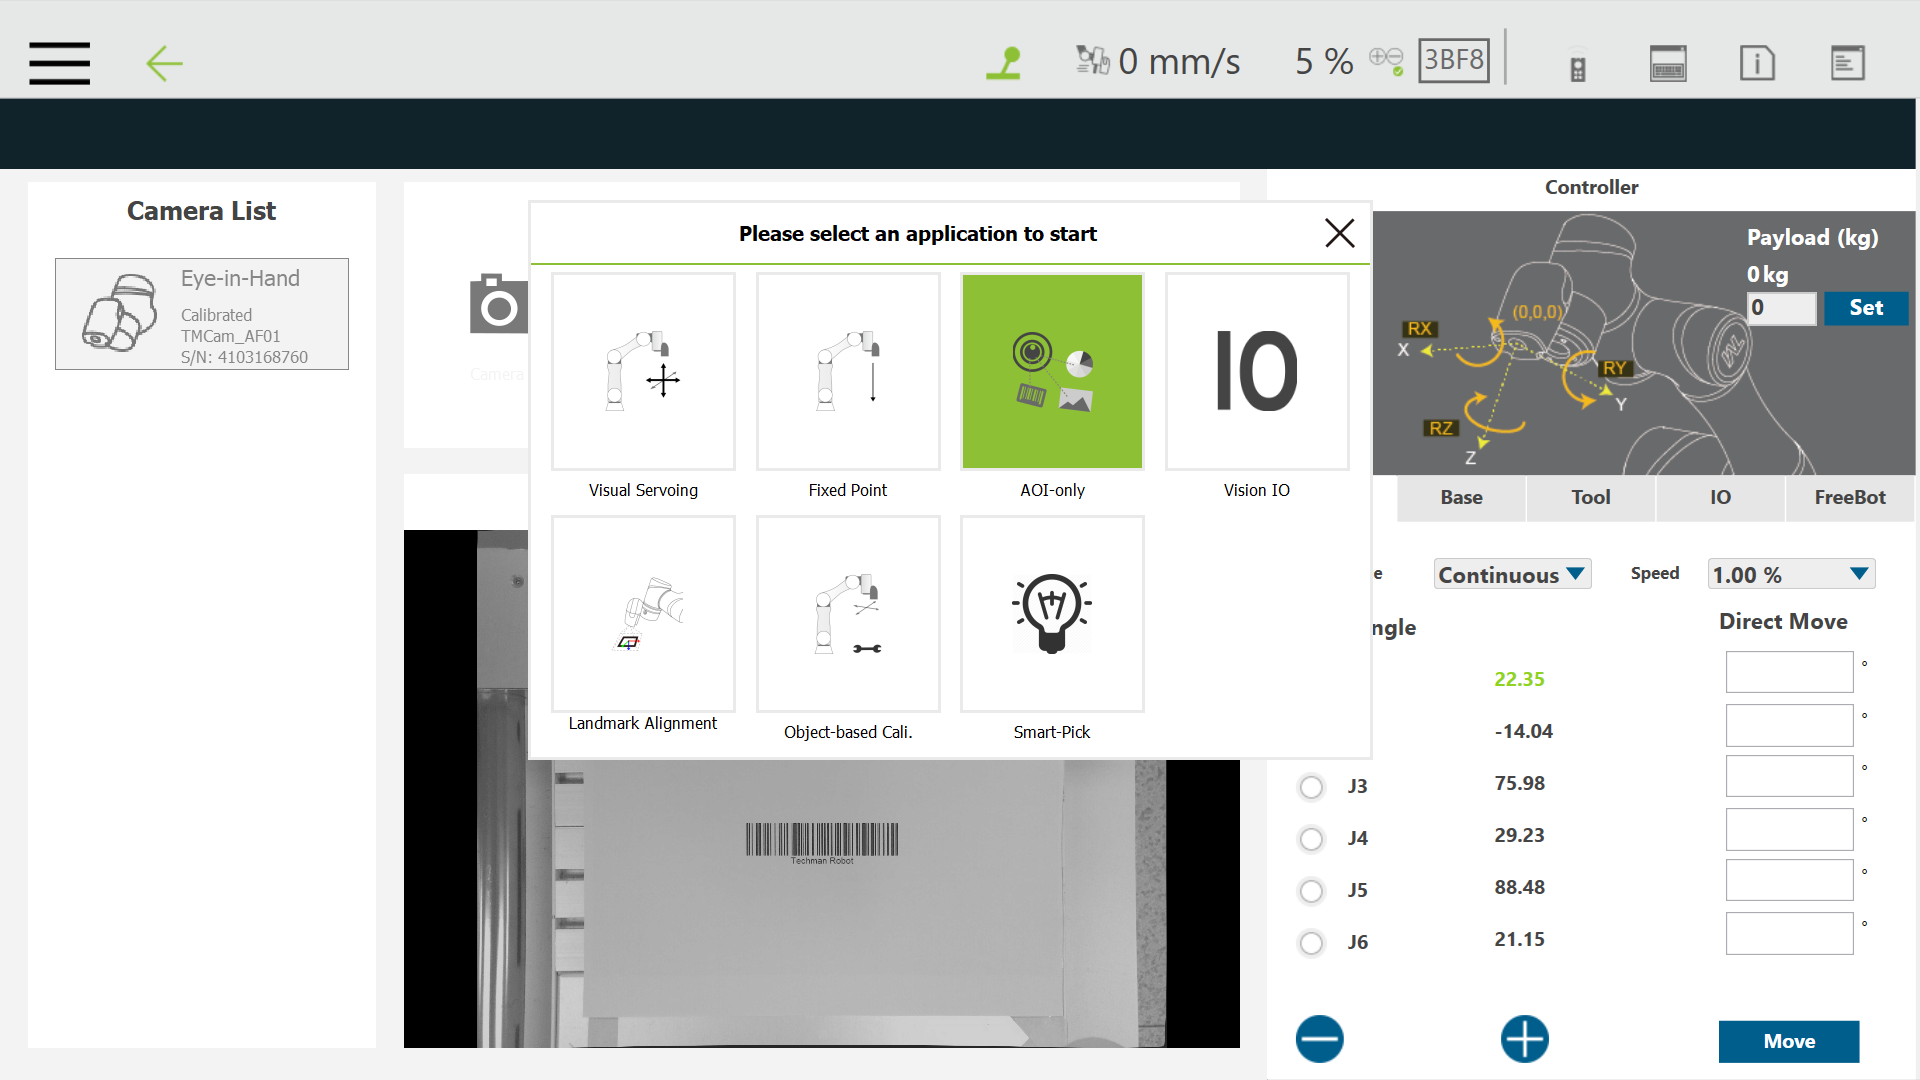
Step #1: Open a new vision job. Select Task Designer --> AOI-only      

https://tm-robot.oss-cn-hongkong.aliyuncs.com/wp-content/uploads/2021/06/icon_aoi_only.png


https://tm-robot.oss-cn-hongkong.aliyuncs.com/wp-content/uploads/2021/06/barcode-1-1024x576.png


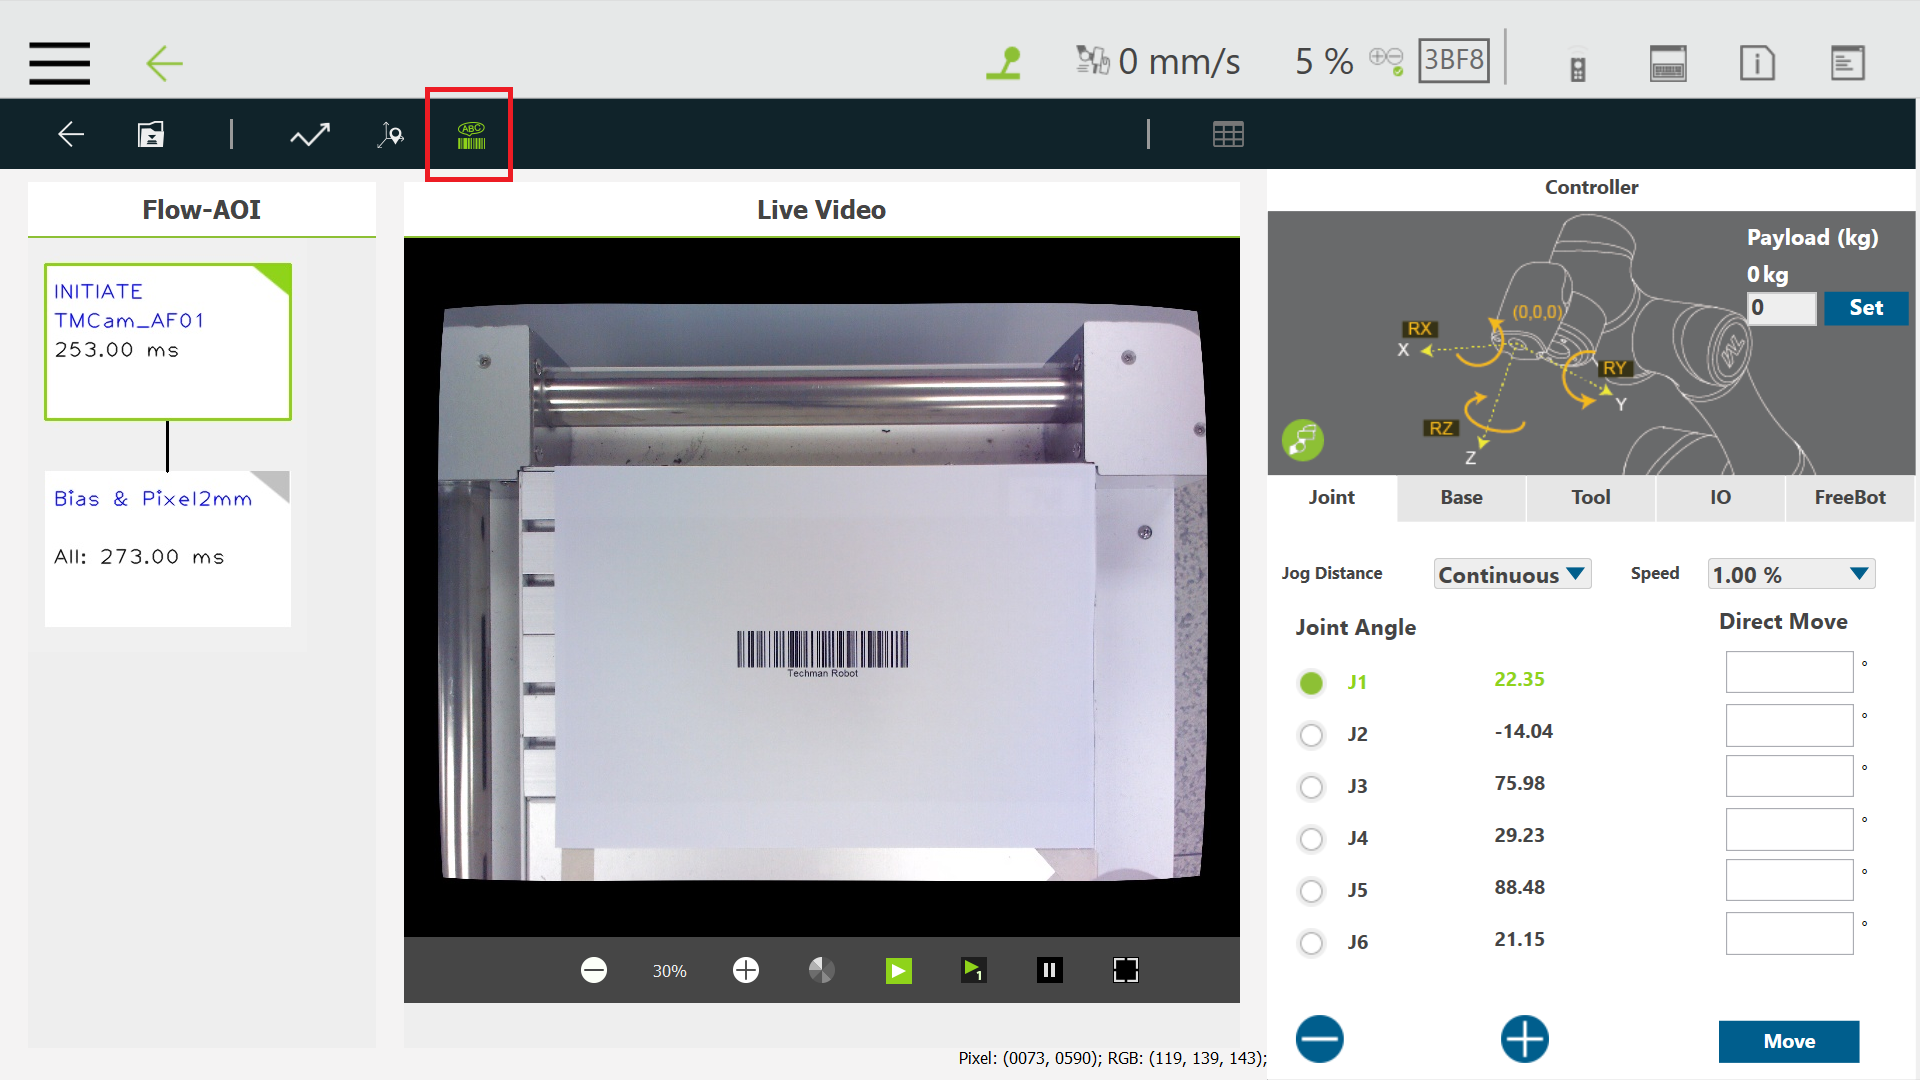
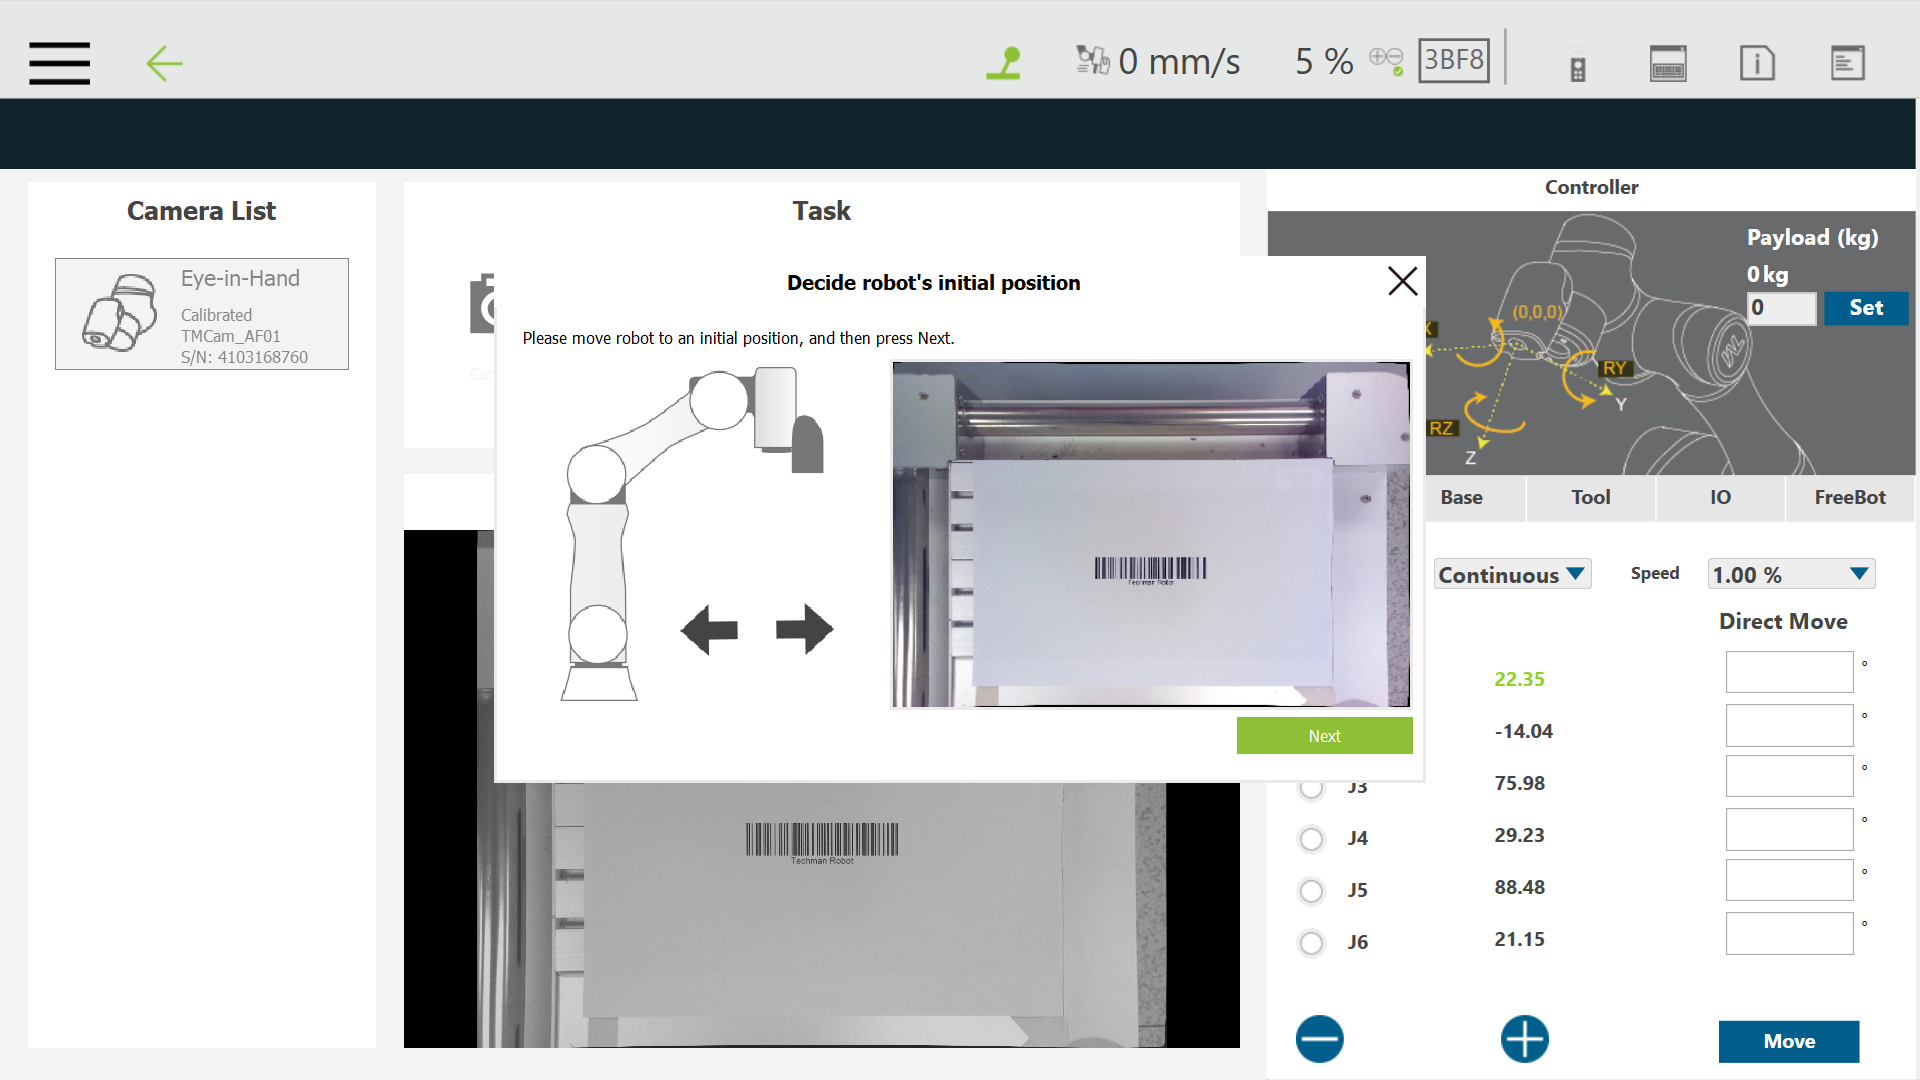
Step #2: Move the robot to the initial position.
 

https://tm-robot.oss-cn-hongkong.aliyuncs.com/wp-content/uploads/2021/06/barcode-2-1024x576.png


Step#3: Place a barcode in the FOV and click the 

https://www.tm-robot.com/wp-content/uploads/2021/06/btn_identify_disable.png

red box.


https://tm-robot.oss-cn-hongkong.aliyuncs.com/wp-content/uploads/2021/06/barcode-3-1-1024x576.png


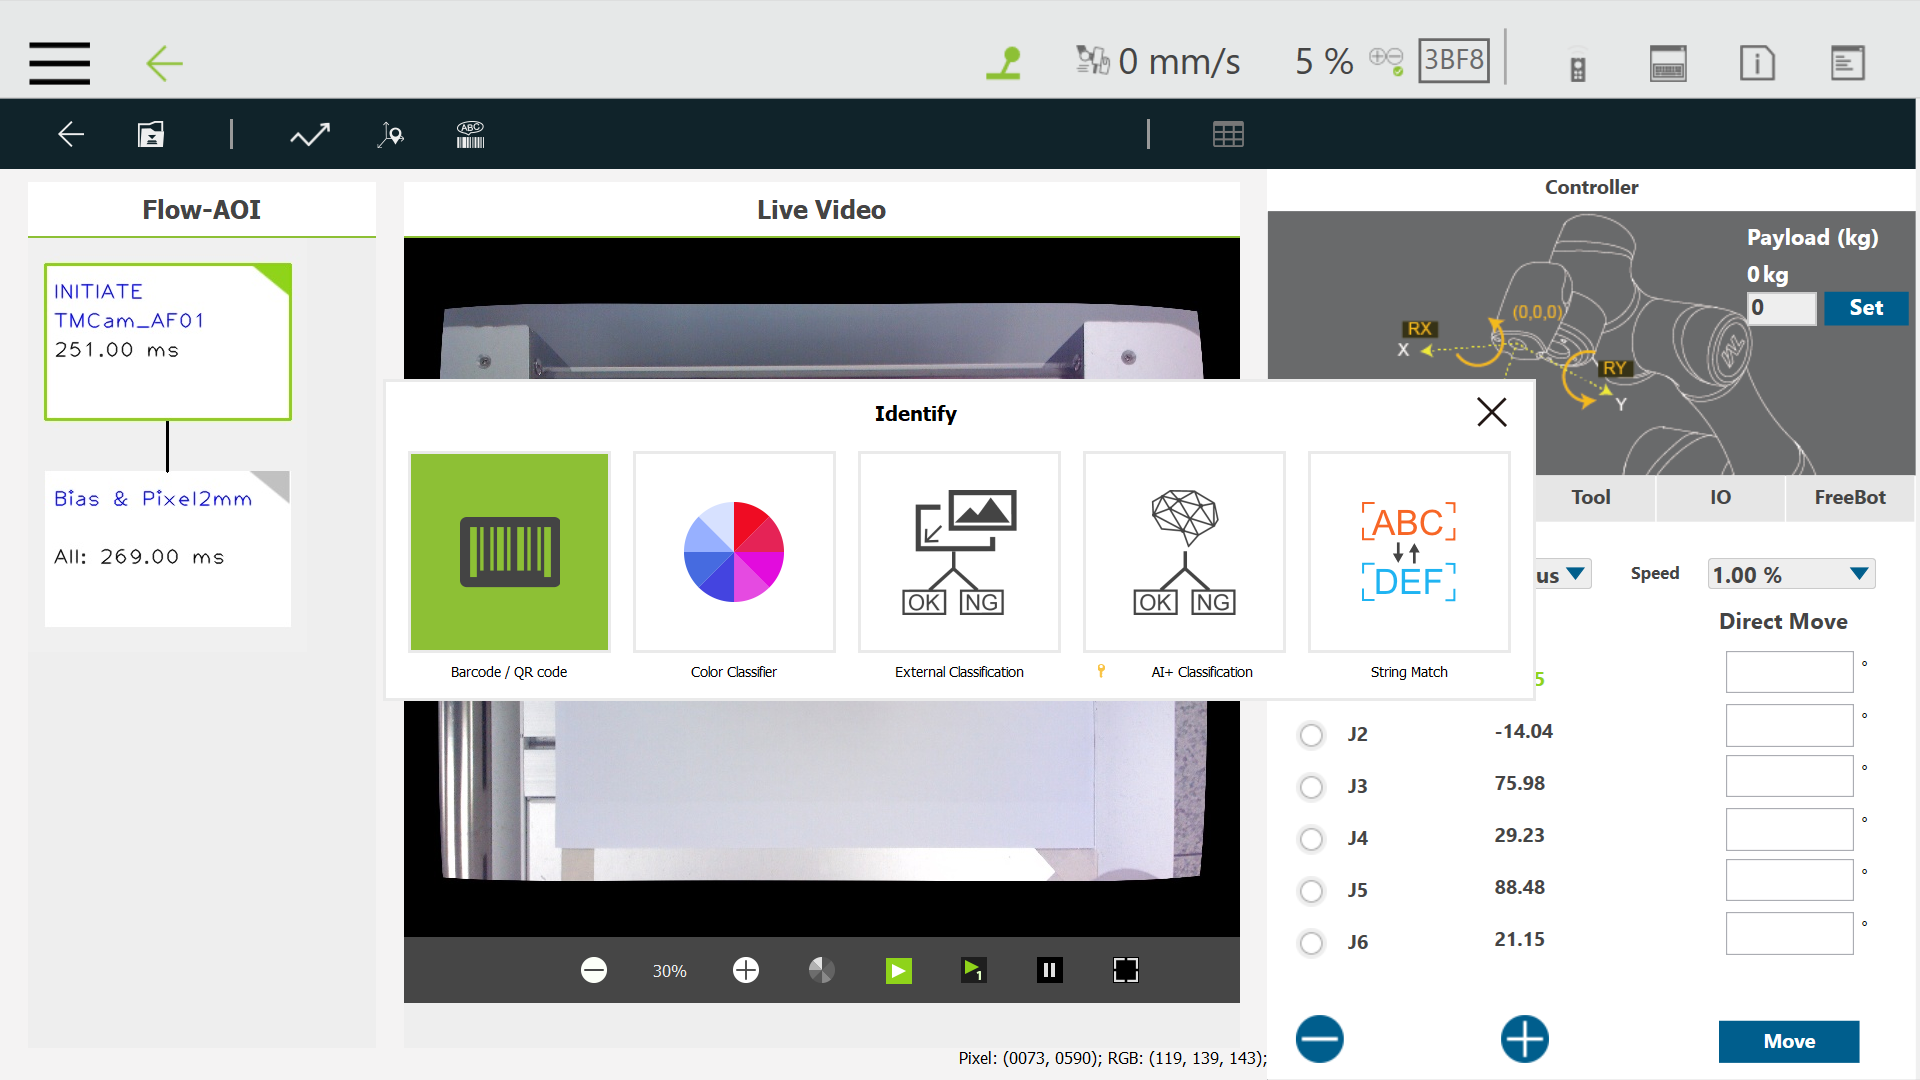
Step #4: Choose Barcode/QR code 

https://tm-robot.oss-cn-hongkong.aliyuncs.com/wp-content/uploads/2021/06/icon_identify_1dbarcode.png


https://tm-robot.oss-cn-hongkong.aliyuncs.com/wp-content/uploads/2021/06/barcode-4-1024x576.png


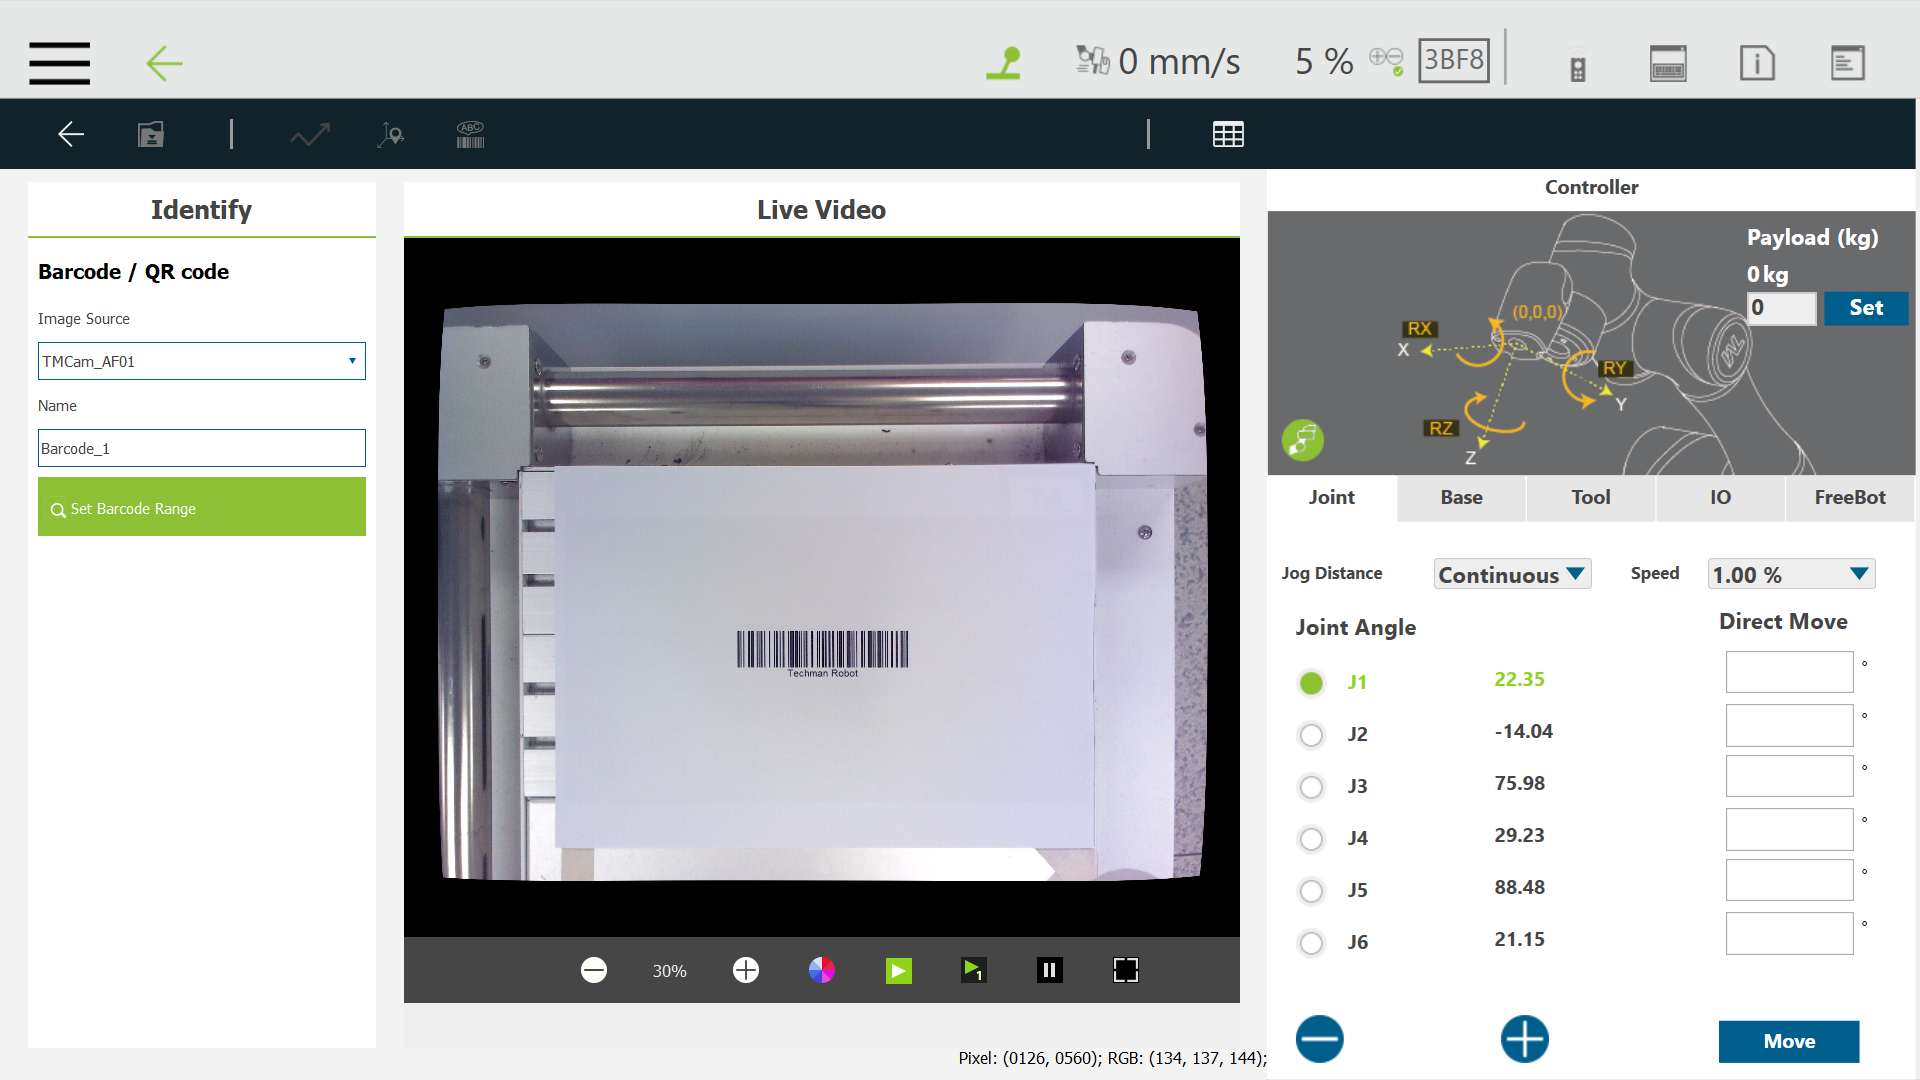
Step #5: Click Set Barcode Range 


https://tm-robot.oss-cn-hongkong.aliyuncs.com/wp-content/uploads/2021/06/barcode-5-1024x576.png


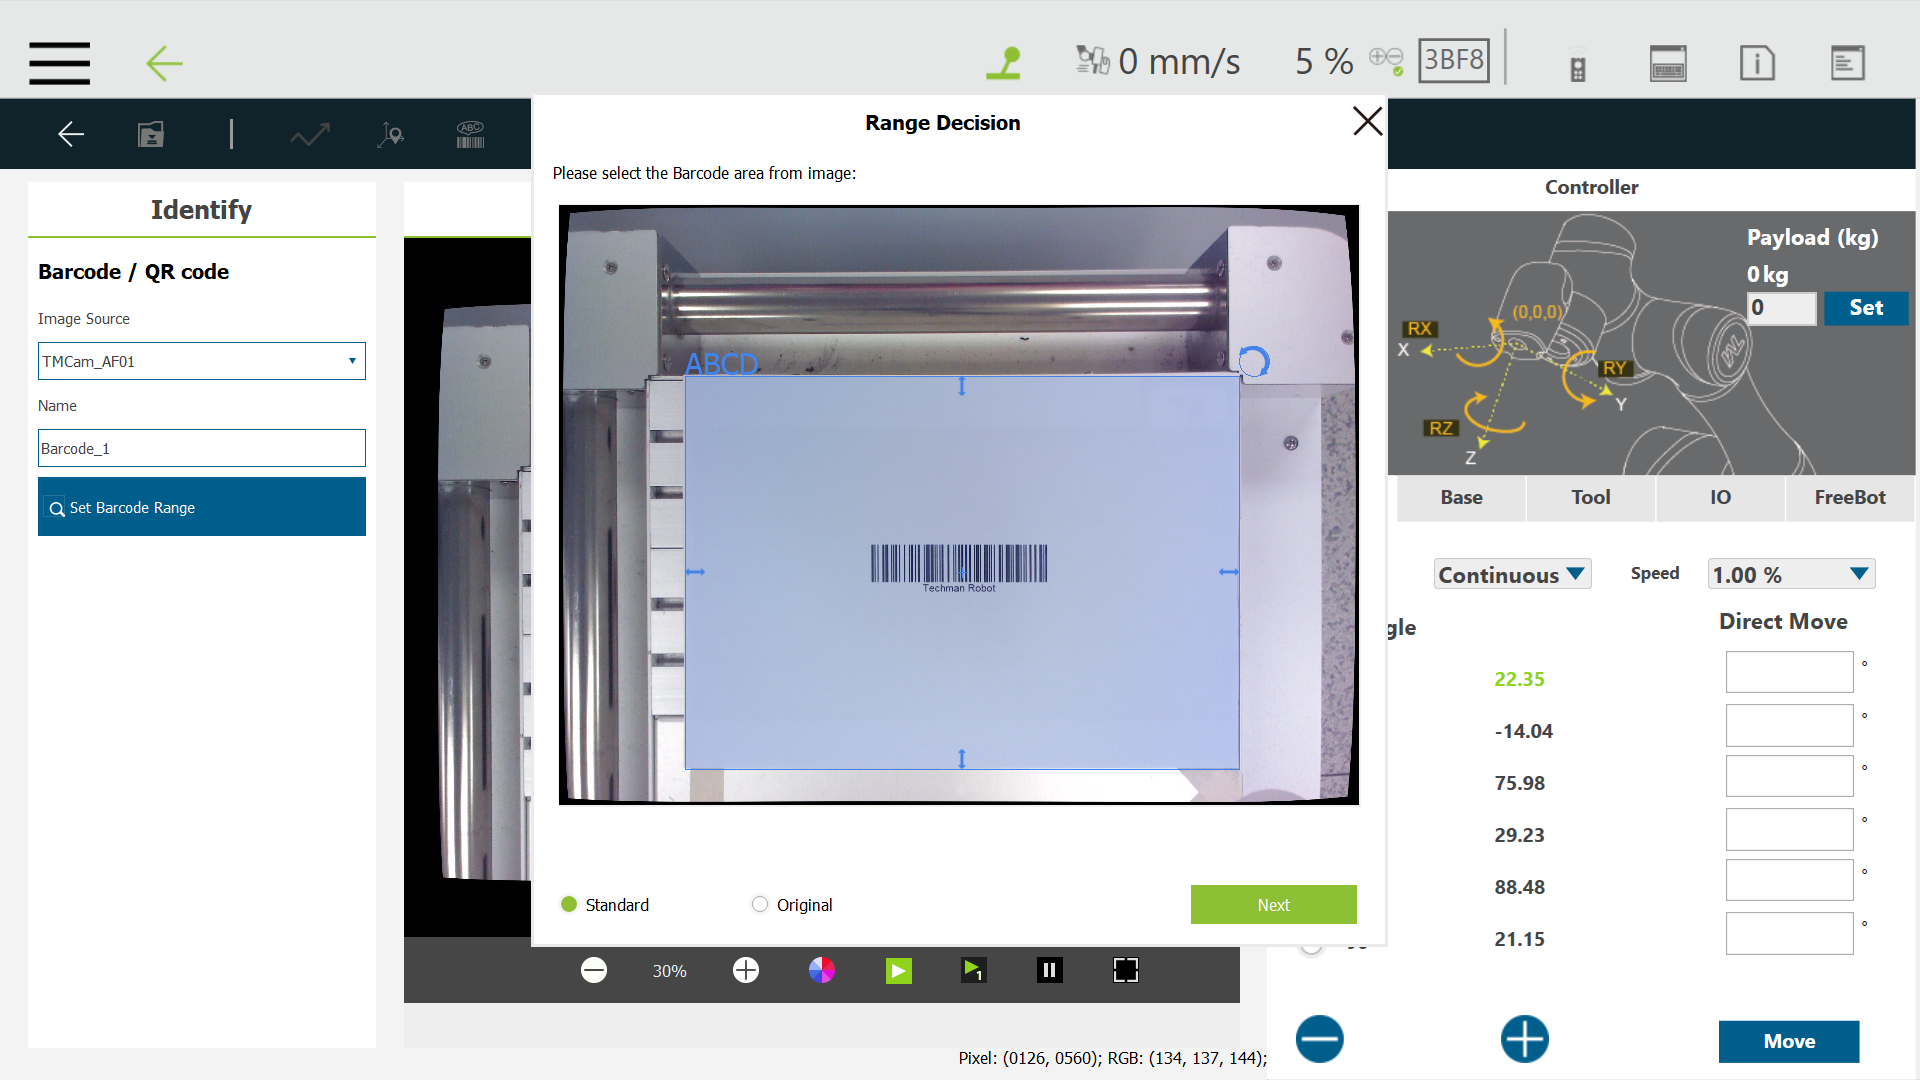
Step #6: Crop the search region and click Next


https://tm-robot.oss-cn-hongkong.aliyuncs.com/wp-content/uploads/2021/06/barcode-6-1024x576.png


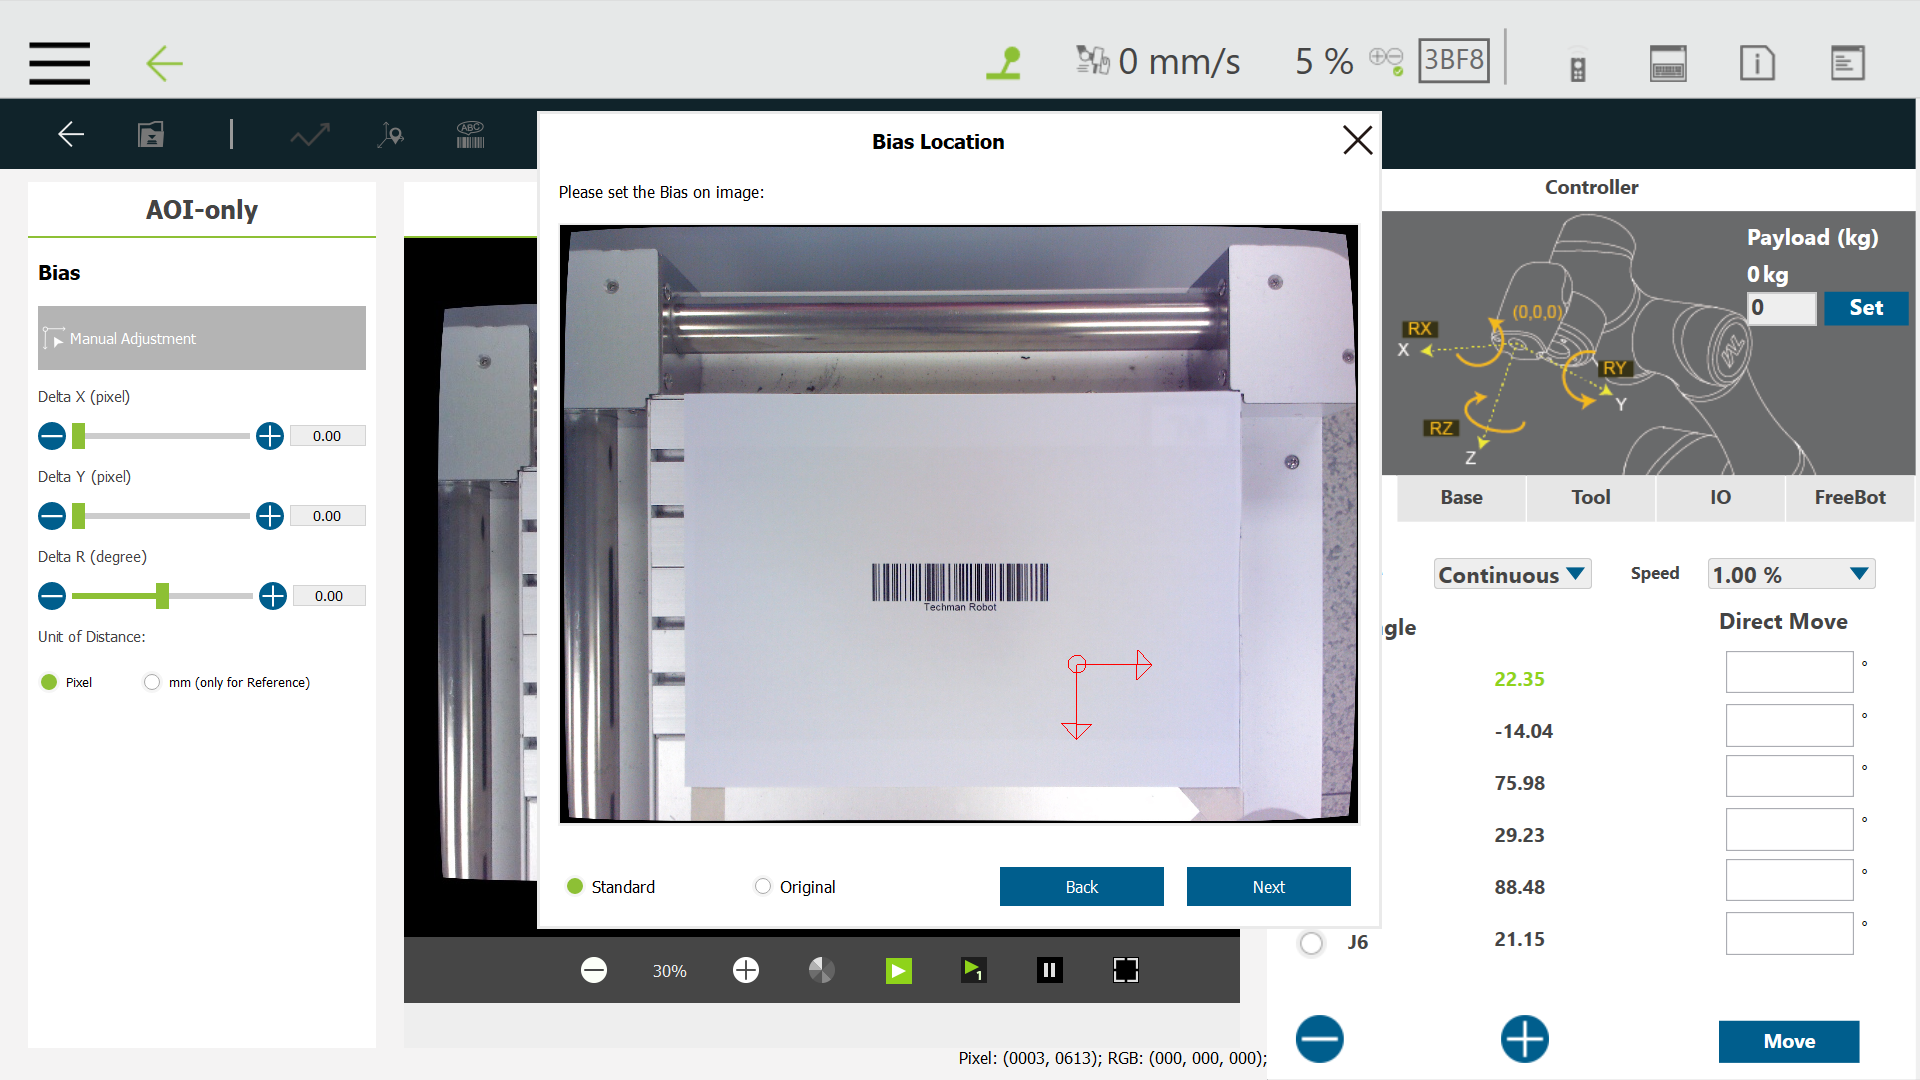
Step #7: Set if any bias position is required. 
 

https://tm-robot.oss-cn-hongkong.aliyuncs.com/wp-content/uploads/2021/06/barcode-7-1024x576.png


Step #8: Click  

https://www.tm-robot.com/wp-content/uploads/2021/06/btn_save_disable.png

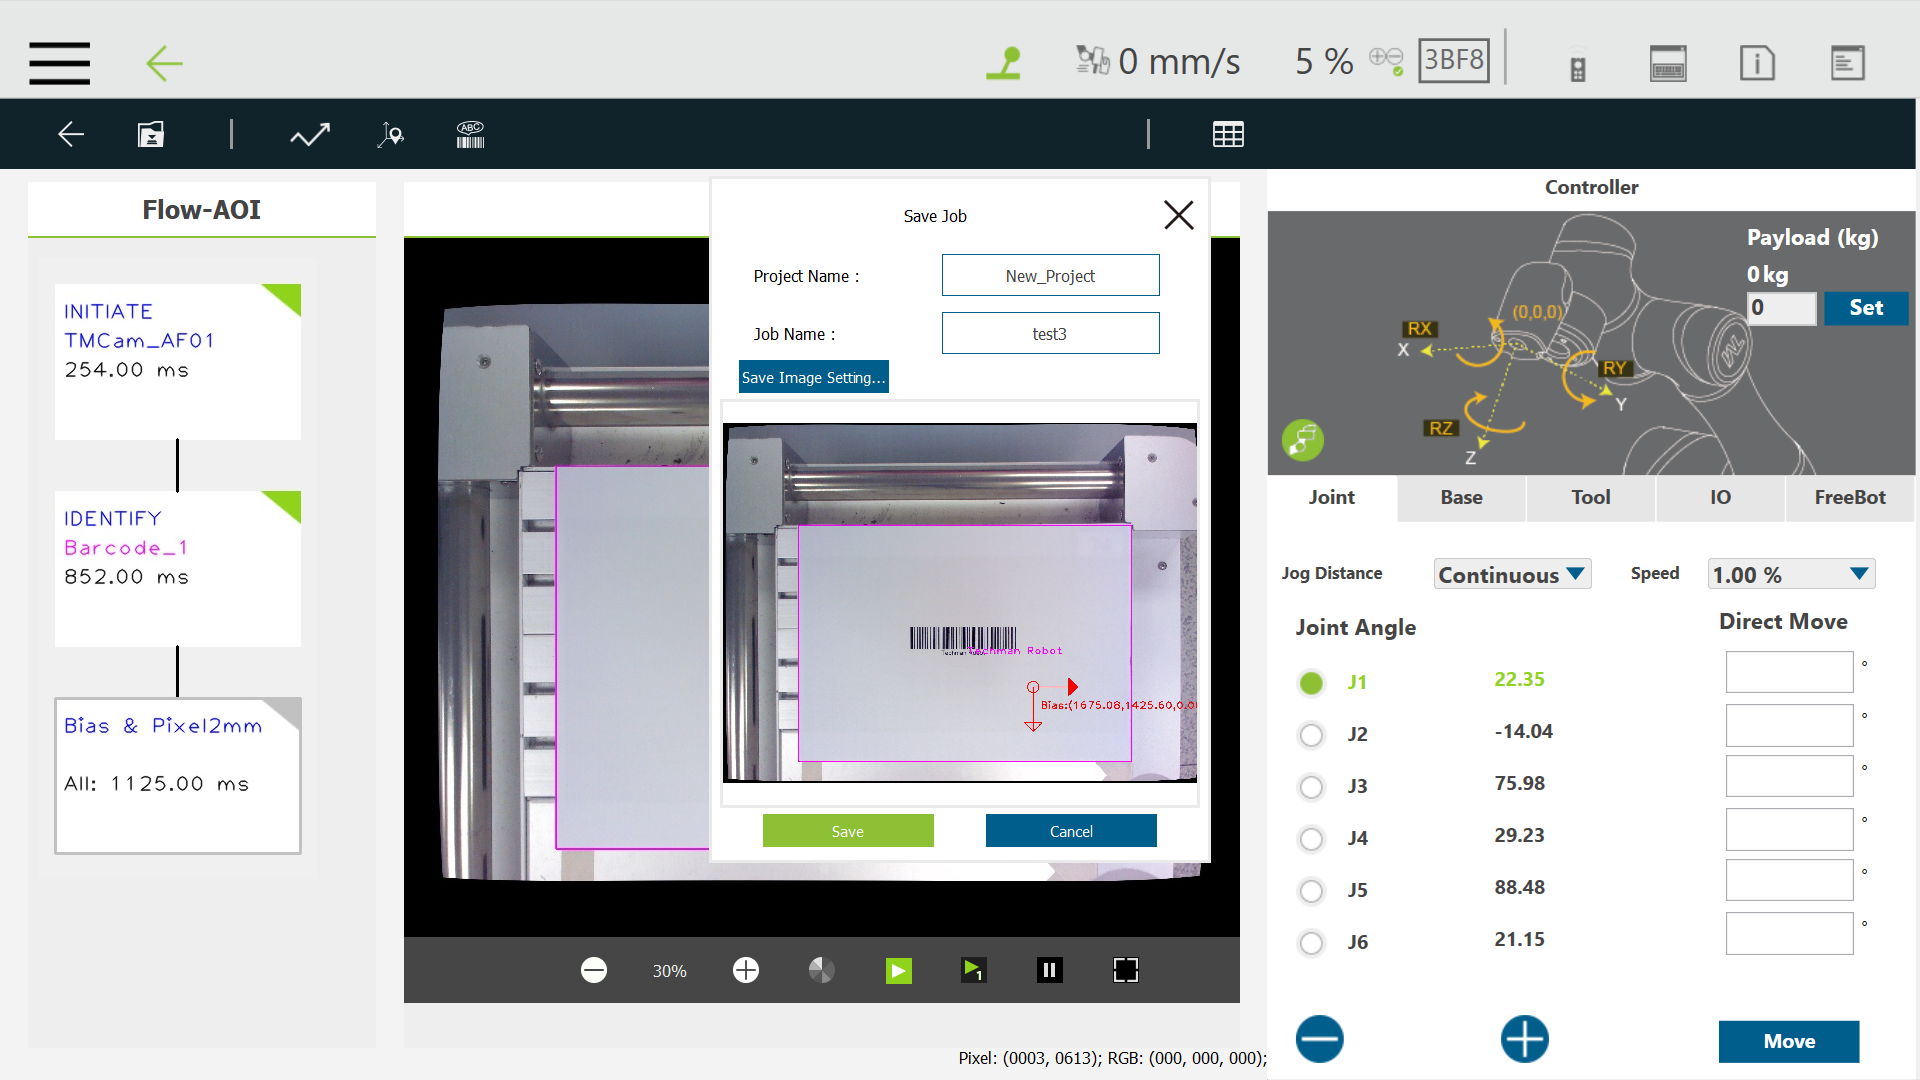
  to save vision job and click Save.


https://tm-robot.oss-cn-hongkong.aliyuncs.com/wp-content/uploads/2021/06/barcode-8-1024x576.png


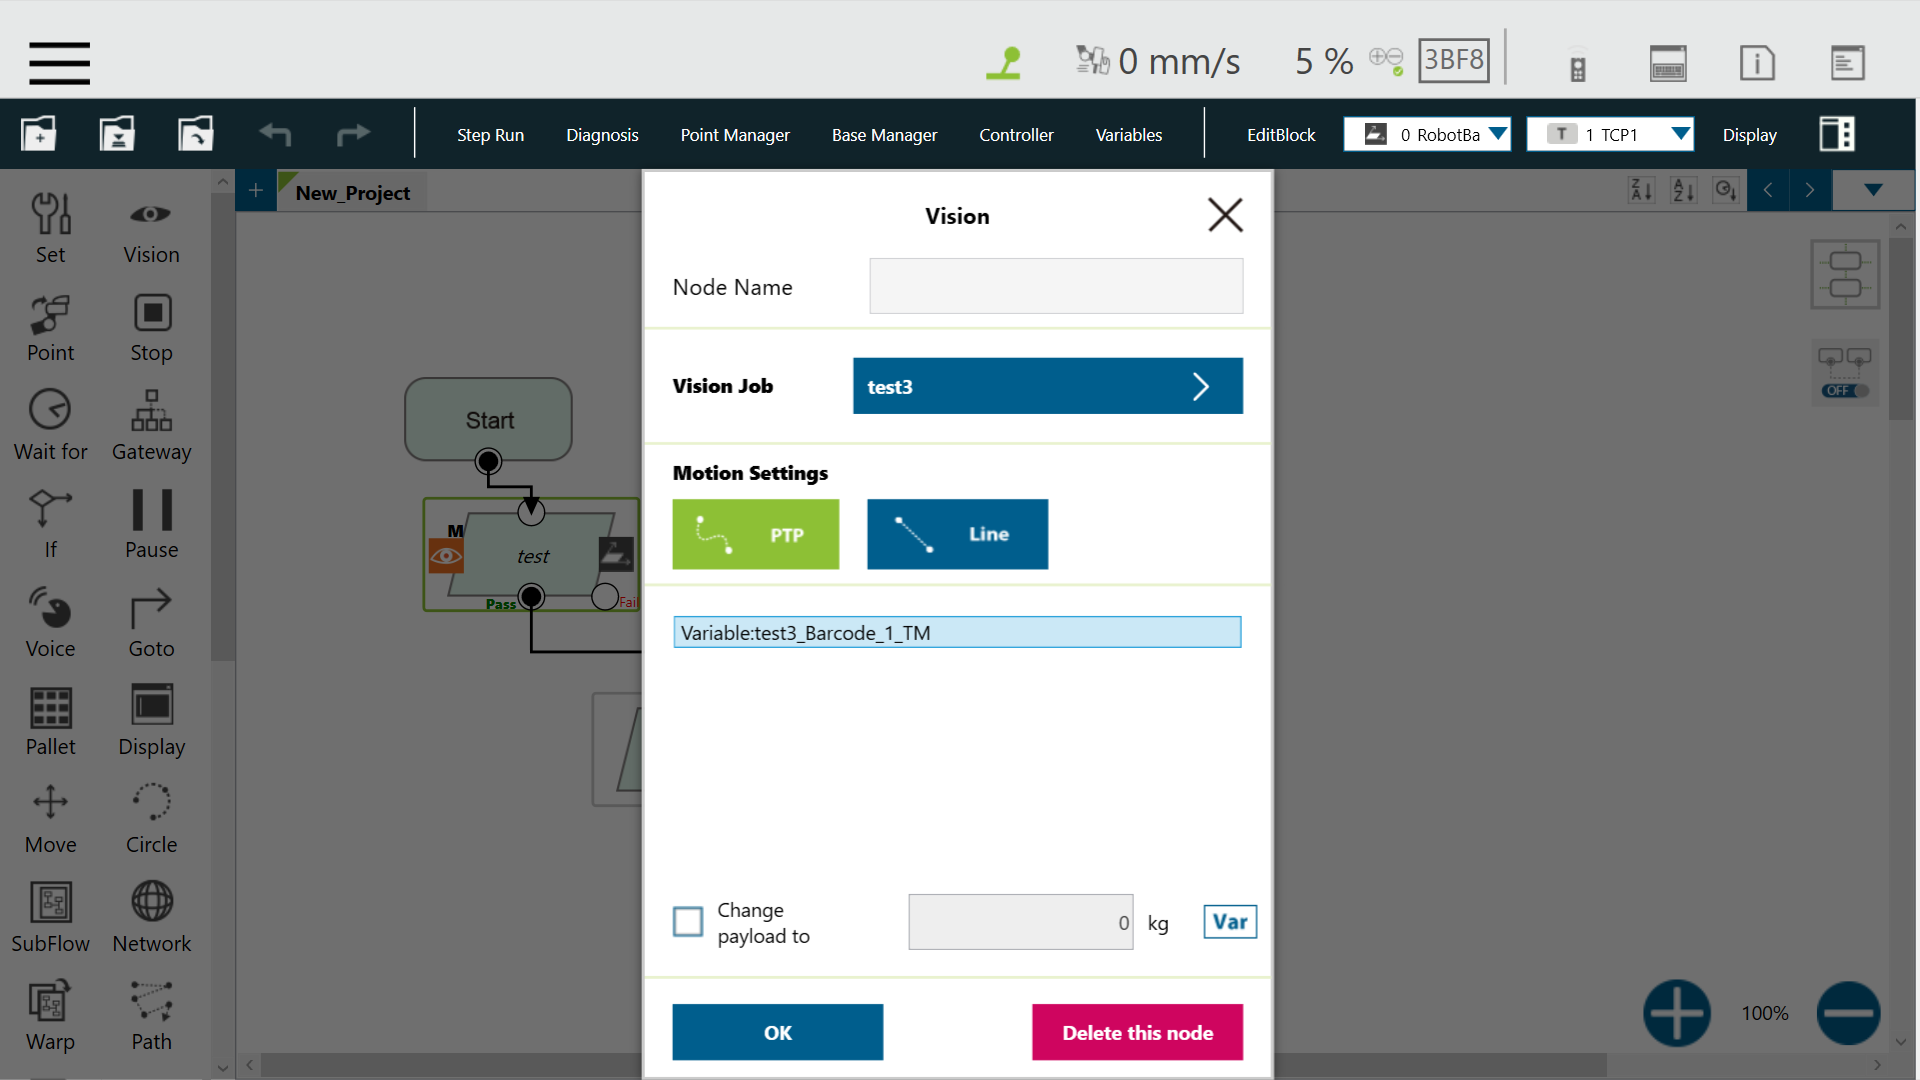
Step #9: Click OK and check the return variables as shown in the window. 
 

https://tm-robot.oss-cn-hongkong.aliyuncs.com/wp-content/uploads/2021/06/barcode-9-1024x576.png


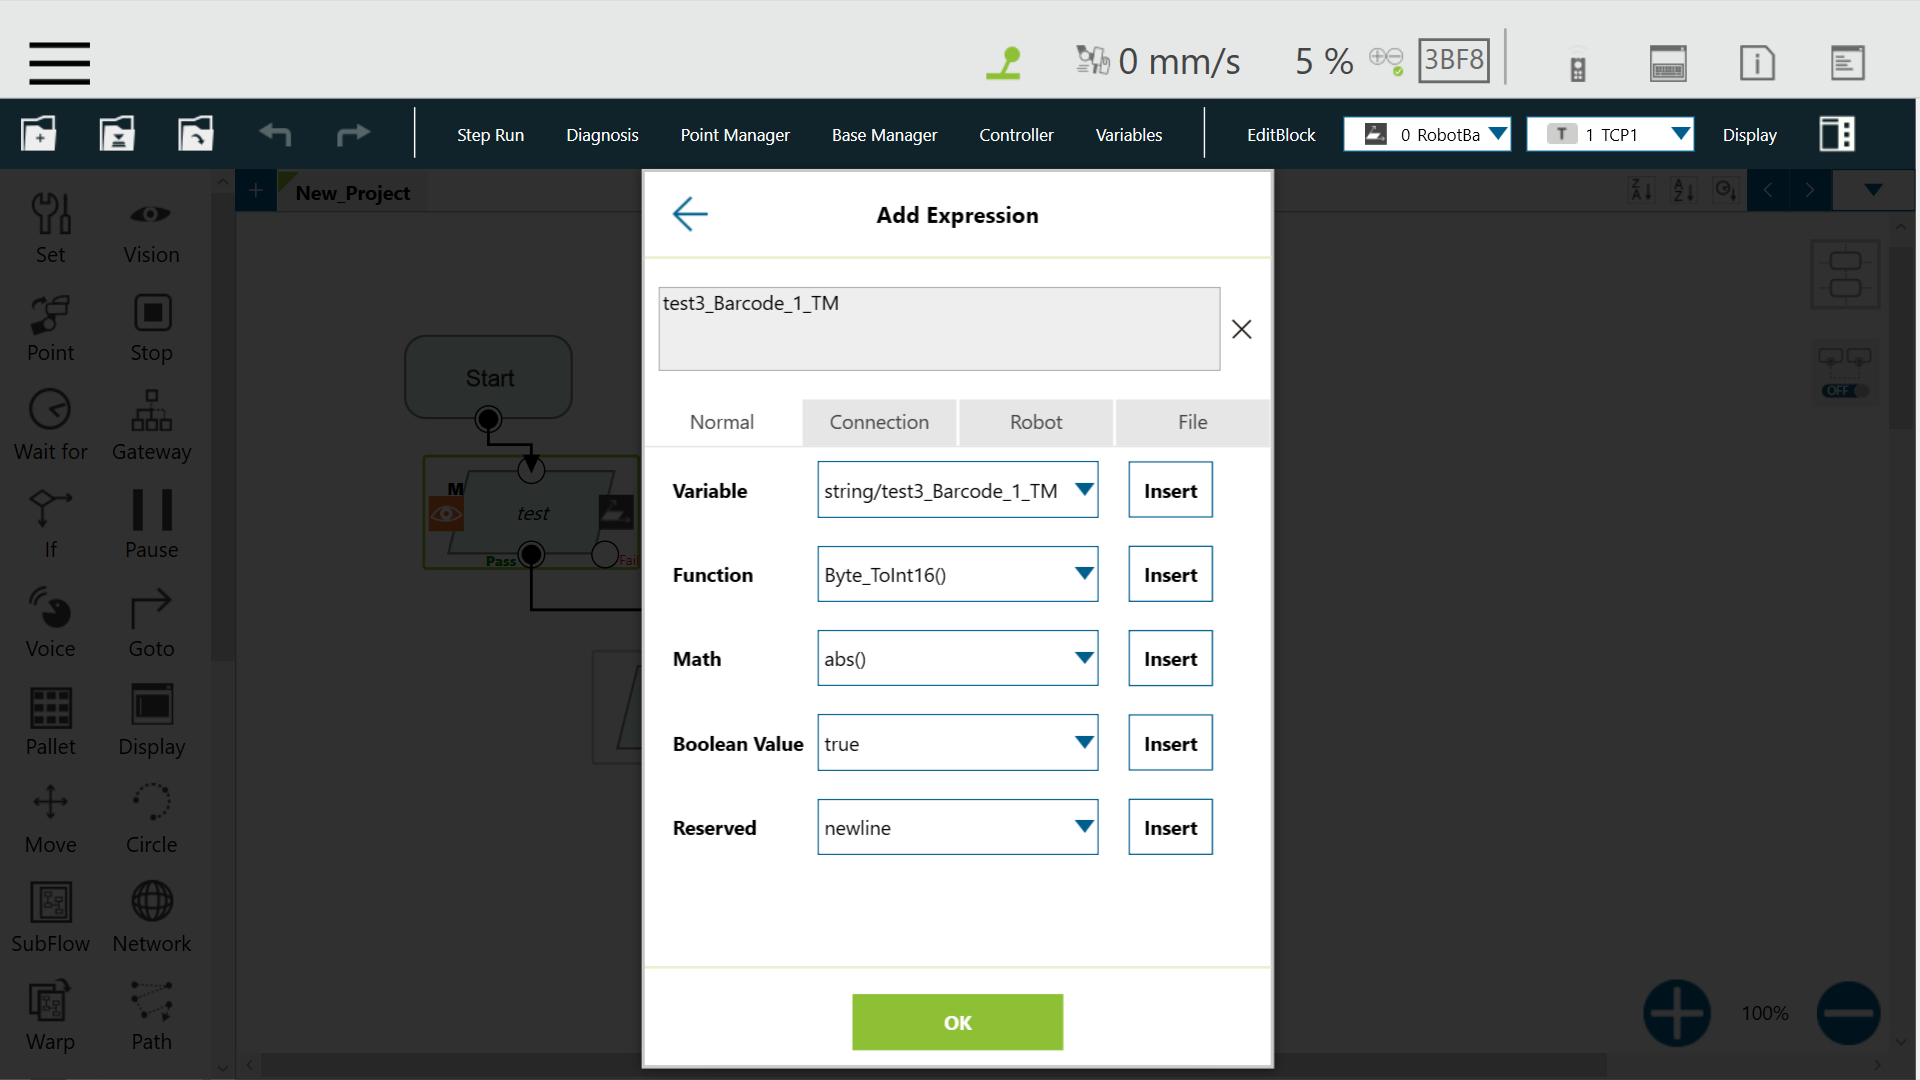
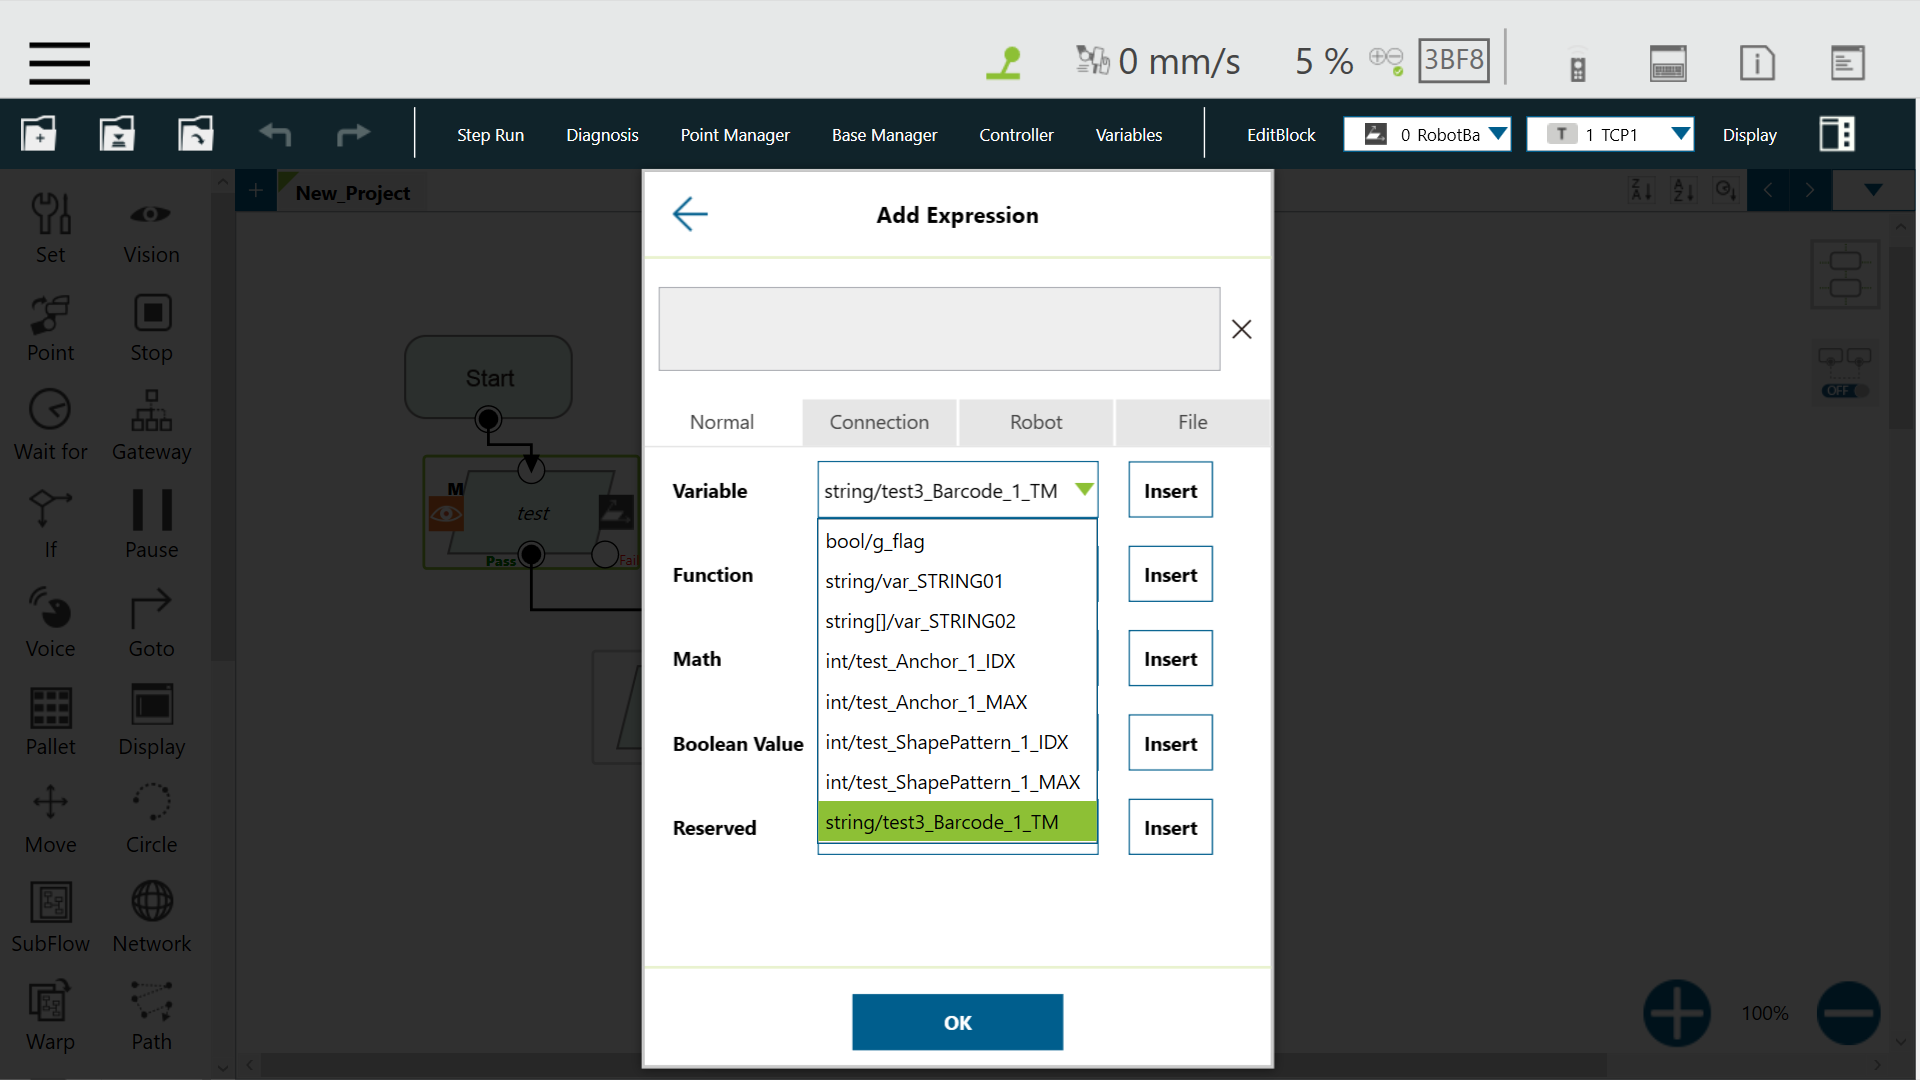
Step #10: Use a display node to display the set node result (the output of the vision job). 
 

https://tm-robot.oss-cn-hongkong.aliyuncs.com/wp-content/uploads/2021/06/barcode-10-1024x576.png


Step #11: Click OK.


https://tm-robot.oss-cn-hongkong.aliyuncs.com/wp-content/uploads/2021/06/barcode-11-1024x576.png


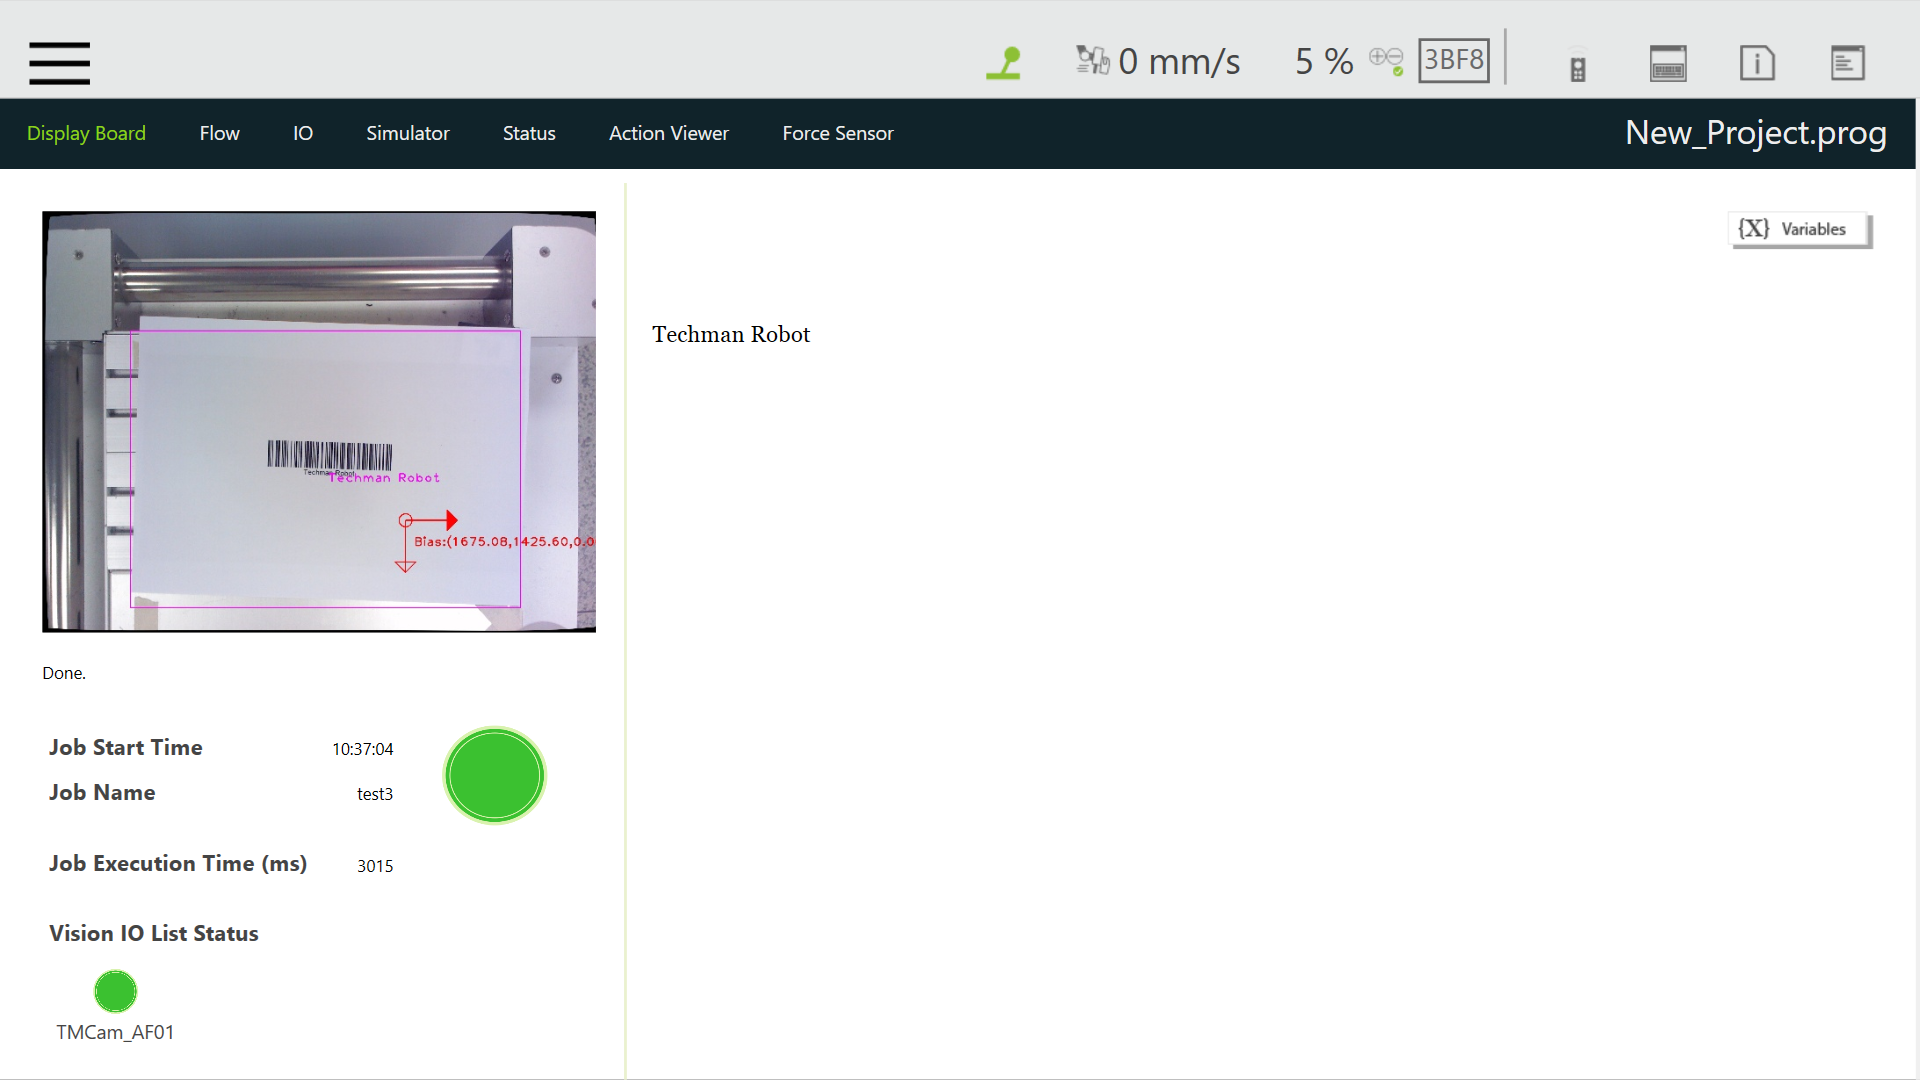
Step #12: Play the project by pressing the Play/Pause Button on the robot stick. The result is shown successfully. 
 

https://tm-robot.oss-cn-hongkong.aliyuncs.com/wp-content/uploads/2021/06/barcode-12-1024x576.png