How to Run an Example of External Image Processing
Updated on 2026 / 08 / 27
Examples are valid for :
TMflow Software version : TMflow 2.14 or later, no additional license needed.
TM Robot Hardware version : HW3.2 or above.
Other specific requirements : External PC – Win10 64 bit.
- TMvision 2.14 manual – you can find it in the TM download center.
- Read the manual with the keyword : External Classification/External Detection.
- Download Sample Here : V3 (file name : tmvision_http_server_sample_code_2.14 (1))
- Basic knowledge of operating Python codes and TMvision.
Note :
- Older or newer software versions may have different results.
- There are C++ and Python codes in this package, we will take Python for demonstration. You can modify the source codes for customization.
Purpose
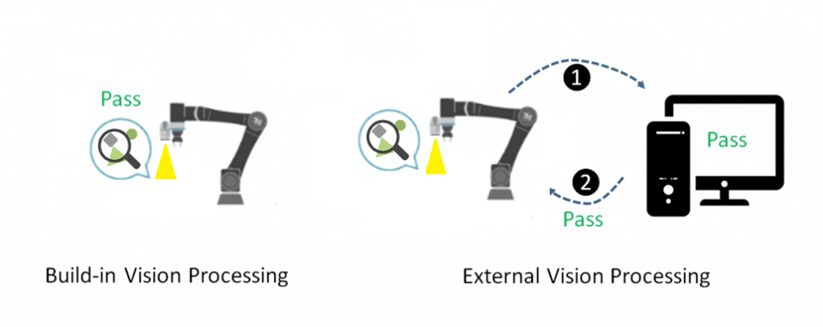
This is an example for External Image Processing demo with vision from TM Robot. You can get image from robot to an external PC for calculation then send the result back to robot for the rest task.
What is External Image Processing?
In most cases, you can identify object with build-in vision system with your TM Robot easily.
But sometimes you might have your own vision algorithm and want TM Robot to act as a camera without brain, that's why External Image Processing introduced in this article.
Preparation
- TM Robot - TMflow 1.84 or later, no additional license needed.
- External PC - Win10 64bit.
- TMvision 1.84 manual - you can find it in the TM download center.
- Read the manual with the key word: External Classification/External Detection.
- Download Sample Here : V2
- Basic knowledge of operating Python codes and TMvision.
Note : There are C++ and Python codes in this package, we will take Python for demonstration. You can modify the source codes for customization.
Running the Demonstration for External Classification
Step 1. [On PC] Install the environment on external PC for Python
Find more information in README.md in the Python package.
Step 2. Set IP for robot(192.168.132.44) and PC(192.168.132.100)
Step 3. Run the HTTP server on the PC
It means that the HTTP server is running on 192.168.132.100:4585

Step 4. [On TM Robot] Create a Vision Job in TMflow
Step 5. Select External Classification
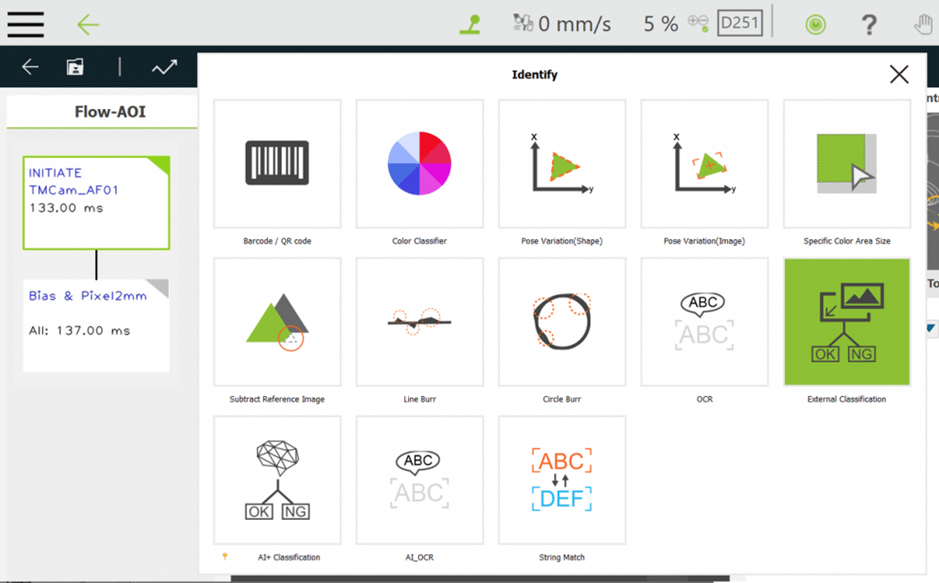
Step 6. Set Parameters for HTTP Server
- Enter the IP of PC, test connection in #3, you will get response from server in #4
- Enter
http://IP/api/CLSin #5, where [/api/CLS] is defined in Python source code, you can modify it if needed. - Save this setting with a name in #6
- Save and return to last page
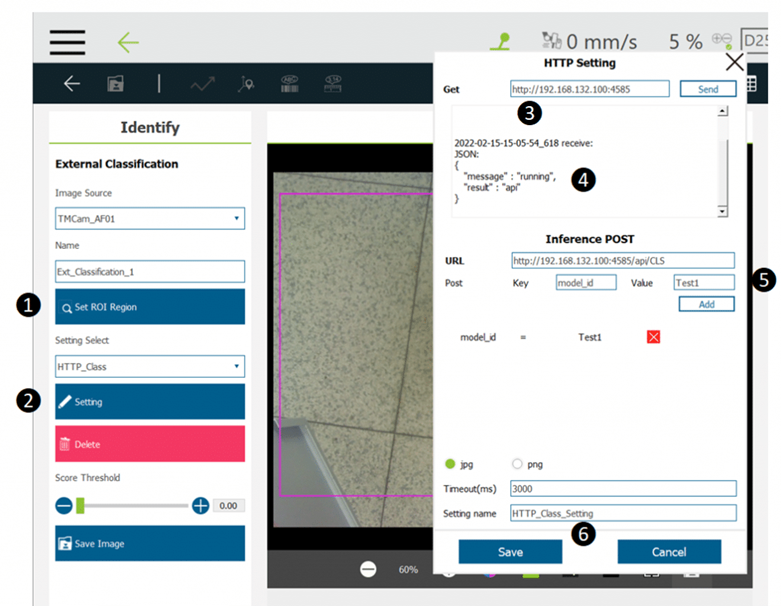
Step 7. Check the result
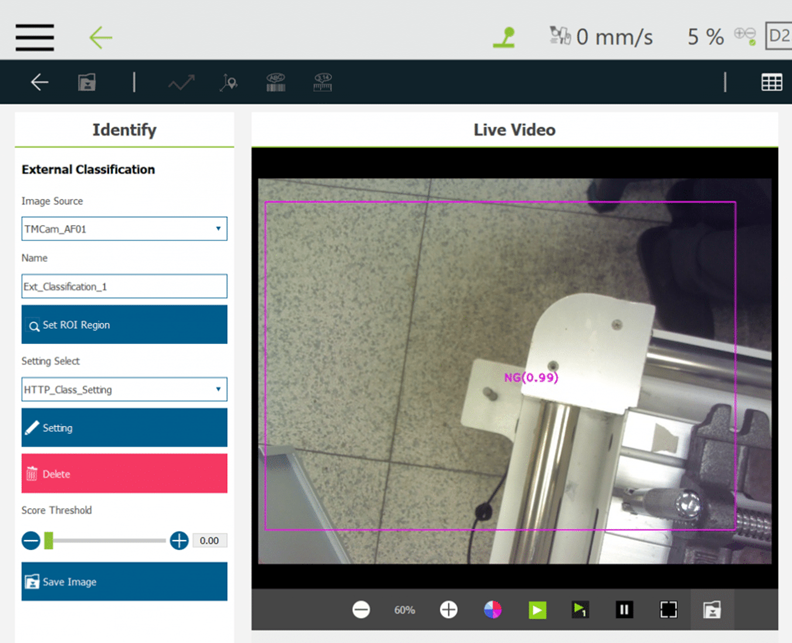
Setting is Done! HTTP Server will send test string [NG] and [Score 0.99] to robot in Live Video.
Remember to save this vision job before leaving.
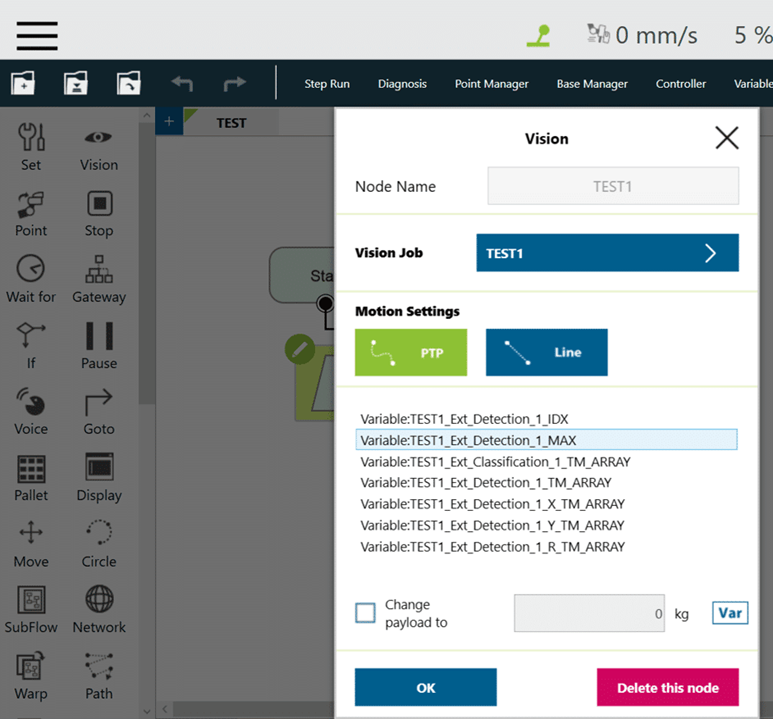
And the item TEST1_Ext_Classification_1_TM_ARRAY is added to this vision job for further usage.
Running the Demonstration for External Detection
Mostly the same for Step1~Step7 above, but one something is different in Step6.
Step 6. Set Parameters for HTTP Server
Enter http://IP/api/DET , where [/api/DET] is defined in Python source code, you can modify it if needed.
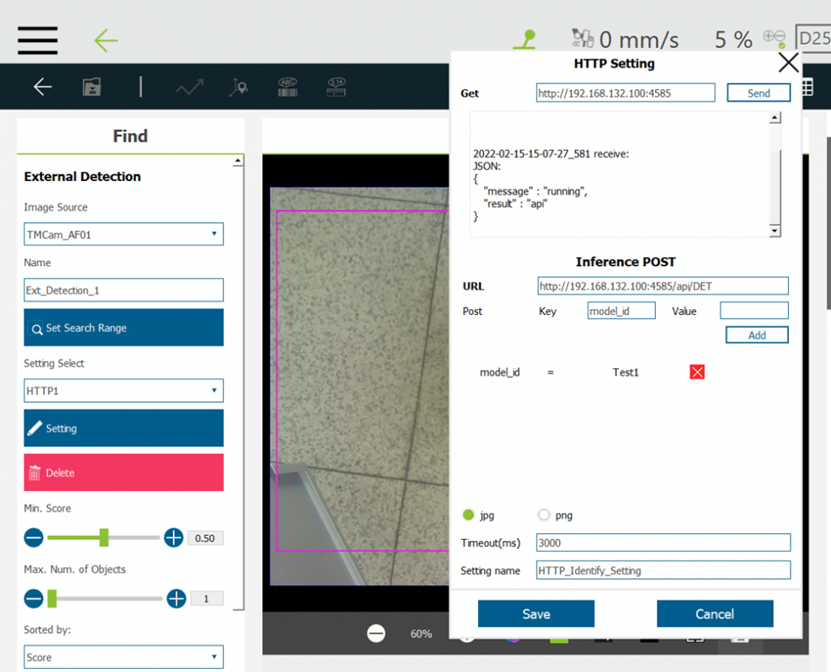
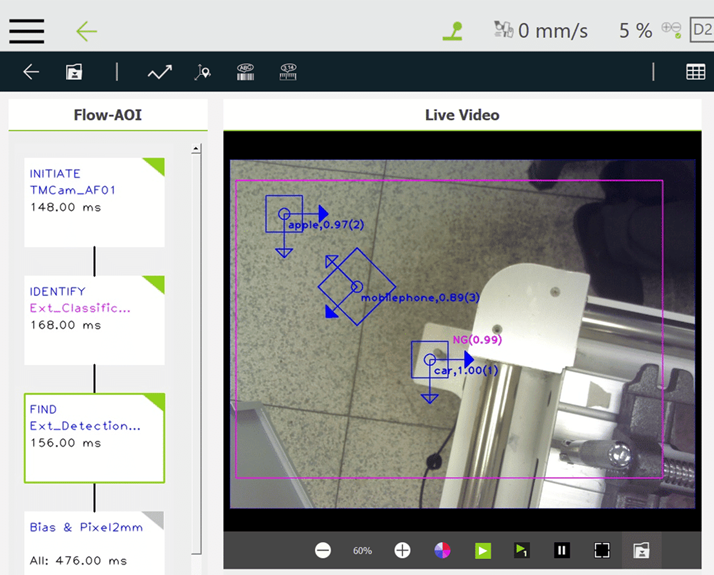
Step 7. Check the result
Setting is Done! HTTP Server will send 3 fake objects to robot in Live Video.
Was this article helpful ?